

Linkin
-
Posts
155 -
Joined
-
Last visited
-
Days Won
36
Posts posted by Linkin
-
-
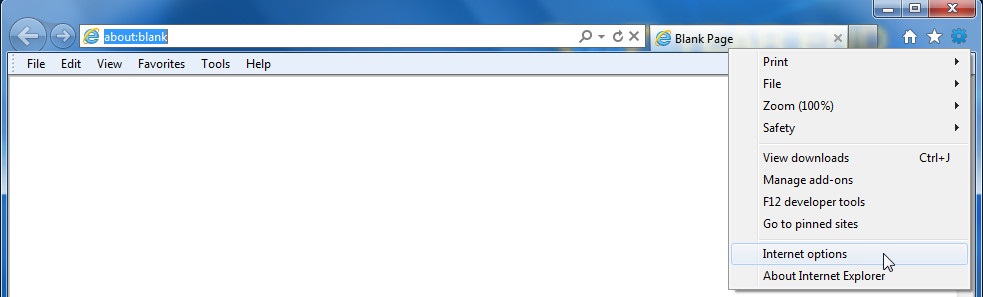
If you are using IE, you may have this problem, when you try to open a new browser window only to find about:blank is what will greet you. You try to change it back but either your Internet Options are greyed out or you change the page back, only to find next time you start Internet Explorer the dreaded About:blank has returned.
About:blank is a special page within most browsers. It is simply a benign page that’s built in to your browser. It’s not something to “get rid of”.
It’s the page that your browser displays when it has nothing else to display. That’s all.
The problem, of course, is that about:blank can show up unexpectedly, and people get confused about why, and what to do next.
How to deal with about blank page?
Method 1: Reset IE settings.
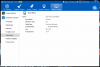
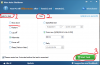
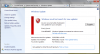
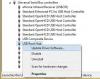
1. Open Internet Explorer, click on the “gear icon” in the upper right part of your browser, then click again on Internet Options.
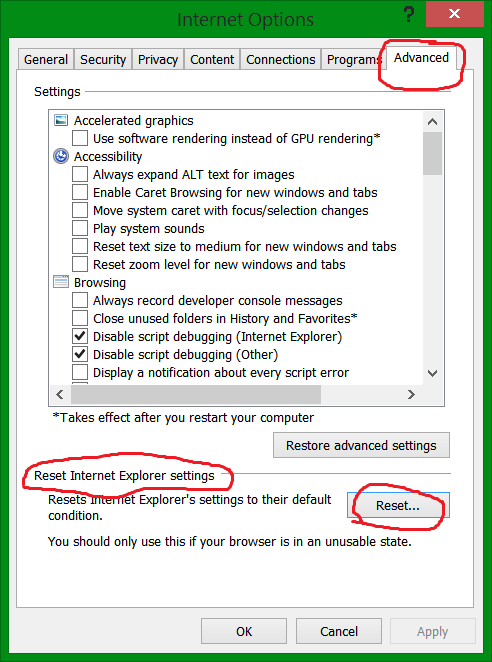
2. In the “Internet Options” dialog box, click on the “Advanced” tab, then click on the “Reset” button.
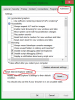
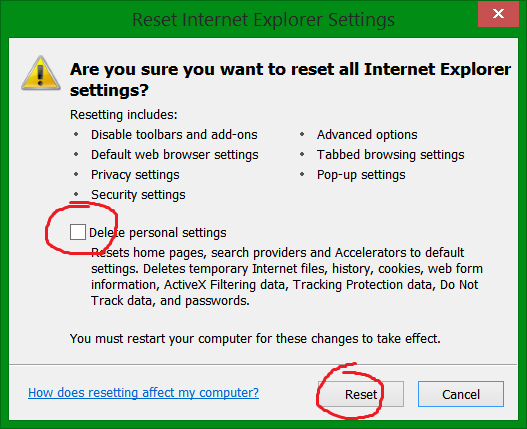
3. In the “Reset Internet Explorer settings” section, select the “Delete personal settings” check box, then click on “Reset” button.
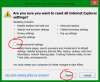
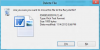
4. When Internet Explorer has completed its task, click on the “Close” button in the confirmation dialogue box. You will now need to close your browser, and then you can open Internet Explorer again.
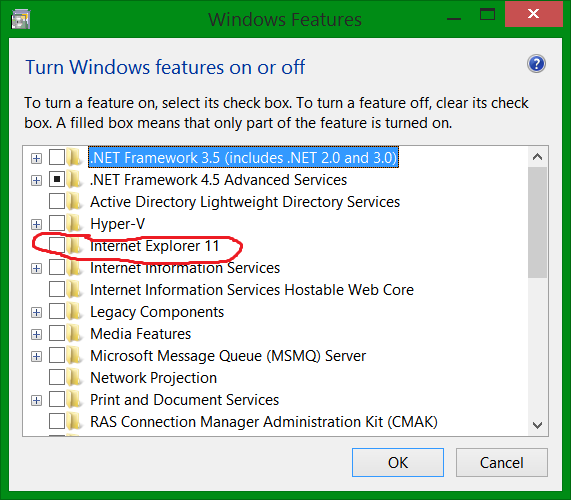
Method 2:Turn off; turn on Internet Explorer from Turn Windows Feature on or off.
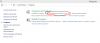
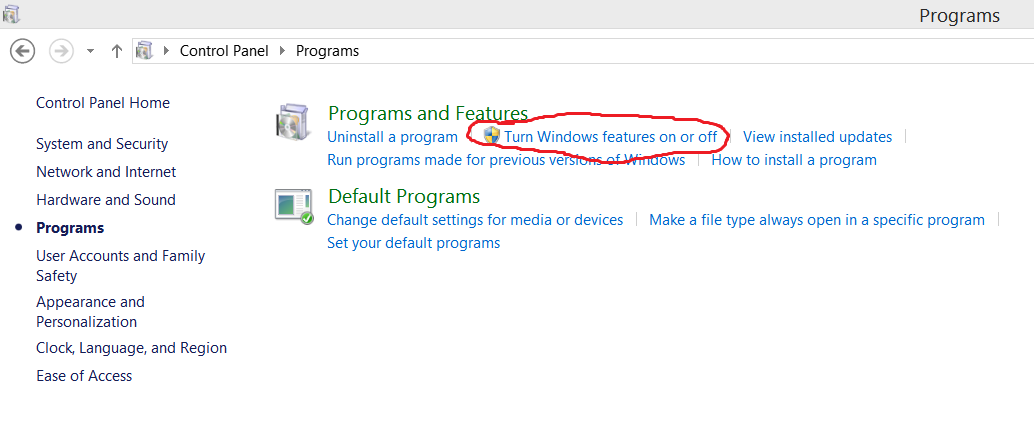
1. Open Control Panel
2. Click Turn Windows Feature on or off in Program section and press enter.
3. Uncheck Internet Explorer to turn off and restart the computer.
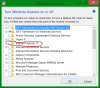
4. Follow above steps and check the Internet Explorer to turn on.
5. Restart the computer and check the issue status.
-
1. What is File History?
File History was introduced in Windows 8, and gives you a new way to protect your files. File History regularly backs up versions of your files in the Documents, Music, Pictures, Videos, and Desktop folders and the One Drive files available offline on your PC.
Any time your personal files change, there will be a copy stored on a dedicated, external storage device of your choice. File History continuously protects your personal files stored in libraries, desktop, favorites and contacts folders. It periodically (every hour by default) scans the file system for changes and copies changed files to another location. Over time, File History builds a complete history of the changes made to any personal file.
2. How to use File History to back up your files?
Now I am gonna show you how to enable File History inside Windows 8, and then once its enabled how to configure it in order to back up your data.
it can be configured for recovery of important files from folders, that can include Favorites, Contacts, Libraries, etc… This feature is not enabled by default inside Windows 8, because backup location needs to be selected before user enable it. This backup location is usually considered as an external hard drive or network location. This tutorial will show you how to enable it first, and then configure this feature to back up our data.
First we have to enable File History:
Step 1: First you need to connect your computer with USB drive on which you want to save your backups.
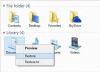
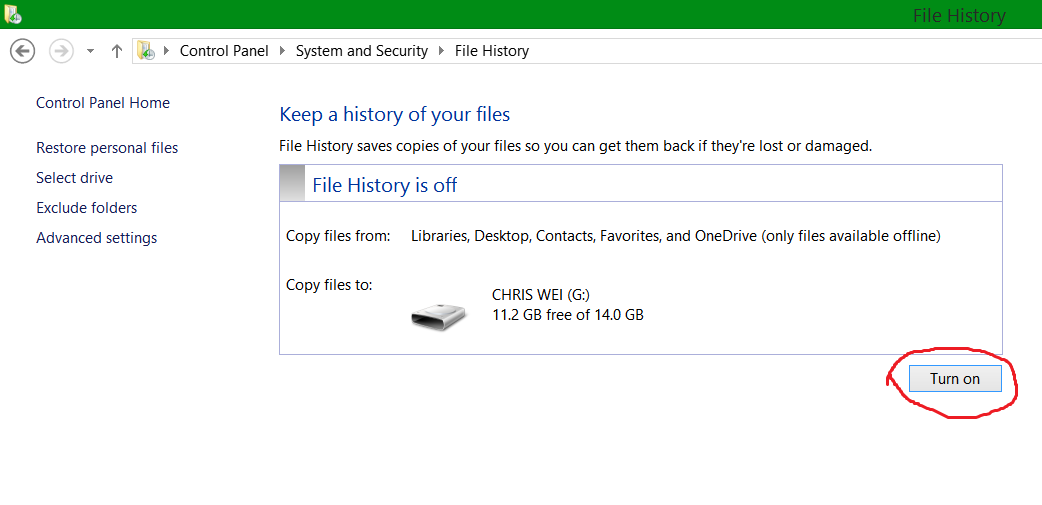
Step 2: Open Control Panel and click All Control Panel Items, click File History
Step 3: From File History main window, click on Turn on button located in bottom right and close the window.

Step 4: If you click on Select drive located in left navigation you can choose a another drive or network location.
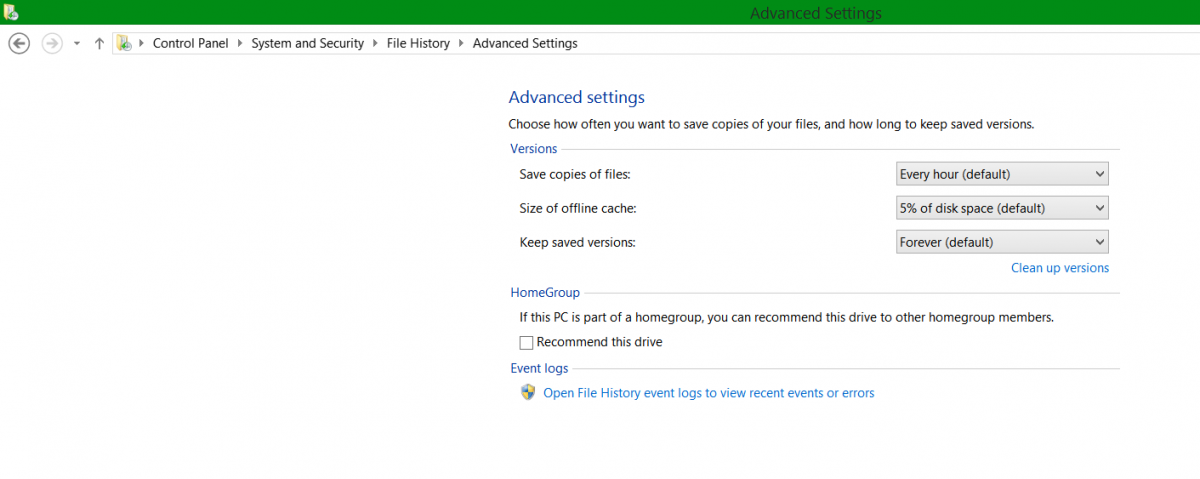
Step 5: By clicking on Advanced settings option from left navigation you can change how often you want to create backups, choose the size of offline cache etc…

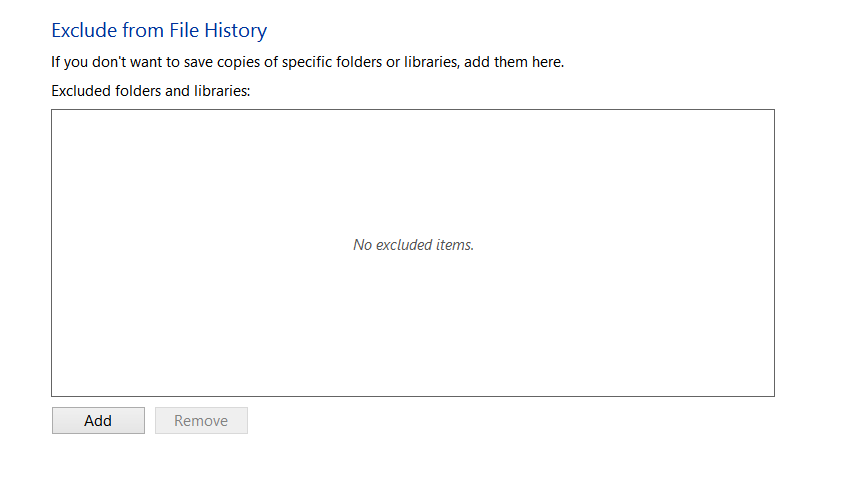
Step 6: If you click on Exclude folders, you can specify a group of folders which you don’t want to back up. For example you can exclude Pictures library or Music library since they can take a lot of space on your drive and may not contain documents that are important for your business.

Step 7: If you wish to recover any deleted file from your computer, from left navigation click on Restore personal files link.
Step 8: Select all the files you want to restore by pressing Ctrl on your keyboard and left mouse click on any folder or file. Then right mouse click on any of those files and from context menu that appears choose Restore (it will restore it to the original location) or Restore to (or choose the new location).
This feature will certainly help you keep your documents and files secure in case of system failure so make sure you keep it running in the background.
-

If you have an old PC, your hard drive disk is probably FAT 32 format. But NTFS is the preferred file system for Windows. It has many benefits over the FAT32 file system, including:
1. The capability to recover from some disk-related errors automatically, which FAT32 cannot.
2. Improved support for larger hard disks.
3. Better security because you can use permissions and encryption to restrict access to specific files to approved users.In this article, I will show you how to convert FAT32 to NTFS format without losing any data.
Conversion of Fat32 to NTFS can be done using command prompt without any data loss. Generally you have a pendrive or external hard disk having this kind of Fat32 system. FAT32 system does not support handling of larger files over 4GB. FAT32 file system has less stablility, security and more defragmentation time. But NTFS file system has more stability, security and less defragmentation time.
Generally we use all removable media's in FAT32 file system only. We don't convert it into NTFS as we bother about data loss. But microsoft added capability to convert FAT32 to NTFS without any lossing any data or formatting the disk. This method is easier and doesn't require any additional tools and can be done using command prompt.
Follow these steps for conversion of FAT32 to NTFS. ( Backup your data in case if anything goes wrong )
Conversion Steps :1) Open My computer and note the name and letter of the drive to convert.
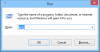
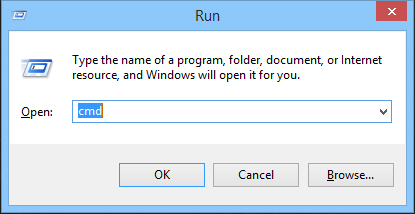
2) Open run ( win + r ) and type cmd and hit enter.
2) Command prompt will open.
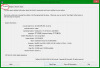
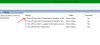
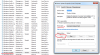
4) Type and execute "chkdsk F:/f" where F is the drive letter. This command checks and fix the drive errors.
5) Then type and execute "Convert F:/FS:NTFS". Command prompt will start the process and after the process is completed it will show the conversion is successful.

6) Later you can check the properties of the drive.Note: This method will convert form FAT32 to NTFS only. This doesn't work for NTFS to FAT32. You need to format the entire drive which will definitely cause data loss.
-
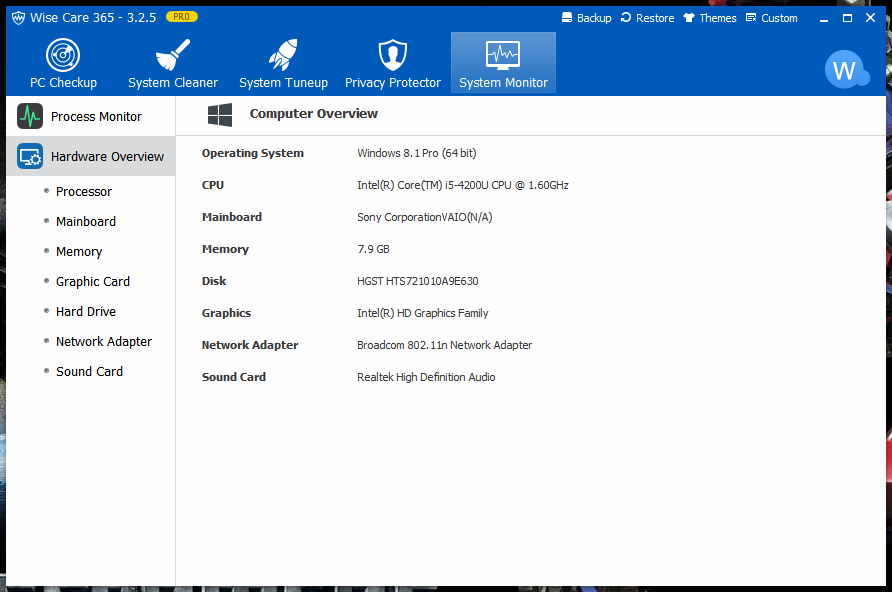
In this article, I will show you how to see the system and hardware info of your PC.
1. open search, type run.
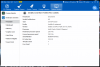
2. Then click on run and type dxdiag then click Enter

3. Now click on System or display tab.

4. Information regarding operating system and some hardware components like graphics card will be shown.
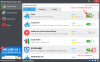
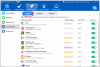
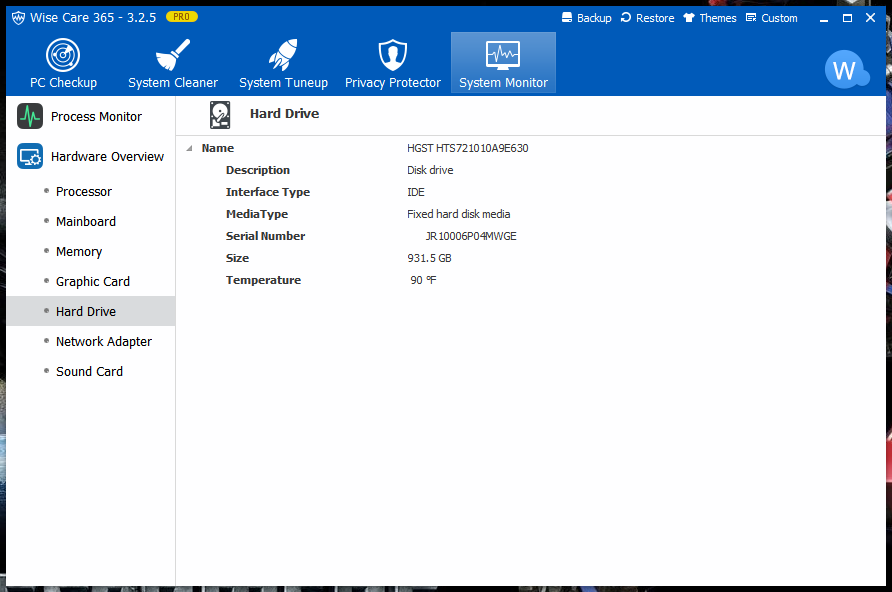
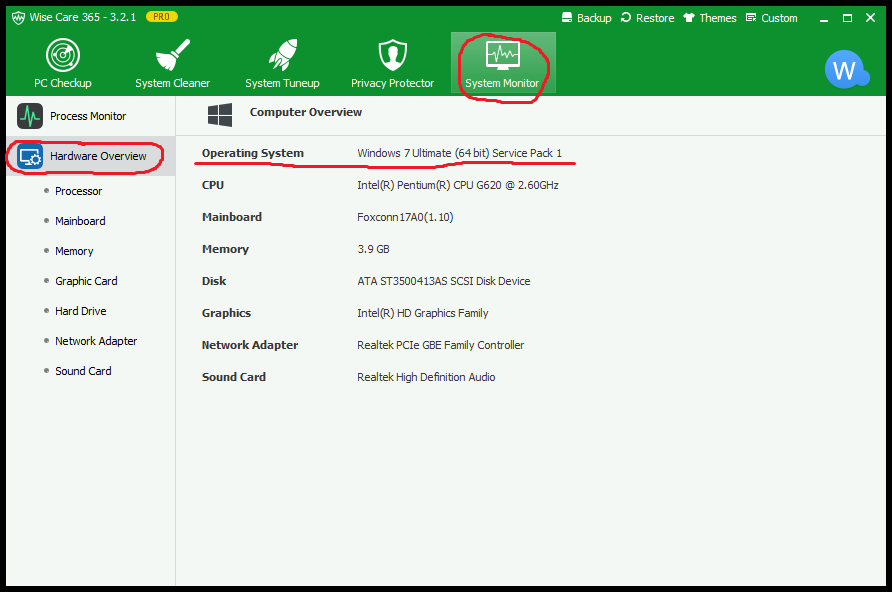
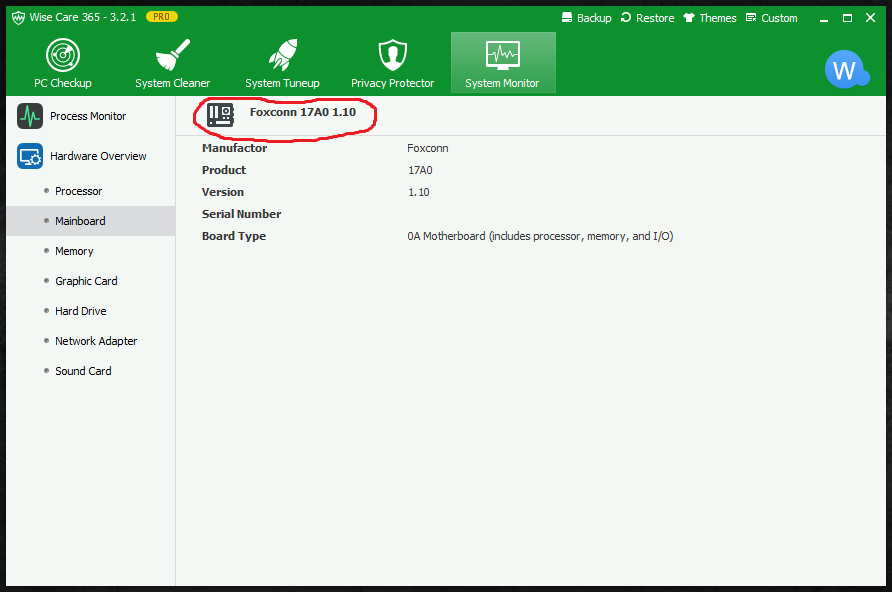
You can also check all these information with the newly added System Monitor section in Wise Care 365, the good thing about this info in Wise Care 365 is that it is displayed in a detailed manner including almost everything you need to know about your computer.

-
In this tutorial I will show you how to disable automatic download of apps updates which you have downloaded over Windows Store, so you can save your data plans.
In Windows 8, the apps which you have downloaded from Windows App Store are set to automatically update whenever new version is available. It’s true that this feature can save your time and reduce manual efforts in order to update all your apps, but if you don’t have unlimited data plans this can drain your monthly limits very quickly. That’s why, this tutorial will show you how to disable Windows 8 Apps automatic updates.
To get started follow steps below:
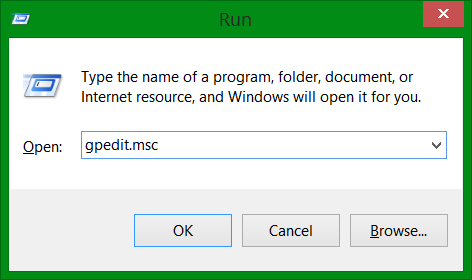
Step 1: On your keyboard press Win+R buttons to lunch Run window.
Step 2: Inside Run window type gpedit.msc and press Enter on your keyboard.

Step 3: If you got prompted by UAC click Yes in order to continue.
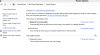
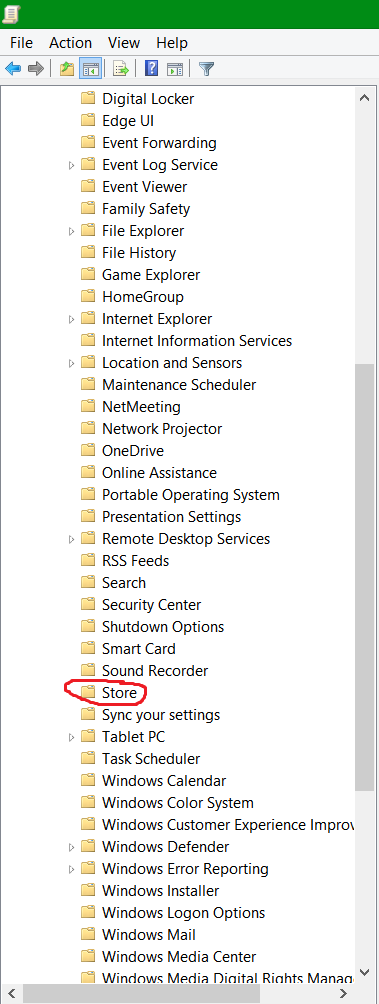
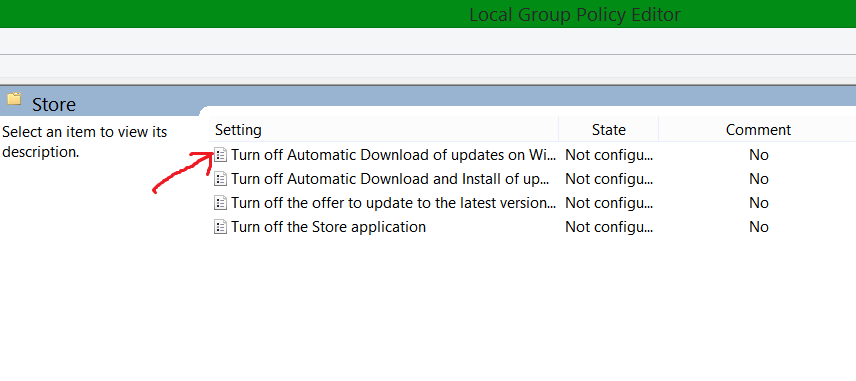
Step 4: When new window opens up, inside left pane, follow this path Local Group Policy Editor\Computer Configuration\Administrative Templates\Windows Components\Store\
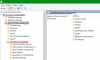
Step 5: With Store selected, inside right pane double-click on Turn off Automatic Download of updates.
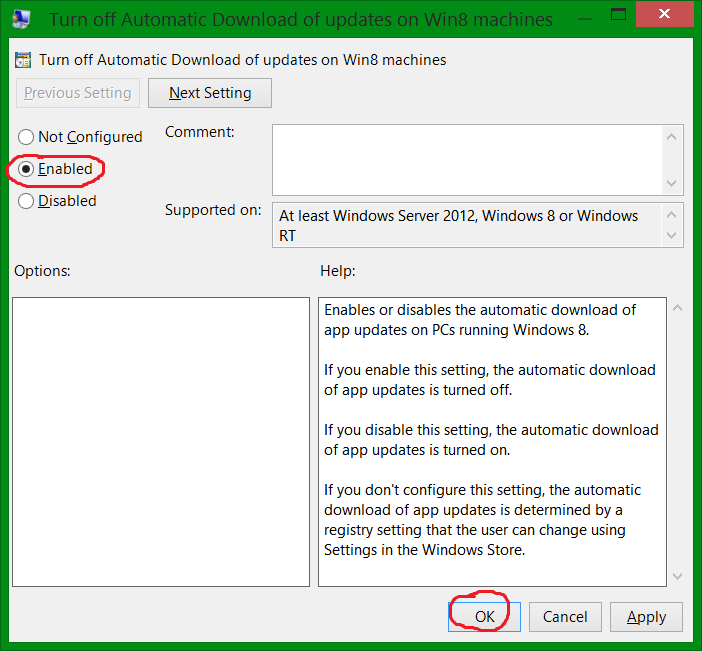
Step 6: New window will open up where you have to change default value from Not Configured to Enabled.

Step 7: Click OK to save your changes and restart your computer.
From now on your apps downloaded from Windows Store won’t update automatically and you can lunch their updates manually when ever you want.
-
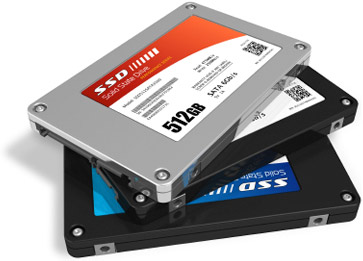
Nowadays, more and more computers are using SSD, some computer users upgrade their HDD to SSD, which brings the question should we defrag an SSD?

Traditional spinning hard drives have a metric known as Access Time (or Seek Time, which is a slightly different measurement) that refers to the average amount of time it takes for the drive armature to physically reposition the heads so that they can begin reading data from a given sector of the disk (it may be more or less depending on how far the heads have to travel). It should be noted that this latency is measured in milliseconds (thosandths of a second) and is incurred every single time the heads have to be repositioned.
The whole purpose of defragmentation is to arrange the files in such a way as to make them more or less sequential, so that the heads do not have to be repositioned as much in order to read a file.
SSD's do not have heads that need to be moved, nor do they have spinning latency. As a result, the access time for every cell in the matrix is equal, and is measured in nanoseconds (billionths of a second). Even if a file is very heavily fragmented, the increased latency to read it is imperceptibly small. Defragging will not improve performance to a noticeable degree.
Also unlike traditional spinning hard drives, the individual cells in an SSD have a limited number of write cycles before they "wear out". SSDs employ a wear-leveling algorithm to spread out writes to extend the life of the drive. Relocating the same data to a different area of the flash cells waste those write cycles. In this case, defragging can actually reduce the lifespan of the drive.
So now our concern is what shall we do to increase the lifespan of SSD.
Below are the 5 most basic and effective ways to improve SSD’s lifespan.
1. Disable prefetch parameters to increase SSD working life.
2. Disable Superfetch parameters to increase working life of SSD.
3. Disable defrag system drive on boot to increase working life of SSD.
4. Disable auto defrag when idle to increase working life of SSD.
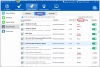
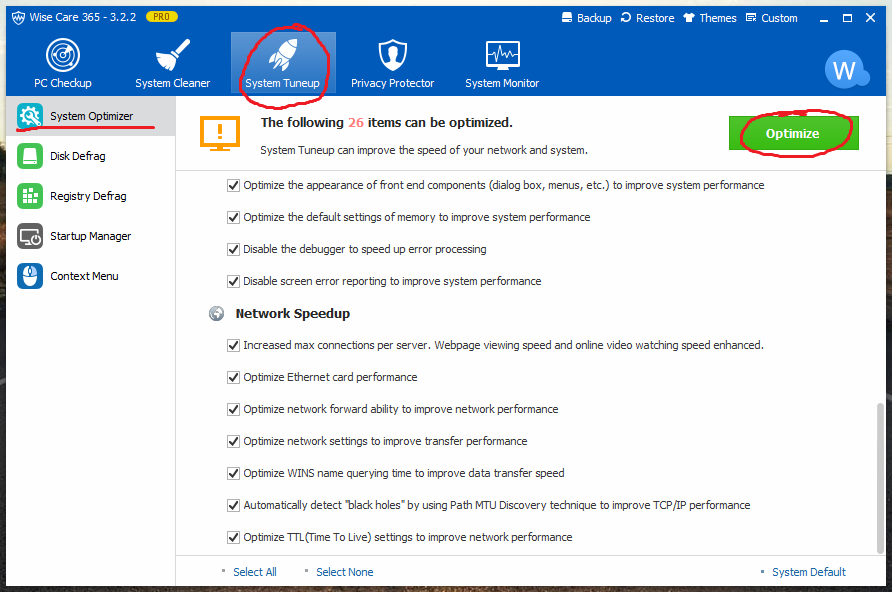
5. Enable TRIM function to improve working performance of SSD.These tweaks may sound a little bit hard for normal users. No biggie, you can make all these setting modifications with one single click. I am not bluffing. Just download Wise Care 365, you can see System Optimizer feature in System Tuneup section. If there is an SSD in your computer, there will be an item called SSD Optimization right below Network Speedup( Unfortunately my computer does not have one, so this item is not shown here). Single click ‘Optimize’, Wise Care 365 will make all the 5 changes I mentioned above along with other optimizing tweaks.

-
If you connect your desktop computer or laptop to your HD LCD TV trough a HDMI cable, you may encounter a problem with sound on your tv speakers. The typical problem is the video is working but the sound is not coming out of the speaker. In this article, I will show you how to deal with it.
Note: This method applies to Windows 8.1, Windows Vista and Windows 7.
Instructions
1. Open the Windows "Control Panel" on your computer.
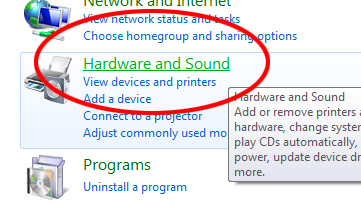
2. Open "Hardware and Sound".
It will be easy to create a desktop shortcut to the sound settings, so that you can easily open these settings from your desktop because you need to set your computer speakers back to default when you disconnect from your tv.
To create a shortcut: Right-click on "Sound" and choose "Create shortcut".

3. Open "Sound".
4. Right-click on HDMI, Digital Audio or High Definition Audio Device and choose "Set as Default Device".
When you want the sound back on your computer or laptop speakers you need to set "Speakers" as default device.
5. Click on "OK" to close the sound settings window.
Of course you can follow the same steps to set the computer or laptop speakers back as default after disconnecting.
-
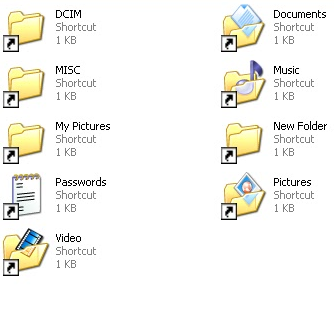
Pen drives and Memory cards are very common devices to transfer data, but unfortunately they often get infected by shortcut virus. If you connect your infected Pen drive to your system it will show files and folders having shortcuts. And in case you open the shortcut fie or folder it would infect your whole system badly.
This post will help you to remove shortcut virus from pendrive and Memory card and recover the files. To remove the shortcut virus use the following steps.
Do not open the shortcut file or folder otherwise the virus could infect your system.
Step 1: Connect your Pen drive or memory card.
Step 2: Open command prompt. To open command prompt press windows button + R . Enter the command cmd in Run and press enter to open command prompt.
Step 3: Go to My computer and check out your Pen drive letter.
Step 4:To remove shortcut virus from pendrive type attrib -h -r -s /s /d g:\*.* in the Command prompt. Don’t forget to replace the g with your Pen drive or memory card letter.

Step 5: Press Enter button.
Step 6: Go back to your Pen drive or memory card. You would see both your original files and shortcut files.Delete all the shortcut and unknown files and copy your original files and folders to another drive.
Step 7: At last format the Pen drive or Memory card. You have successfully remove shortcut virus from pendrive and recovered the infected files in the Pen drive.
-
The easiest way to shut down your Windows 8 & 8.1 PC with one click.
One of the ways is to use Keyboard Shortcuts to power down Windows. There’s an easy way to put the shutdown and restart functions just one click away from the desktop and Start screen. Just create shortcuts for both actions using the following steps:
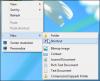
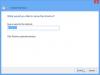
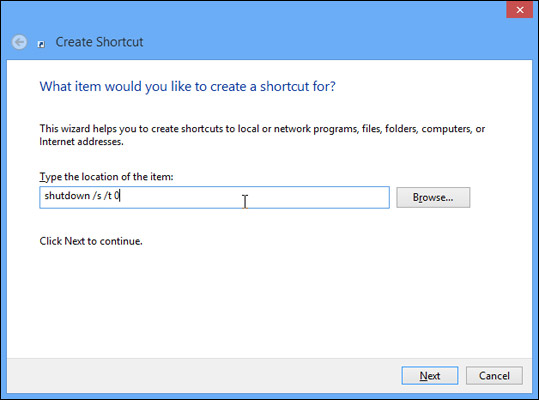
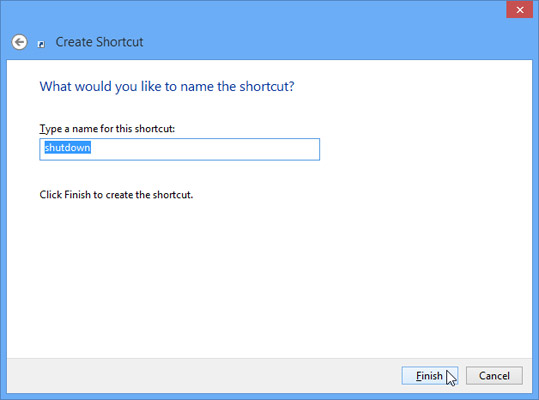
Step 1: Go to Desktop and Right Click then go new and Click Shortcut menu.
Step 2: Enter the following Code in Shortcut bar.
Make Shutdown Button Code is: shutdown -s -t 0Make Restart ButtonCode is: shutdown -r -t 0
Make Logoff Button Code is: shutdown -l -t 0

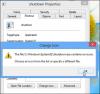
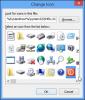
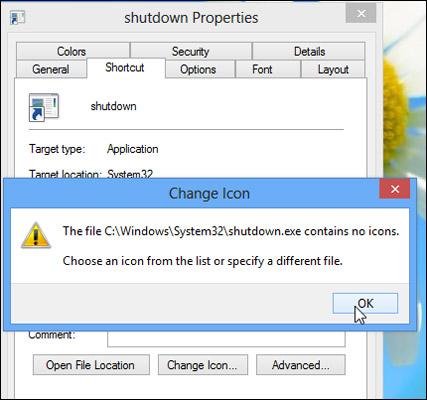
Step 3: Change the Setup Icon Go to Shutdown Button Proporties then click Change Icon and Choose your Icon Done.
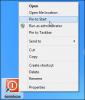
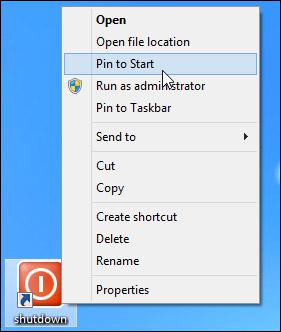
Step 4: Right click the shortcut and select Pin to Start. The shutdown icon will now appear on your Start screen.
Step 5: Drag the shutdown icon to a prominent place on your Start screen. We recommend putting it in the first column to the left so you will always see it.

Step 6: Right click the icon and select Pin to Taskbar if you want the shortcut to live on your desktop’s taskbar as well.

Step 7: Repeat the previous steps to create a Restart or Log Off button.
Extra tips: With the steps above, your PC can achieve quick shutdown, restart and logoff, but how about when you want your PC to shutdown automatically when you are not around. For example, you are downloading something from the internet or you are converting some files while you go outside or go to sleep. An automatic shutdown feature will come in real handy. I got the right solution for this: download Wise Auto Shutdown(http://wisecleaner.com/wiseautoshutdownfree.html), and set the time you want your computer to shut down, restart, etc. Then your computer will shut down or log off at the exact time you set.
-
Some time during browsing on Google Chrome plugins run automatically. This is because of some websites who change your browser settings.
How can we get rid of them?
You just have to simply follow the steps:Step1
Open chrome and go to settings and click on”Show advance settings”.
Step2
Go to privacy in advance settings and Click on “Content Setting”

Step3
After Click on “Content setting ” a window will appear and change its “plug-ins” setting to “Click to play” like this:

It will prevent plugins from automatically running.
Workaround
Wisecleaner.com always provide you with easier solutions for PC problems. As for dealing with plugins, add-ons and extensions, we have the functional Wise Plugin Manager(http://wisecleaner.com/wisepluginmanager.html)
. Regarding to the problem we talked about above, you can disable/enable or uninstall any plugin, add-on and extension with Wise Plugin Manager. There is more, it supports 4 of the most used browsers including Internet Explorer, Firefox, Opera and Google Chrome. You just need to click the corresponding browser tab, then you can quickly manage all the plugins, add-ons and extensions.
Note: When you are using Wise Plugin Manager to manage the plugins, etc, you have to close the browser.
- leoncy18, darrengc18 and MichaelWeini
-
 3
3
-

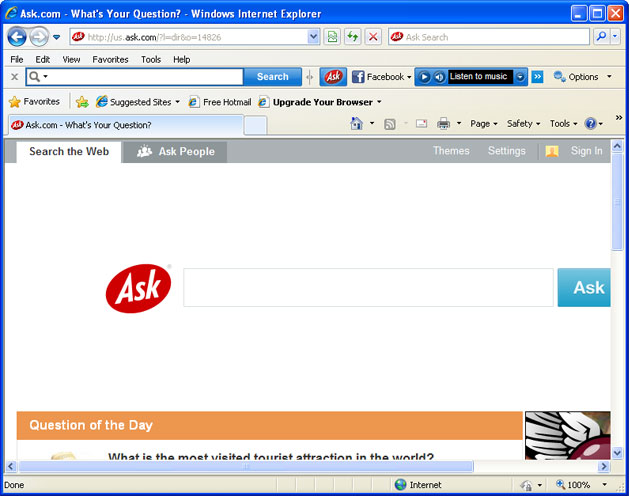
Ask toolbar is promoted via other free programs and once installed on your computer, they will hijack your browser homepage and replace your default search engine. Sometimes you may find Ask toolbar in your Internet Explorer without you knowing when you installed it.
In this article, I will show you how to remove it completely from your IE You may see more than a lot of articles on how to remove Ask toolbar on the internet, but in this one, I am gonna tell you the easiest fix.
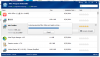
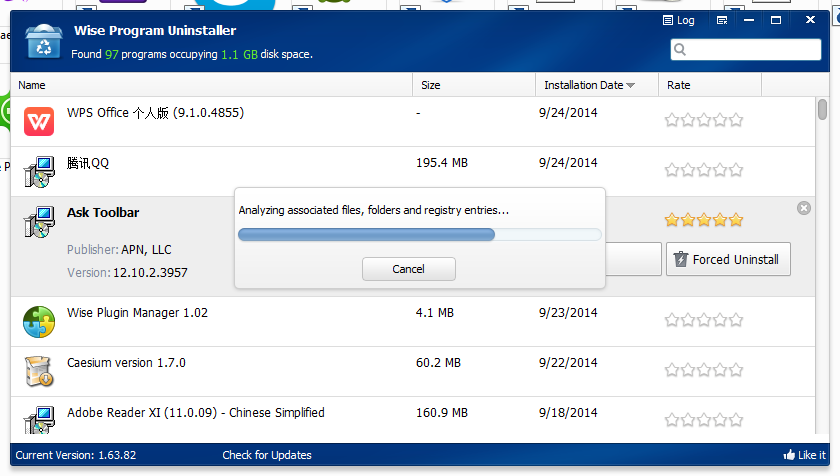
First you should download Wise Program Uninstaller(http://wisecleaner.com/wiseuninstallerfree.html), a function formidable program uninstaller. Someone may wanna ask, we can uninstall a software in Control Panel, why bother downloading a third party uninstaller. One thing you might not know is the uninstaller built in a software can’t remove a software completely, it might leave behind some residual files, folders or registry. Accumulation of this kind of junk files or registry could lead to a slow computer or even computer crash.
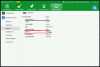
After downloading Wise Program Uninstaller, find Ask toolbar in the list. Of course if you have a lot of programs, you can just quick search it. When you find it, single click it, you will see a key called Safe Uninstall, single click it, it will automatically execute the built-in uninstaller of Ask toolbar. When this process is finished, Wise Program Uninstaller will analyze all the associated files, folders and registry entries, and present you a list of the analyzing result. You can just click Remove to erase all these useless files. Then you will find the toolbar is already gone from your IE browser.
One more thing
How do I change Ask.com default home page or search engine in Internet Explorer?
Internet Explorer allows you to change your browser home page at any time. In the upper right corner of your Internet Explorer browser window, select the gear icon (as shown below), and then "Internet Options" from the drop down menu. If you cannot find the gear icon, find the row of menus across the top of your computer screen such as File, Edit, View, etc. Click on the menu that says Tools, and from that Tools menu, click on Internet Options. Then proceed to the next step.

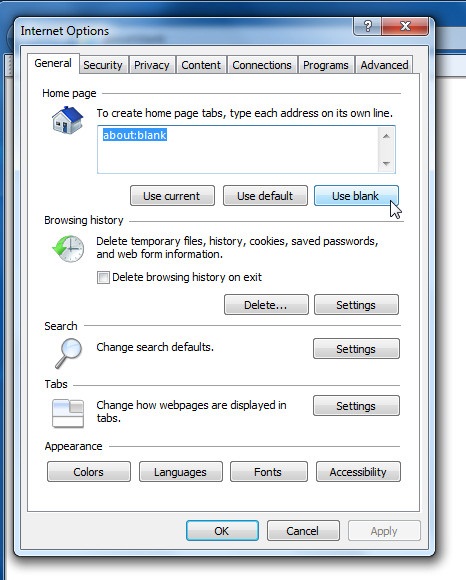
Find the section marked "Home page." When you first open Internet Options, the entire home page address should be highlighted in light blue; type the backspace key on your keyboard to delete it. Alternately, use your mouse to select the entire address you see beginning with "http://www.search.ask.com" and delete it with the backspace key. Then, type your desired home page in that space--for example, if you'd like Yahoo as your homepage, type in www.yahoo.com. Once you have typed in your preferred homepage, click "Apply" and then click "OK."
That's it for your default homepage settings! After making the change to your default homepage, you'll need to open a new Internet Explorer window to see the change. Changing your homepage setting doesn't retroactively affect pages you already had open prior to making the change.
- RobertPhesk, Aaronkew, Williamtak and 11 others
-
14
-
If you are using Windows 8.1, you may have experienced this: Windows 8.1 notification gives you ease to receive notifications regarding alarms, received emails and messages, weather and other updates. It is real convenient feature, but during working hours or during sleep hours, you want to turn off all notifications on your PC to avoid disruption.
In this article, I will show you two ways you can follow to stop receiving notifications according to your requirements.
Method 1: Stop receiving notifications for a short period of time
If you want to stop receiving Notifications temporarily for today only. Follow the steps below
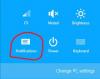
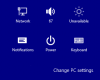
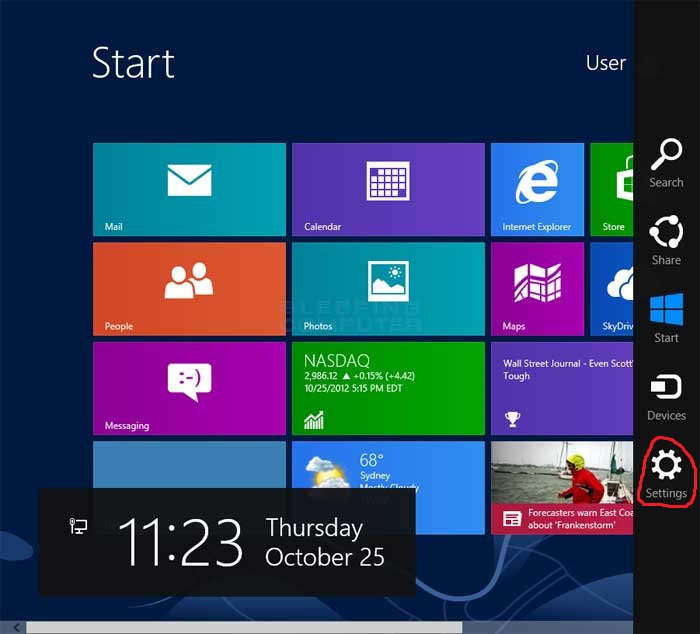
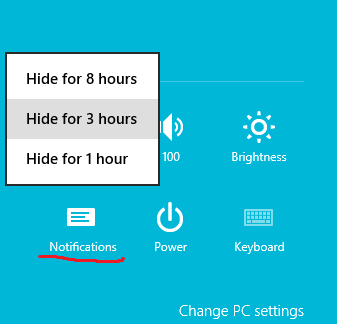
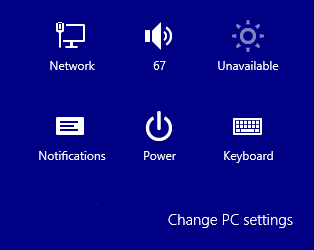
Step 1: Go to the “Charms Bar” where you will find the option “Settings”. Click this option.
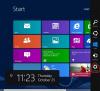
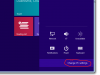
Step 2: Now you will find some options before you. Here you need to select “Notifications”. Once you select it, there will appear three options, whether you want to hide Notifications for 1 Hour, 3 Hours or 8 Hours. You can select one of them and thus, you would be able to stop receiving Notifications for your required time.

Method 2: Use Quiet Hour feature to stop receiving notifications.
If you want to stop receiving Notifications permanently in some specific hours of the day, you need to use “Quiet Hours” function in Windows 8.1. You can stop receiving the notifications regarding emails, messages, calendar and weather in some specific hours only. Follow the steps below to learn how to use it.
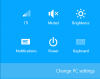
Step 1: Move your mouse to the bottom right of the screen to show the charm bar, and then choose Settings. Alternatively, you can press Ctrl + C to show the bar.
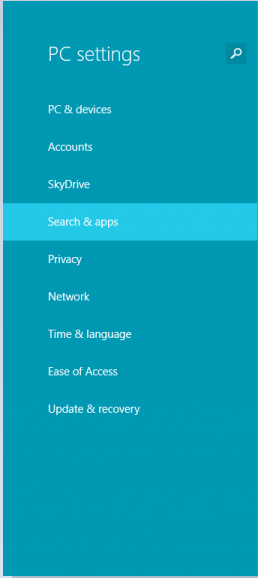
Step 2: In the slide-out panel, choose Change PC settings to go to the Metro panel.
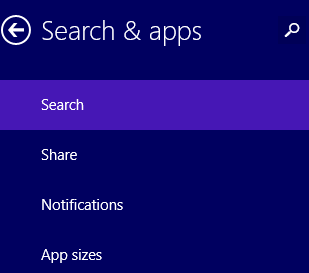
Step 3: Next, choose the Search & apps -> Notifications section on the left side of the screen.

Step4: On the right side of the screen, look for the Quiet hours option. Make sure to turn it on if you have not. You can configure Quiet hours using From and To. During this period, all notifications will be disabled and will not interrupt you. In addition, you can decide whether toreceive calls during the quiet hours or not. This option is enabled by default, so make sure to turn it off if you do not want receive calls. Currently, there is no way to add special contacts to the exception list so that you can still receive calls from them. Therefore, be careful when you use this feature.

Step 5: Later, if you want to turn off this feature on weekends, go back to the notification section, and disable the Quiet hours option.
-
The USB ports not working problem can be a very annoying one. Last minute it was working normally, now it is dead. In this tutorial I will show you how to deal with this problem.

Method 1: Use Device Manager to scan for hardware changes
Use Device Manager to scan for hardware changes. After your computer scans for hardware changes, it might recognize the USB device that is connected to the USB port so that you can use the device.
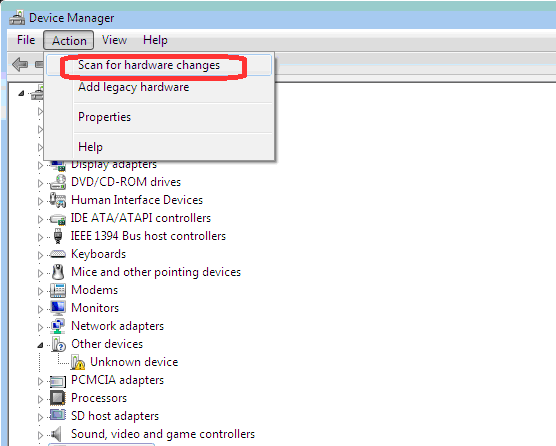
To scan for hardware changes, follow these steps:Open Device Manager by typing devmgmt.msc, and then click OK.
In Device Manager, click your computer so that it is highlighted.
Click Action, and then click Scan for hardware changes.
Check the USB device to see whether it is working.
If scanning for hardware changes fixed the problem, you are finished. If this method did not fix the problem, go on.

Method 2: Restart the computer
If scanning for new hardware did not fix the problem, try restarting the computer. After the computer has restarted, check the USB device to see whether it is working.
If restarting the computer fixed the problem, you are finished. If this method did not fix the problem, read on.
Method 3: Power Management and USB Controller
Open the Device Manager as explained previously.
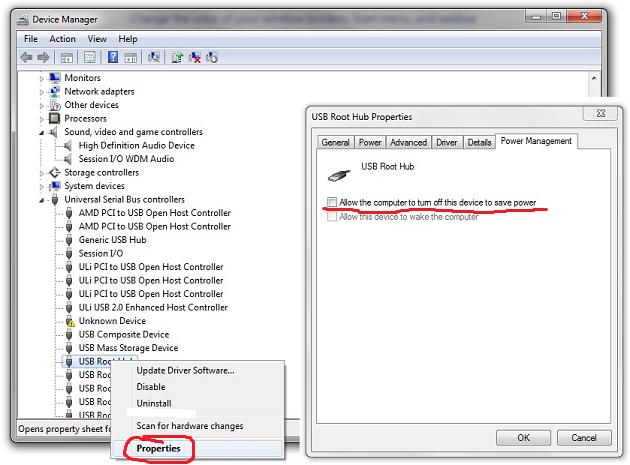
Expand "Universal Serial Bus controllers."
Right-click each entry titled "USB Root Hub" and select "Properties."
Change to the "Power Management" tab.
Uncheck the check box next to "Allow the computer to turn off this device to save power."
Press "OK."
Repeat this for each "USB Root Hub" entry.
Reboot the computer.
Method 4: Uninstall and Reinstall the USB Controller
Open the Device Manager as explained previously.
Expand "Universal Serial Bus controllers."

Right-click each entry under "Universal Serial Bus controllers" and select "Uninstall."
Ensure you've done this for each entry under "Universal Serial Bus controllers."
Restart the computer. After the computer starts, Windows will automatically scan for hardware changes and reinstall all the USB controllers that you uninstalled.
Check the USB device to see whether it is working.
-

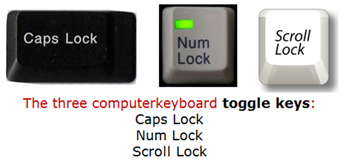
This article describes about how to make Windows play an alert each time you press the Caps Lock, Num Lock, or Scroll Lock keys. These keys are called “Toggle Keys” in technical language. These alerts can help prevent the frustration of inadvertently pressing a key and not realizing it.
Below is how:
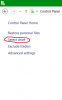
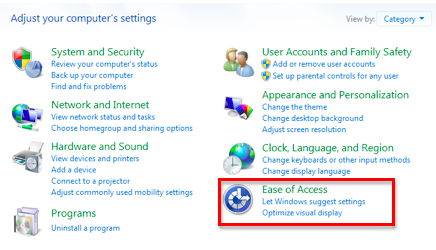
Step 1: Come to the desktop mode where you will see the Start button at the very left side at the bottom of the screen. Once you right-click this button, you will see a menu where you need to select the option Control Panel to move on.
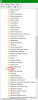
Step 2: In the Control Panel menu, you need to click the category “Ease of Access” that can be found at the end of the list.

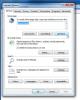
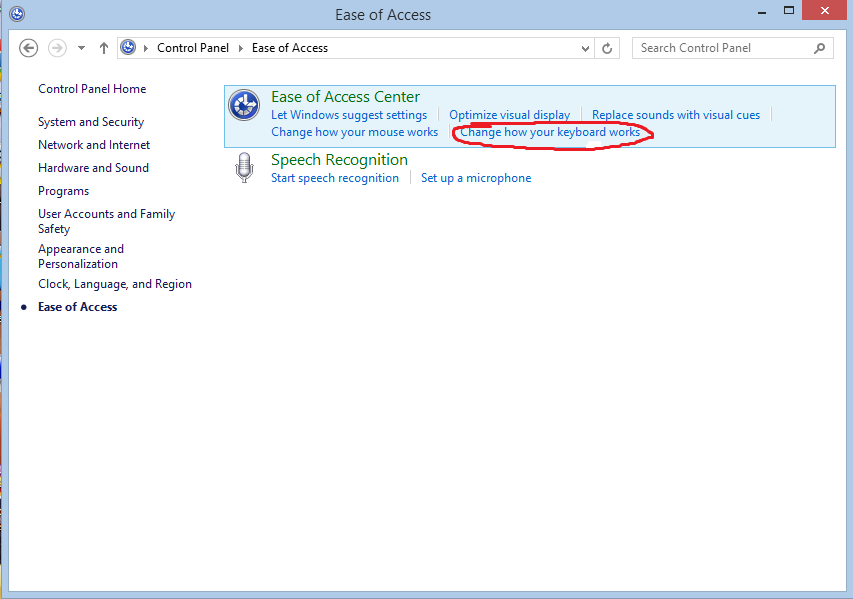
Step 3: Now the next window appears before you where the first category is “Ease of Access Center”. In this category, you should select the “Change how your keyboard works” option.
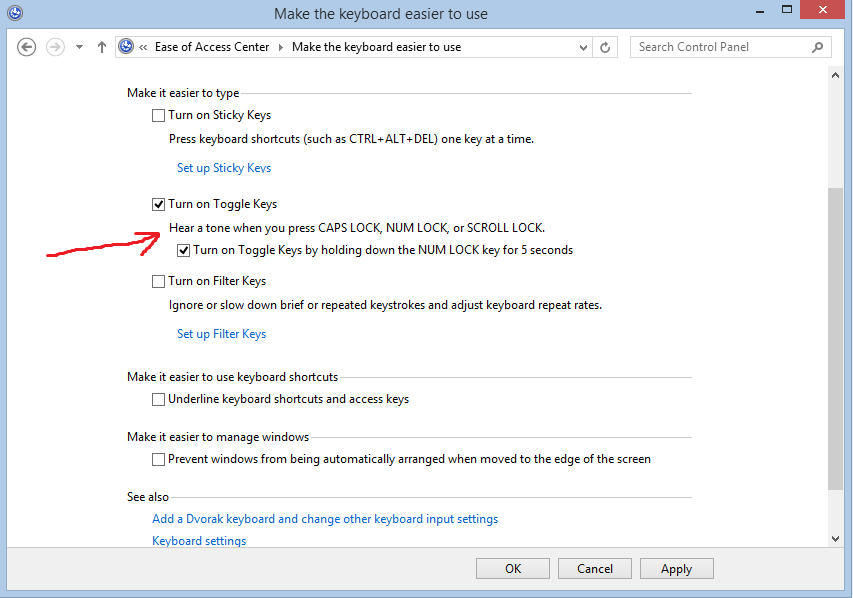
Step 4: In the next window, you will see various categories and options and the check boxes with them. Here, you will see an option “Turn on Toggle Keys” that should be checked. Now click “Apply” and “OK” to apply the settings.
Now you have enabled the sounds of the three keys successfully and whenever you touch any of these keys intentionally or unintentionally, you will hear a sound that will let you know that you have pressed a toggle key.
-
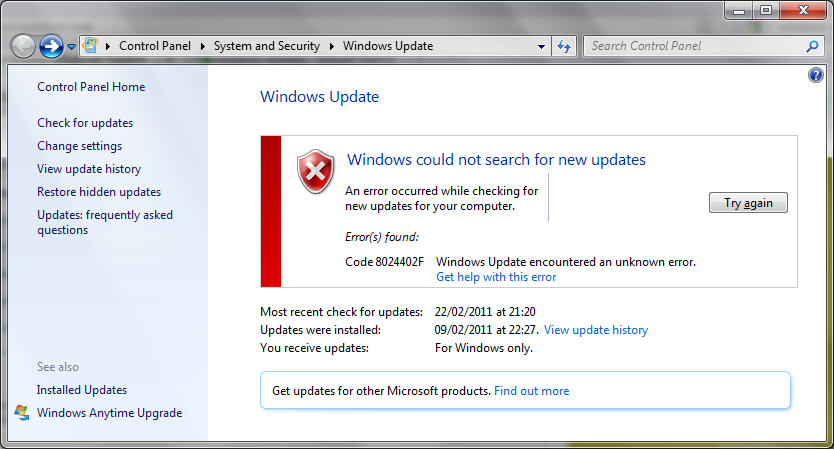
This issue can be caused by the following factors:
1. The Windows Update service has been stopped.
2. Corrupted Windows Update Temporary folder.
NOTE: Some third party programs can affect the Windows Update service. If you are running any third party applications such as Spyblocker, Internet or web accelerators (programs designed to boost the speed of the Internet connection), security or anti-virus programs (Norton, McAfee, etc.), I recommend we temporarily disable or shut them down and then try accessing Windows Update later. Please understand that we are disabling these programs only for the purpose of troubleshooting and we can re-enable these programs after we finish troubleshooting.
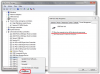
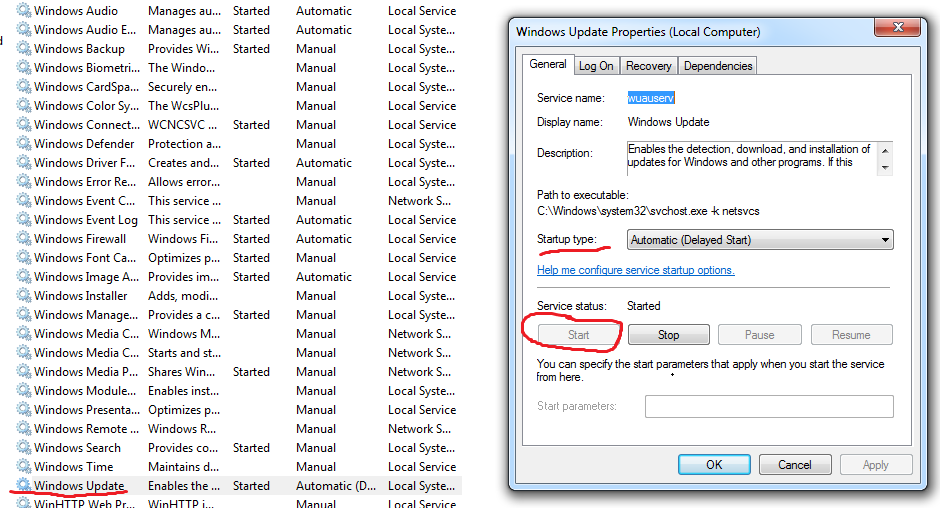
Step 1: Verify the relevant Windows Update services1. Click the Start Button, in Start Search box, type: "services.msc" (without quotes) and press Enter. If you are prompted for an administrator password or confirmation, type the password or provide confirmation.
2. Double click the service "Windows Update".
3. Click on the "General" tab; make sure the "Startup Type" is "Automatic" or "Manual". Then please click the "Start" button under "Service Status" to start the service.
4. Please repeat the above steps with the "Background Intelligent Transfer Service" service.
You need to temporarily stop these services.
Step 2: Rename the Windows Update Software distribution folder
This problem may occur if the Windows Update Software distribution folder has been corrupted. We can refer to the following steps to rename this folder. Please note that the folder will be re-created the next time we visit the Windows Update site.
1. Close all the open windows.2. Click the Start Button, click "All programs", and click "Accessories".
3. Right-click on "Command Prompt” and click "Run as administrator".
4. In "Administrator: Command Prompt" window, type in "net stop WuAuServ" (without the quotes) and press Enter.
Note: Please look at the cmd window and make sure it says that it was successfully stopped before we try to rename the folder.5. Click the Start Button, in the "Start Search" box, type in "%windir%" (without the quotes) and press Enter.
6. In the opened folder, look for the folder named "SoftwareDistribution".
7. Right-click on the folder, select Rename and type "SoftwareDistribution.old" (without the quotes) to rename this folder.
8. While still in the "Administrator: Command Prompt" window, type the command "net start WuAuServ" (without the quotes) in the opened window to restart the Windows Updates service.
-
Windows 8&8.1 fast startup is a new feature which speeds up the startup process by creating a hibernate file which contains system configuration data and is re-loaded each time a PC starts up. In most cases, if Windows 8 detects a change in the PC configuration, it will ignore the hibernate file and perform a normal startup process which reloads the kernel, services, device drivers and applications.
In this tutorial, I will show you how to enable it to help your PC boot faster
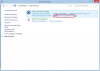
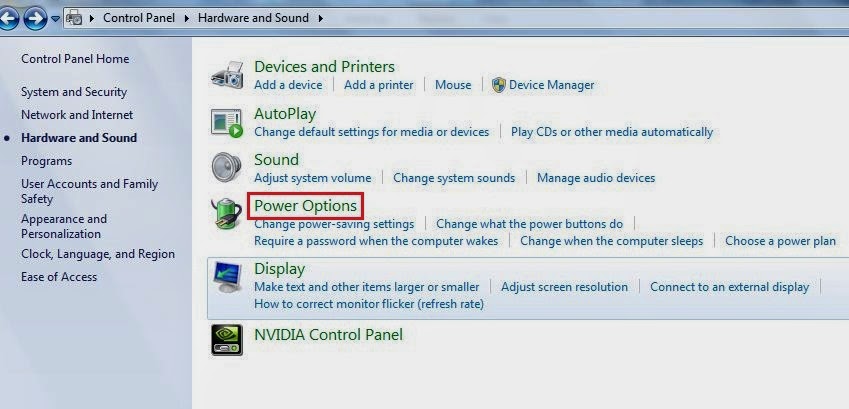
1. Open the Control Panel, and click on the Power Options icon.

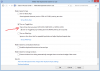
2. Click/tap on the Choose what the power buttons do link on the left side.
3. Click/tap on the Change settings that are currently unavailable link at the top.
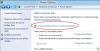
4. If prompted by UAC, then click/tap on Yes.
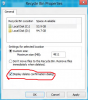
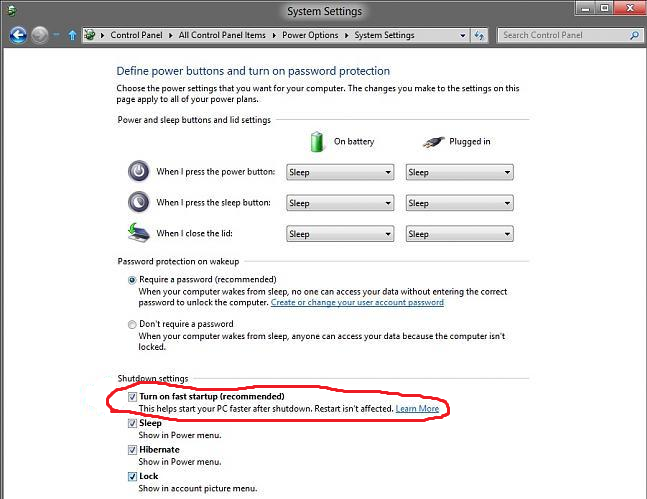
5. To Turn On "Fast Startup" (Hybrid Boot) for a "Hybrid Shutdown"NOTE: This is the default setting.
Under Shutdown settings, check the Turn on fast startup box, and click/tap on the Save changes button.
NOTE: If the Turn on fast startup setting is not listed, then you will need to close the System Settings window, enable hibernate, then start back at step 1 again.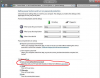
The Shut down Power option will now perform as a hybrid shut down when used.
For a faster startup, you also need to disable the programs and services that you don’t need start on bootup.
Here is an easy solution for disabling all the unnecessary services and programs when windows start.
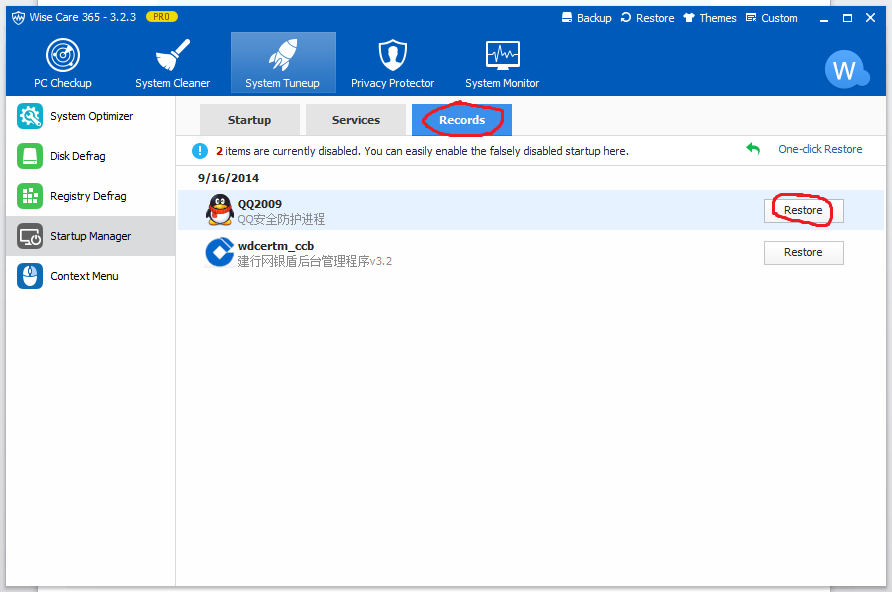
Download Wise Care 365 (Click here: http://wisecleaner.com/wisecare365.html)
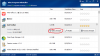
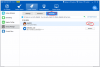
There is a Startup Manager feature in System Tuneup section, there you can disable any program or service that starts on bootup. Of course if you are just a normal user and don’t know what services to turn off, you can refer to the Suggestion column, it suggests whether you should keep the service, enable the services or disable the services. If you wanna get the services back on bootup, you can use the Records option( Pro versions only) and make disabled services and programs start on bootup again.
With the two solutions above, you will see an improvement in your Windows startup time.
- cloncuche, Jabzooge and BoxTriaxia
-
3
-
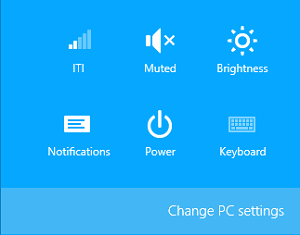
Step 1: Go to the very right corner at the bottom of your desktop screen until the Charms Bar appears. Click “Settings” on it.
Step 2: You will get a few options where you need to click “Change PC Settings” at the bottom of the screen.
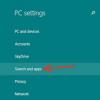
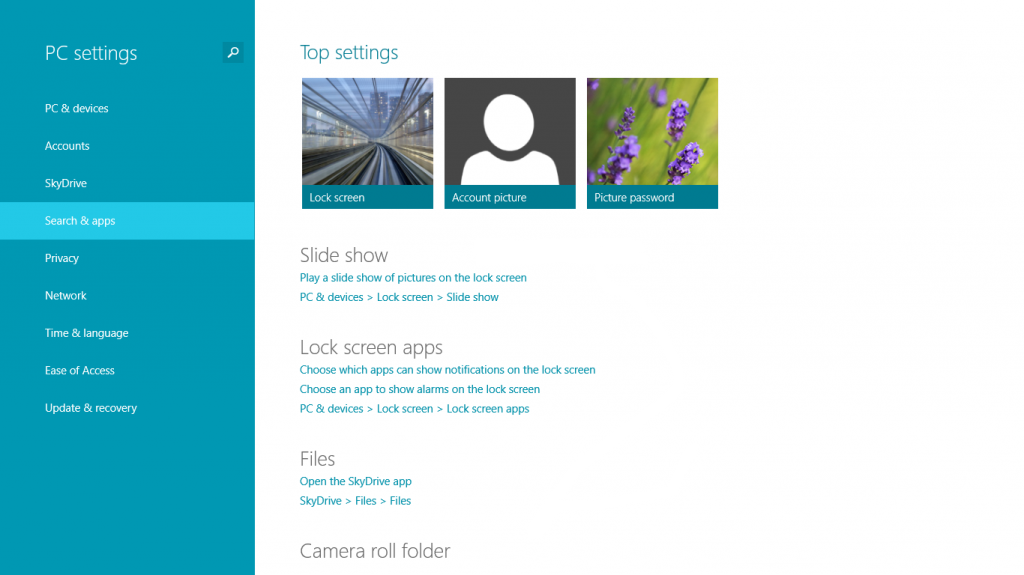
Step 3: Now you will see “PC Settings” menu where you need to select the category “Search & Apps” as it has been shown in the image below.

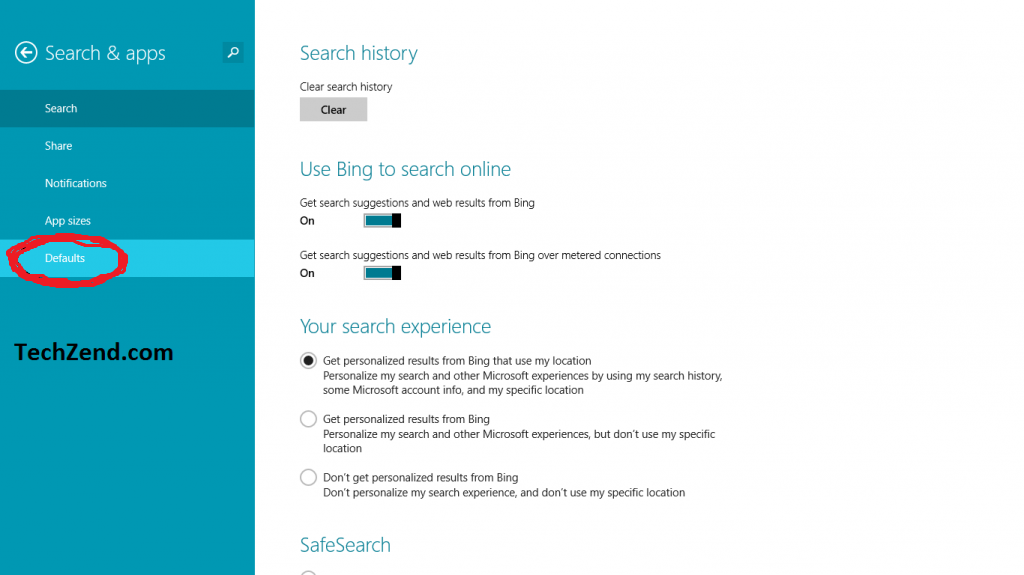
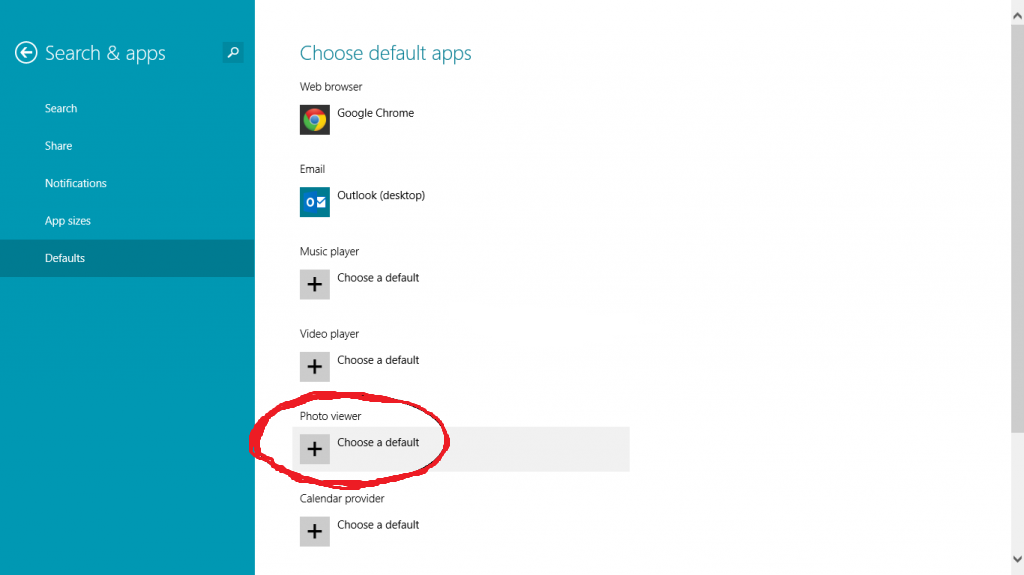
Step 4: In the next section, you need to select “Defaults” category from the given list to move to the next section.

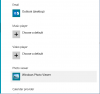
Step 5: Here, go to the Default “Photo Viewer” and click on the “+” icon. You will see some relevant apps where you need to select “Windows Photo Viewer” to set it as your default app to view your photos.


Step 6: Now you will notice the icon of “Windows Photo Viewer” is appearing instead of “+” icon in Photo Viewer category that shows you have surely set your desired photo viewer as a default one.
-
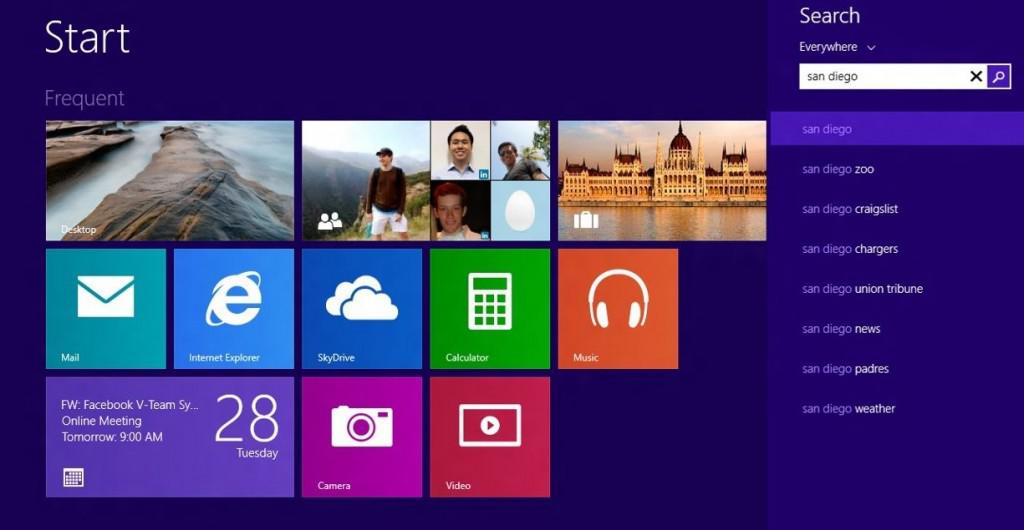
In Windows 8.1, when you search for something, Windows will use Bing’s search engine to initiate the online search. Every time you search for something on your local hard drive, Windows will enhance the results by searching for the keywords online.

There will be many users out there who find this annoying and want to disable Bing’s search engine feature.
Some people just don’t want their personal search activity to be routed via an online search engine like Bing. Privacy is important to everyone, and below is how to achieve that:
Disable Bing Search Engine Feature From Windows 8.1
To start off, launch the Charms bar (or press Windows + C combination on your keyboard). From there, head over to the Settings charm menu.
See the “Change PC Settings” option on the bottom right of the screen? Click on it. This will open up the settings.
You need to open to “Search & Apps” menu, where you will see the option to disable search results via Bing. Make sure it’s showing as “Off”.


-
Windows.OLD folder is often created during an upgrade of Microsoft's operating system from one version to another. Windows.old folder has all the system files your Operating System was before using. It contains files from your previous installation of Windows, which were either not required or can't be used with the new version. You don't need to keep these unless something has gone wrong with the upgrade and you need to roll back to your previous version.
Unless your low disk space situation is causing problems, we suggest leaving the Windows.OLD folder where it is until you've made sure you're happy with your upgrade, and all your files and settings are in place.
To get started follow steps below.
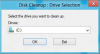
Step 1: On your keyboard, press Win+Q to lunch search charm bar. Inside search field type cleanmgr and then inside left pane lunch the app cleanmgr.exe.( In Windows 7, click start orb, also type in cleanmgr in the search bar)

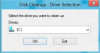
Step 2: When Disk Cleanup window opens, select the drive that you wish to clean up, choose the drive( C drive normally) where you Windows. Old is located and then click OK button.
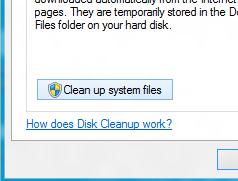
Step 3: Inside the next window that appears click on Clean up system files button.

Step 4: If you got prompted by UAC, click on Yes button.
Step 5: Now again choose a drive which you want to clean (the one you choose in Step 2) and click OK.
Step 6: Select the checkbox in front of Previous Windows Installation(s) and then click OK.
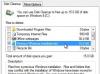
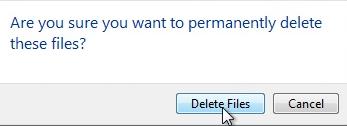
Step 7: In the confirmation window click on the button Delete Files.

Step 8: Wait until cleanup process is finished, which may take few minutes, and the C:\Window.old folder will be deleted.
-
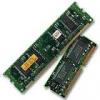
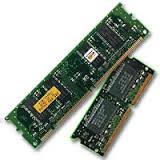
Instead of buying a new computer, adding RAM is often the most cost-effective upgrade you can make to speed up a sluggish computer.
You may see a lot of similar articles on the internet, but they all seem a little bit complicated for normal users.
Follow the next easy steps to upgrade your RAM:
1. Check how many memory slots the motherboard has
Most computer motherboards have two, three, or four memory slots. Some higher end motherboards have as many as six, or possibly even eight memory slots. This is the total number of slots available. Unless you are using a very old computer, you will have to change the RAM. If there is one more slot for adding one memory, you don’t have to reinstall the system.
2. Find Out the Maximum RAM Capacity for Your System
Determine if Windows is 32-bit or 64-bit. Download Wise Care 365, click Hardware Overview in System Monitor, you will see the info of your operating system.

32-bit can support up to 4 GB of RAM. In fact, 32-bit Windows is limited to accessing 3.2GB of that 4GB).
64-bit can support up to 128 GB of RAM or even more than that.
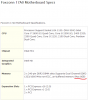
3. Find Out the maximum RAM capacity for your mainboard
In Wise Care 365, check the Mainboard in System Monitor, you will see your mainboard type. Google it to find the spec of it. You will see the maximum RAM capacity for your mainboard.

4. Find out the right type of RAM for your computer
Call me preachy but please first know if you are buying a RAM for your laptop or desktop. In most cases, they are different. Most motherboards accept only one type of RAM, if you're buying new RAM, you're probably going to make your life a lot easier by buying the exact same model as you currently have in your machine, but they don’t have to be the same brand. Check the Memory info in System Monitor and buy the RAM that has the same speed and memory type so that it will be compatible with your computer.
-
How to Recover Deleted Files in Windows For Free? Check this video
Today an integrated graphics card can meet most of our multimedia and gaming needs (except those of the hardcore gamers, of course). So if you are not a hardcore gamer or a professional video editor, chances are that you have a desktop computer or a laptop with an integrated video card. In this article I'm going to show you how to get the max out of the integrated graphics card in Intel processors - Intel HD Graphics. The performance improvement tips in this article will also work for other integrated graphics cards, for example the AMD integrated graphics.


1. Update the graphics card driver

The driver is the piece of software all the programs and games use to communicate with your graphics card. Being with the latest driver means that your graphics card will work faster and you will experience less problems and freezes in graphic intensive applications and games. New driver versions also introduce improvements and optimizations for many games.
If you are on a laptop, it is best to visit the website of you laptop's manufacturer and find the web page related to your laptop. Usually there's a search box where you can enter you laptop's exact model number. When you find your notebook's support page, download the Intel HD Graphics driver for your operating system and install it.
If you are on a desktop, simply go to Intel's website and search for the exact model of your CPU's graphics card, for example Intel HD Graphics for Celeron, Intel HD Graphics 3000, Intel HD Graphics 4000, etc. Then download the driver for your operating system and install it.
2. Increase the amount of RAM and make it work in dual channel mode
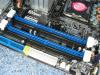
Integrated graphics cards usually do not have their own memory (or only have a small amount of one). They take memory from the RAM of the computer. When your computer has more RAM the Intel HD Graphics will be able to utilize more memory. But what will really speed it up will be using two memory sticks of the same capacity and speed. In this case you computer's RAM will begin to work in dual channel mode which means that it will become at least 15% faster. As the integrated graphics use computer's RAM extensively you can expect an even greater performance improvement for your Intel HD Graphics - it will become 20 - 25% faster in most applications and games.
3. Make sure the graphics card is not in power saving mode

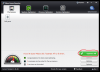
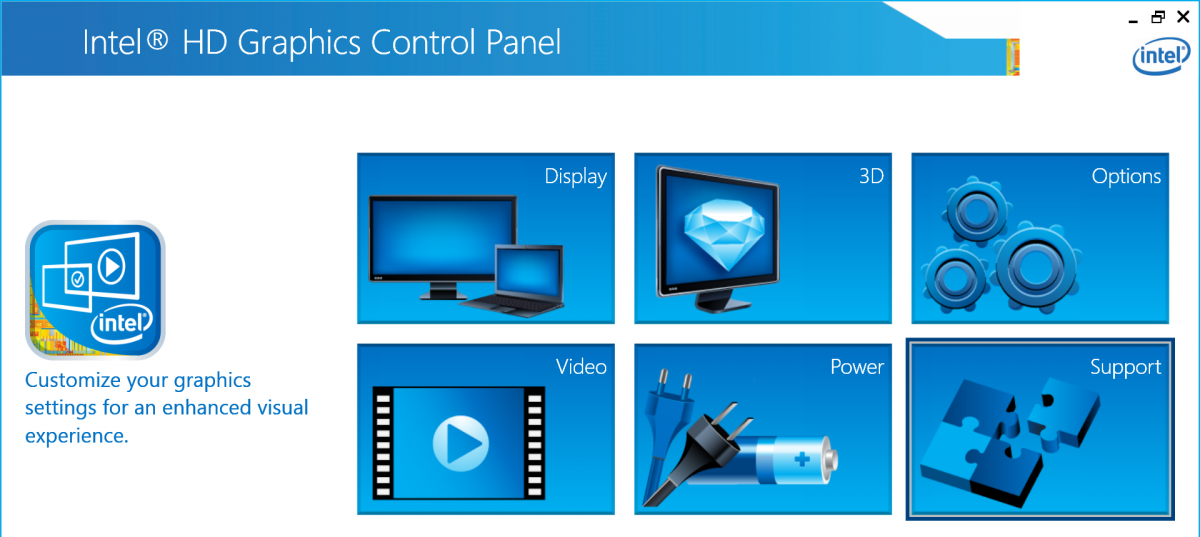
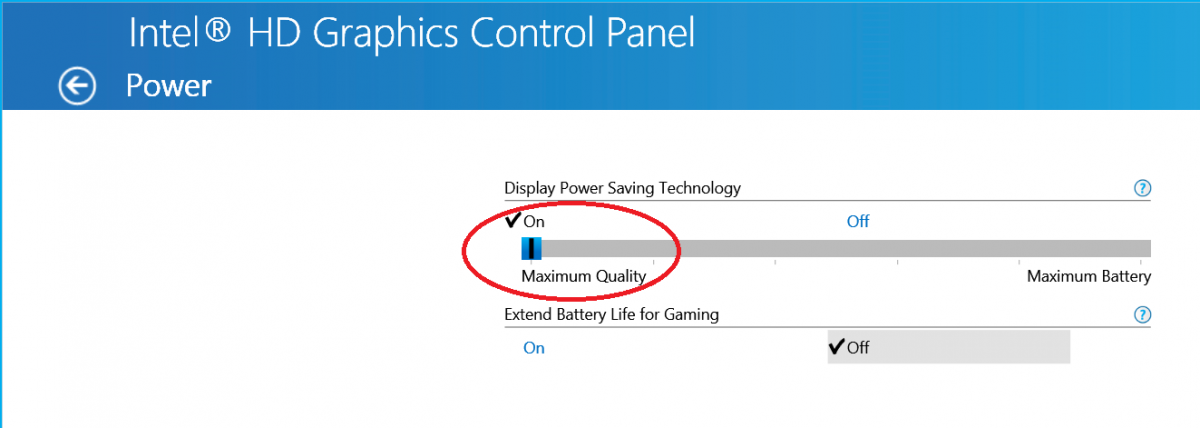
If you are after maximum performance of you Intel HD Graphics, make sure you have turned off all of its power saving features. This tip is valid for all video cards, power saving features kill performance and vice versa. That is why in order to achieve maximum performance you have to make sure that your Windows power plan is not on Power Saver, you can use the Balanced or the High Performance power plan. You can also click the Intel HD Graphics driver tray icon (it should be near the clock in the task bar), select Graphics Properties, then click the Power tab and selectMaximum Performance. The image on the right shows how this dialog looks for Intel HD Graphics 3000 on Windows 7. Please, note that although this tip will certainly improve your Intel HD Graphics' performance it will also increase the power it draws, as well as the heat it generates under heavy load (which is the case for games). Caution is advised, especially if you are on a laptop that experiences temperature problems.
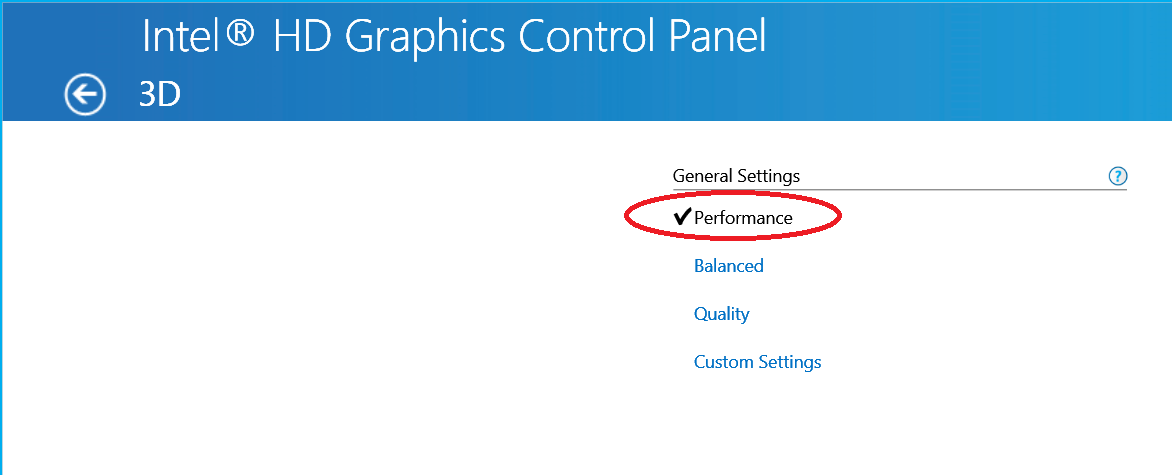
4. Set the 3D preference of Intel HD Graphics to "Performance"

This trick will help you improve the frame rate in games. To apply it click the Intel HD Graphics driver tray icon, select Graphics Properties, then click the 3D tab and move the slider to Performance. In this way you sacrifice a bit of image quality for improved 3D performance, which should lead to a few more frames per second (FPS) in games. The image on the right shows the way this dialog looks for Intel HD Graphics 3000 on Windows 7. Do not expect miracles though, this will not turn your Intel HD Graphics into a high performance gaming video card, but you will get a slight bump in frame rates depending on the game.
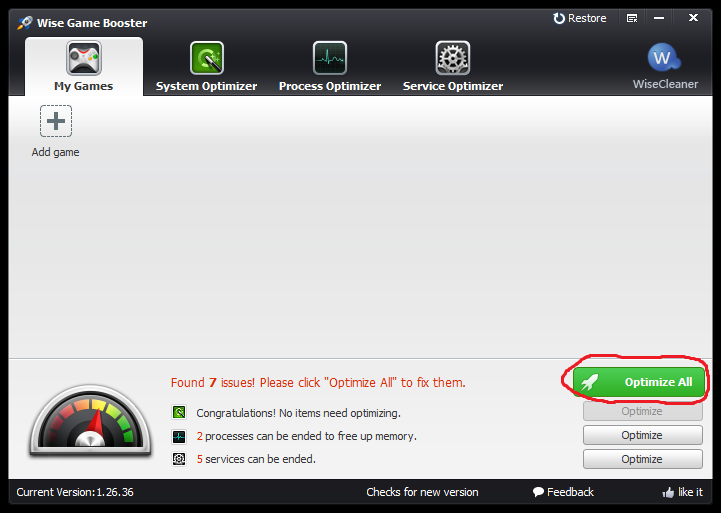
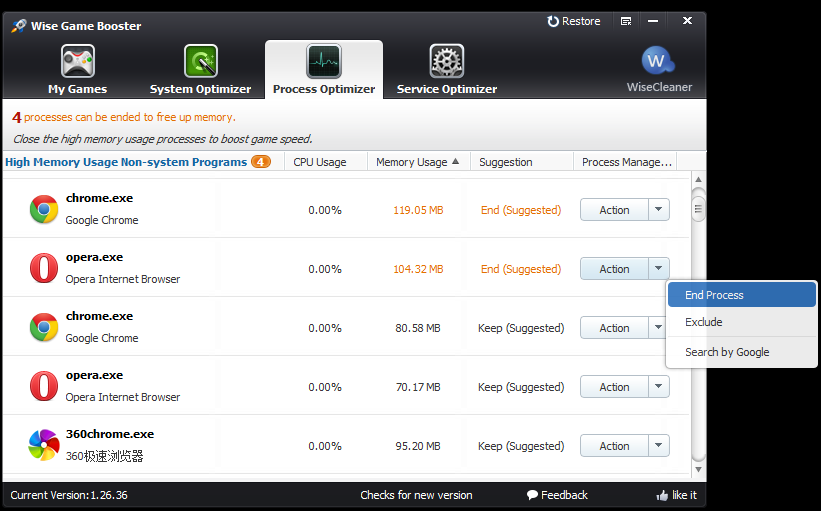
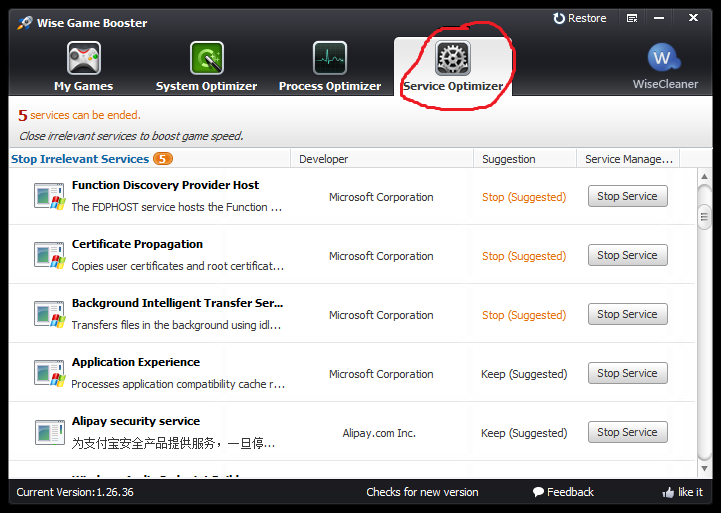
5. Shut down all the processes and services you don’t need.
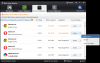
Close any unnecessary background programs while using graphics-intense programs. Background programs may be robbing your CPU of cycles it could be using to boost graphical performance. Instead of closing the processes
one by one and stopping the services in Windows Task Manager, you can achieve all that with Wise Game Booster. You can shut down all the all the suggested programs and services with one single click of ‘Optimize all’. Of course, if you are not satisfied with the suggested options, you can go to each column to close the programs or services according to your own needs.

These 5 tips will greatly improve your Intel HD Graphics performance thus letting you enjoy smooth game play even in games you thought you wouldn't be able to play with an integrated graphics card. Most of them can be applied to other integrated graphics cards, too. Other ways to improve the performance of Intel HD Graphics also exist, but I found these ones most effective. Let me know if they work well for you, too, or if you have any other Intel HD Graphics performance improvement methods.
-
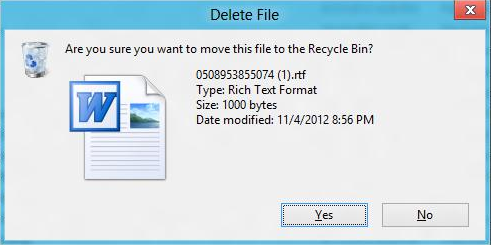
Whenever you delete a file in any of previous Windows version, you are asked by Windows to confirm if you really want to delete that file. However Microsoft decided to disable this feature in Windows 8&8.1 and from now on whenever you delete a file or folder it will immediately be moved into trash. But with small change inside options you can return it back in Windows 8 and avoid accidental file or folder removal.
To get started follow steps below:
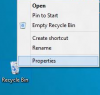
Step 1: Right mouse click on Recycle Bin located on your desktop.
Step 2: From context menu that appears choose Properties.
Step 3: In window that opens up select check box in front of Display delete confirmation dialog.
Step 4: Click OK to save your changes.

Step 5: Next time when you delete certain file or folder in Windows 8&8.1 you will get a confirmation window before that file is deleted, giving you the option to choose: Yes or No.
-
What I hate about Windows 8&8.1 is the unavailability of hibernate option inside Power menu. If you need to have Hibernate option inside your Windows 8 Power menu, read this article.
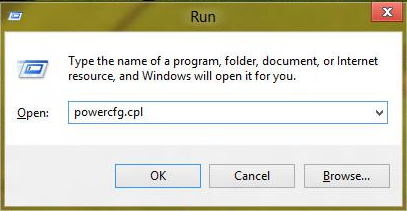
Step 1: On your keyboard press Win+R to lunch the Run dialog window.
Step 2: Inside Run window type powercfg.cpl and press Enter on your keyboard.
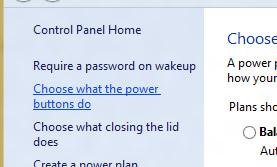
Step 3: When Power Options window opens up, inside left pane you need to click on Choose what the power buttons do link.
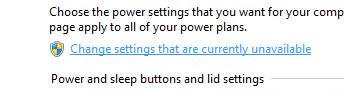
Step 4: Now click on Change settings that are currently unavailable, located at the top.
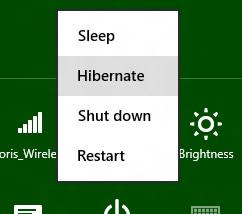
Step 5: Now scroll down the options and at the bottom of existing window you should notice the Hibernate option. Select the checkbox in front of Hibernate and click on Save changes.
Step 6: Next time when you launch Windows 8 power menu, you will see Hibernate option available.
-
Some say with the development of cloud storage, USB drive will be an old timer, But technically, today we can’t imagine any device without USB, whether we use it on our laptop or desktop computer, tablet, smart phone, car or any other device. However even USB became standard for every device, still its drivers could get corrupted sometime, disabled by mistake or removed by virus on our computers. If this happens our computer won’t recognize any device we connect to our computer over USB and we will need to re-install our drivers all over again. This tutorial will show you how to re-install USB drivers in Windows 8 & 8.1 operating system.
To get started follow steps below:
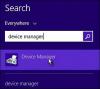
Step 1: Search Device Manager, click on Device Manager. If by any chance you got prompted by UAC click on Yes.
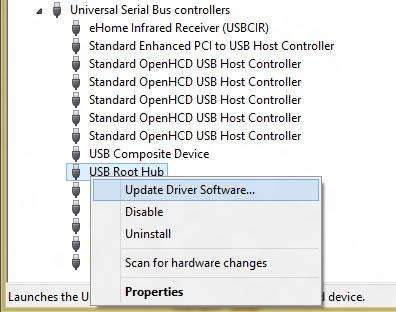
Step 2: When Device Manager window opens up click on small arrow next to Universal Serial Bus controllers to expand its options.
Step 3: You will most probably see dozens of new options in here but you need to right mouse click on USB root Hub and from context menu choose Update Software Driver.
Step 4: A new window will open offering you the option to search the internet for your drivers or browse your computer. Click on Search Automatically for updated driver software.

Step 5: Windows 8 will search for drivers which may take few minutes until it finds them. Once they are found, wait additional few minutes until they are re-installed and you are ready to use your USB connectors again.


How To Use Keyboard As Mouse Contingently When the Mouse Does not Work?
in WiseCleaner Advices & Suggestions
Posted
All the computer users use mouse as a pointing device. But if it stops working all of a sudden, it's quite difficult to operate PC with keyboard. You can use keyboard as mouse contingently before you get another mouse.
In this article, I will show you how to do that:
For Windows XP :
1) Open "Control Panel".
2) Click on "Switch to Classic View"
3) Click on "Accessibility Options"
4) Click on "Mouse Tab"
5) Select "Use MouseKeys"
6) Click "OK".
7) Activate "Num Lock"
8) Now you can control the mouse pointer using arrows on the numeric keypad.
For Windows Vista/7/8/8.1 :
1) Open Ease of Access Center from control panel
2) Click Make the mouse easier to use.
3) Under Control the mouse with the keyboard,check the mouse keys check box.
Direct shortcut to activate mouse keys is Alt+Shift+NumLock. It works only for keyboards having number keyboards. Also you click Alt+Shift+NumLock to deactivate this feature.