-
Posts
2622 -
Joined
-
Last visited
-
Days Won
251
Posts posted by wisecleaner_admin
-
-
-
Steps to Restore Wise Care 365 from Norton's Quarantine
1. Right-click the Norton icon on the Taskbar and select Disable Auto-Protect.
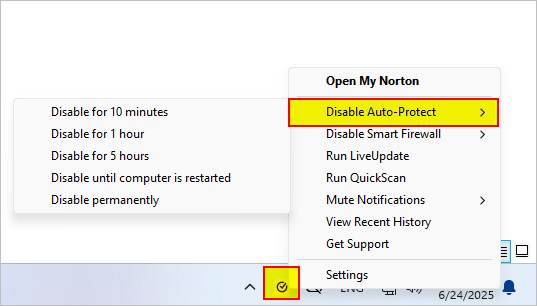
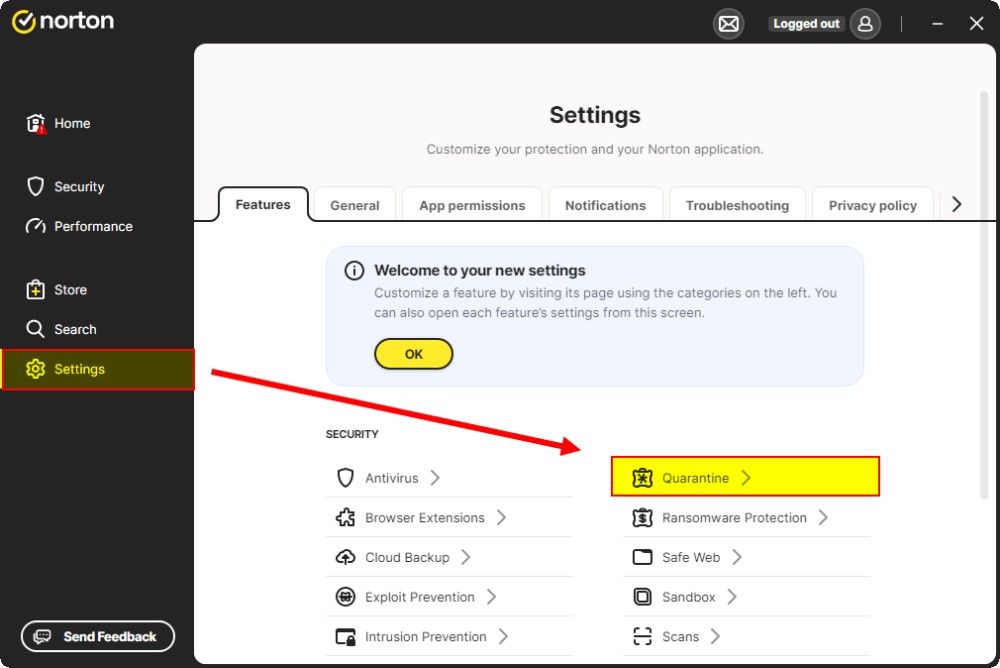
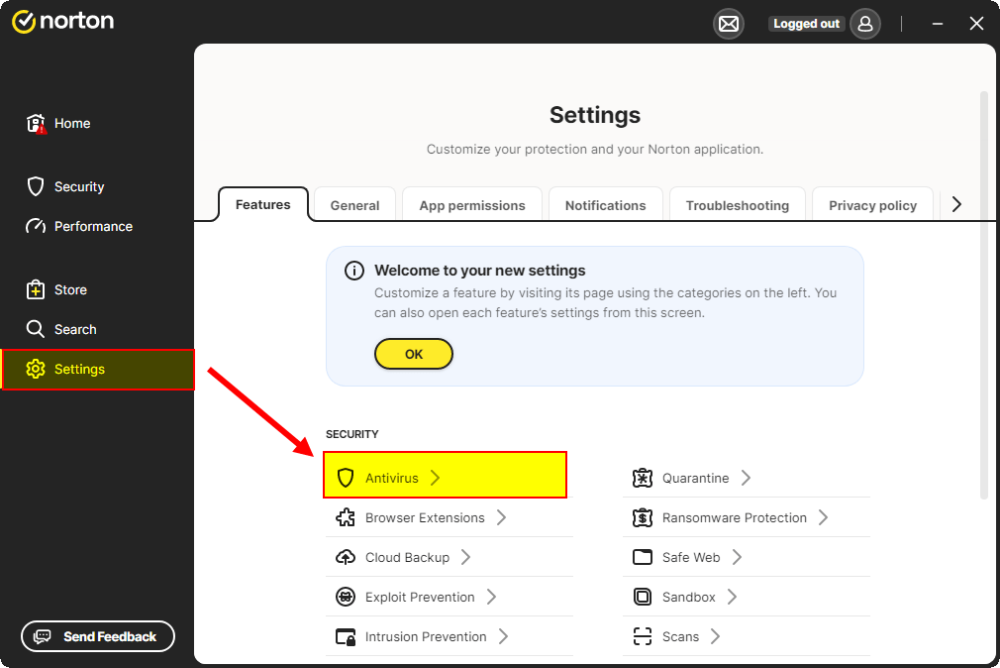
2. Open Norton, click Settings on the left, and select Quarantine.
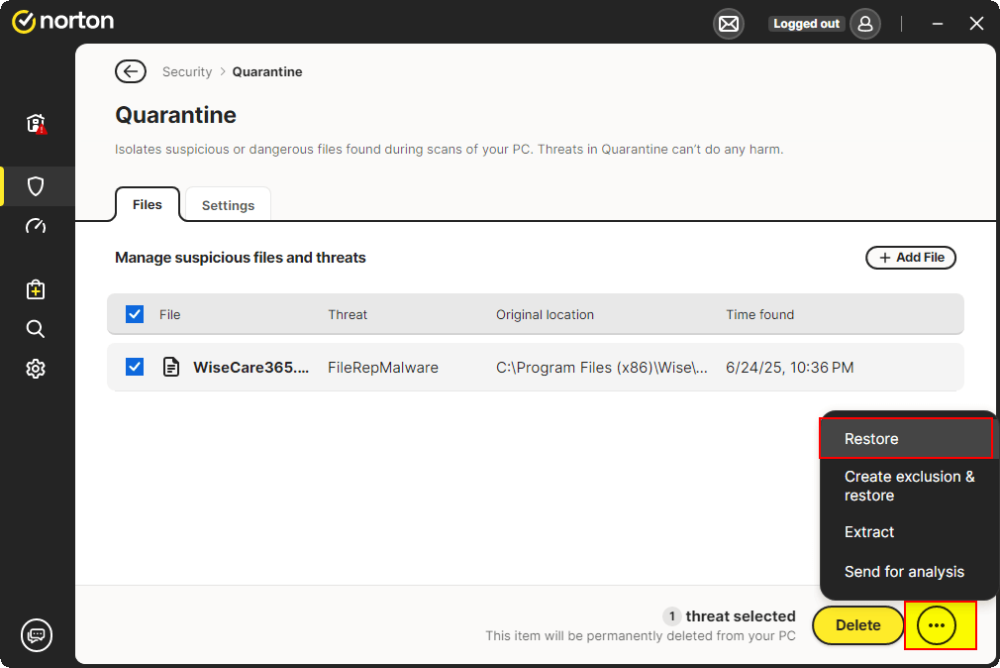
3. Select WiseCare365, click the three-dot icon in the lower right corner, and select Restore.
4. Return to the Settings and select Antivirus.
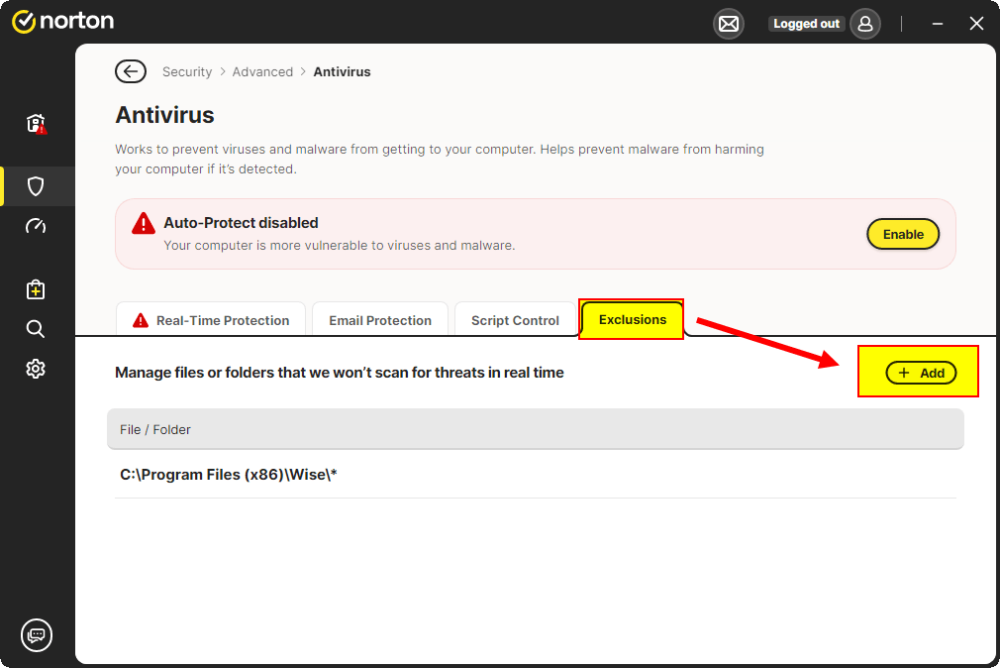
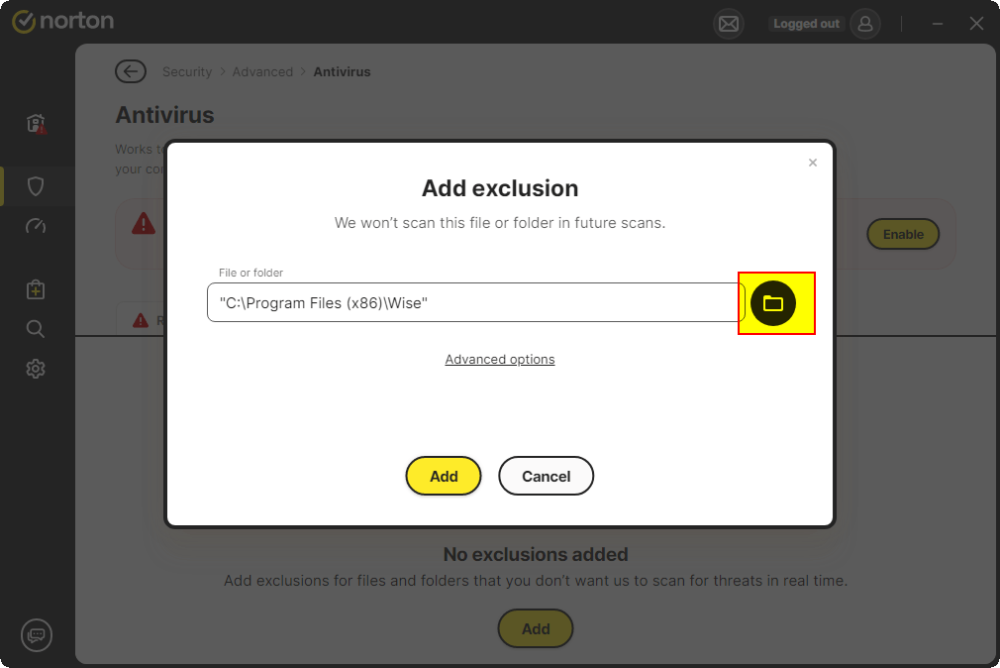
5. Click the Exclusions tab, click the Add button, and add the folder C:\Program Files (x86)\Wise to the exclusion list.
6. Right-click the Norton icon on the Taskbar again and select Enable Auto-Protect.
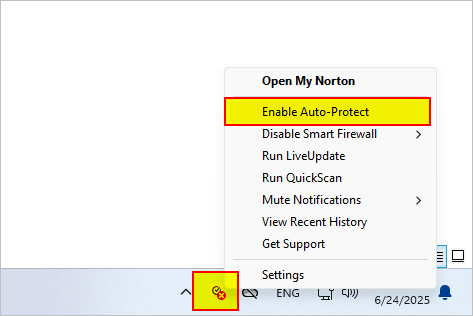
Now, you should be able to run Wise Care 365 normally.
-
Since day one at WiseCleaner, we've been committed to delivering tools that aren't just safe, virus-free, and user-friendly, but also incredibly efficient. To meet all major antivirus security standards, we put every new version through rigorous testing - including comprehensive security scans on virustotal.com before release.
That said, sometimes antivirus programs like Norton might mistakenly flag Wise Care 365 as a Trojan, malware, PUA (Potentially Unwanted Application), or FileRepMalware. This usually happens due to rule updates or other technical glitches and can block installation or operation.
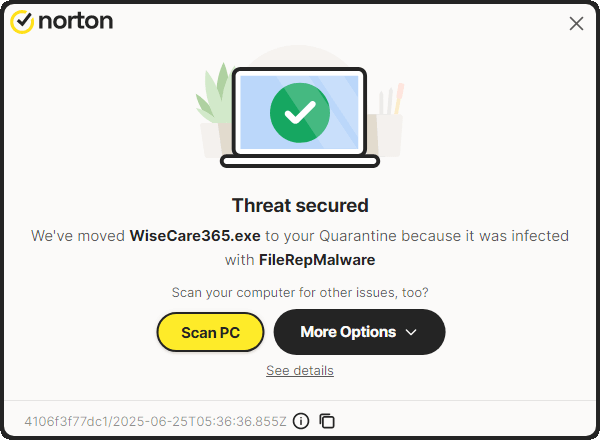
If this happens to you:
- Please contact our team immediately. [email protected]
- We'll work directly with Norton to resolve the false positive ASAP
In the meantime, you can add Wise Care 365 to Norton's exclusion list using the steps below to keep using it without issues.
We truly appreciate you choosing WiseCleaner, and thank you for your patience and understanding.
-
Dear user,
Sorry about that. Please contact our Customer Service:
So we can verify it.
-
Dear user,
Sorry about that. Generally, data from Cloud Storage app like OneDrive is saved in the form of a thumbnail on the C drive instead of the file in itself. So Wise Duplicate Finder needs to download these data from OneDrive first, this process would be very slow. Therefore, there are two suggestions for you:
1. Select the specific folders or files to scan rather than select the whole C drive in Wise Duplicate Finder.2. Open your Cloud program, then click the Sync and backup> Advanced settings> Download all files, which can help you download all files to your PC from OneDrive. Then scan again. -
Dear geogeo.gr,
Thank you for your translation. We will add it to Wise Program Uninstaller as soon as possible. Have a good day.
-
Dear user,
Thank you for your update translation. We will add it to Wise Program Uninstaller as soon as possible. Have a good day.
-
Dear user,
Thank you for your translation. We will add it to Wise Memory Optimizer as soon as possible.
-
Dear user,
Thank you for your translation. We will add it to Wise JetSearch as soon as possible.
-
Dear user,
Thank you for your translation. We will add it to Wise Folder Hider as soon as possible.
-
Dear user,
Thank you for your translation. We will add it to Wise Auto Shutdown as soon as possible. Have a good day.

-
Dear geogeo.gr,
Thank you for your translation. We will add it ASAP.
-
Dear user,
Thank you for your translation. We will add it to Wise Note ASAP. Have a good day.
-
Dear user,
Thank you for your translation. We will add it to Wise Disk Cleaner ASAP. Have a good day.
-
Dear user,
Thank you for your translation. We will add it to Wise Care 365 ASAP. Have a good day.
-
Dear user,
Thank you for your translation. We will add it ASAP.
-
Dear user,
Sorry for any inconvenience caused. We will forward your feedback to the Software R&D team. Have a good day.
-
-
Dear user,
Sorry about that. No features of Wise Folder Hider will add a yellow lock icon to users' files or folders.Maybe you can refer to this guide to fix it: -
Dear user,
Thank you for your translation. We will add it to Wise Folder Hider as soon as possible. Have a good day.
-
Dear user,
Sorry about that. Which feature of Wise Folder Hider did you use?
Please try this:
1. Click the link below to download and run this tool to stop the protection of the Wise Folder Hider.
https://downloads.wisecleaner.com/tools/DelDriver.zip
2. After running this tool you need to restart the PC, please save your important files before restarting.
3. Then uninstall the Wise Folder Hider and you can find your files at the original locations -
Dear user,
Sorry about that. We suppose that the file loss may be because the files are stored in the C drive, and reinstalling the system will automatically format the C drive. You can try to recover lost files with another product of our company, Wise Data Recovery. But the chances of recovering the files are not very high.
-
Dear user,
Thank you for your feedback. Have a good day.
-
Dear user,
Sorry about that. We just tested and didn't find such an issue. Please make a screen record of your operation and send it to us so we can verify it.


FOLDERS MISSING
in Other WiseCleaner Products
Posted
Dear user,
Sorry about that. Wise Folder Hider will not change or revise your folders or files' locations or contents if they are not displayed in the program, please try this:
1. Click the link below to download and run this tool to stop the protection of the Wise Folder Hider.
https://downloads.wisecleaner.com/tools/DelDriver.zip
2. After running this tool you need to restart the PC, please save your important files before restarting.
3. Then uninstall the Wise Folder Hider and you can find your files at the original locations
Please try some search tools to search your folder name to see if you can find it. You can try Wise JetSearch:
https://downloads.wisecleaner.com/soft/WJSSetup_4.1.4.219.exe