Search the Community
Showing results for tags 'windows 8.1'.
Found 7 results
-
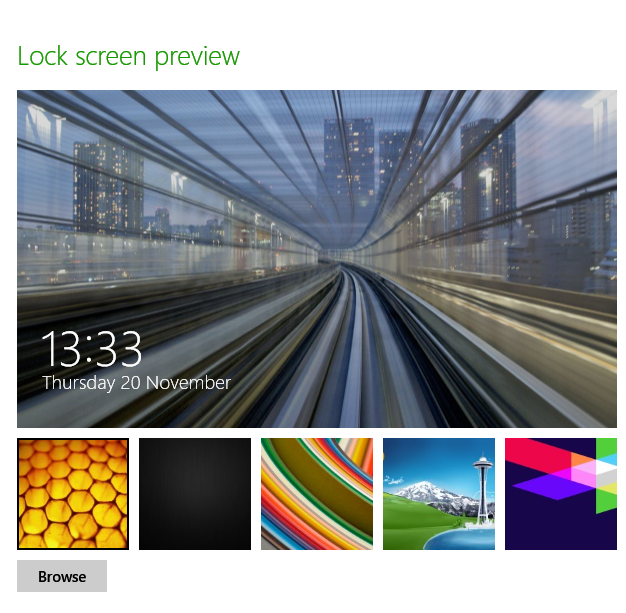
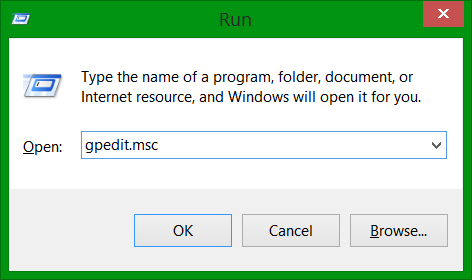
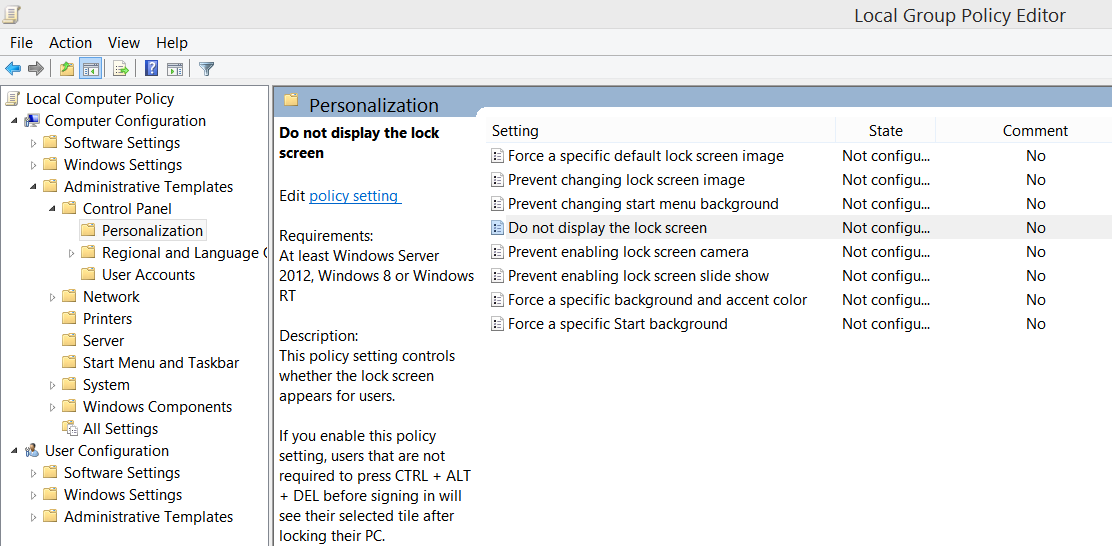
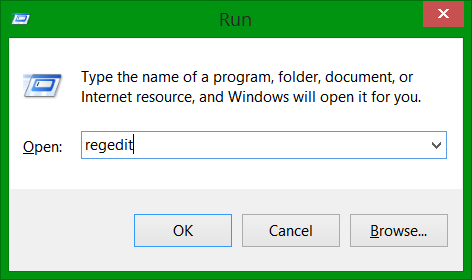
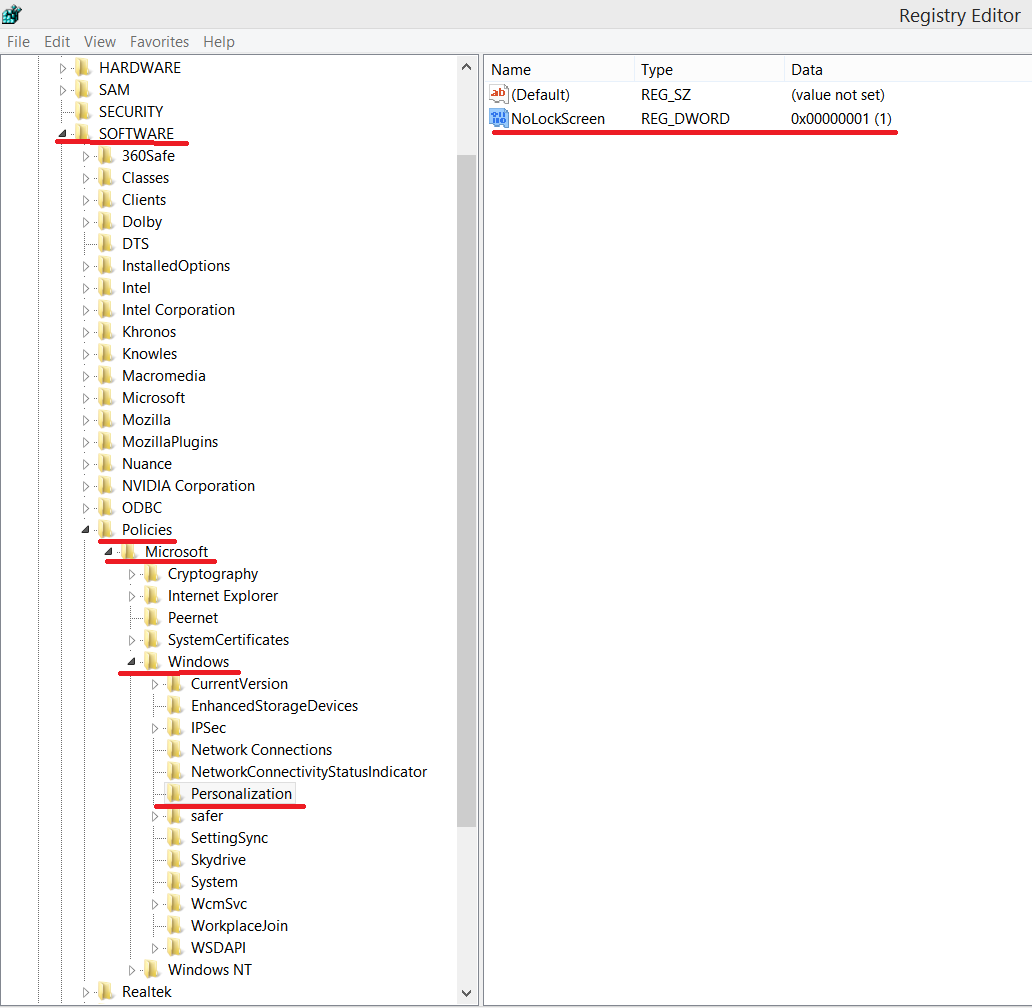
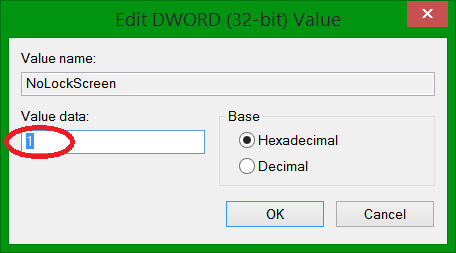
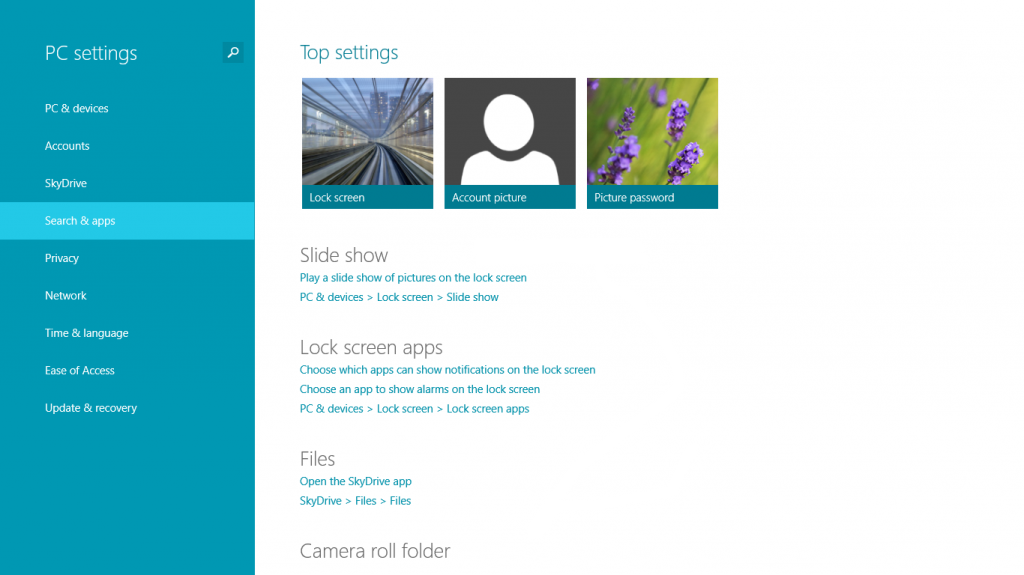
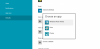
 If seeing the same lock screen in your Windows 8.1 PC makes you pretty bored, or you don’t want to see the lock screen at all, you come to the right place. In this article I will show you how easily you can add any other background you like on your Lock screen or completely disable it. To change the lock screen, follow the next steps below Step 1: Bring up the Charm menu by pressing Win+C on your keyboard. Step 2: From Charm menu bottom right corner click on Settings. Step 3: Now from bottom right corner of your screen click on Change PC Settings. Step 4: Select Lock screen tab. Step 5: Click Browse button and then locate your new image which you want to use for your Lock Screen background and click Open. Step 6: If you wish to select a default or previously used image simply press on one of offered thumbnails located right above Browse button. If you just want to turn off the lock screen, one little tweak will do that, follow the next steps. Step 1: Press "WIN+R" key combination to launch RUN dialog box then type gpedit.msc and press Enter. It'll open Group Policy Editor. Step 2: Now go to: Computer Configuration -> Administrative Templates -> Control Panel -> Personalization Step 3: In right-side pane, double-click on "Do not display the lock screen" option and set its value to "Enabled". If your Windows 8.1 does not have Group Policy Editor, you can use the Registry Editor. 1. Press "WIN+R" key combination to launch RUN dialog box then type regedit and press Enter. It'll open Registry Editor. 2. Now go to following key: HKEY_LOCAL_MACHINE\SOFTWARE\Policies\Microsoft\Windows\Personalization If the above key doesn't exist, you'll need to create it manually. 3. Select Personalization key and in right-side pane, create a new DWORD NoLockScreen and set its value to 1 4. Reboot the computer and you will not see the lock screen any more.
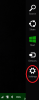


-
- 7
-

-
- lock screen
- windows 8.1
- (and 2 more)
-
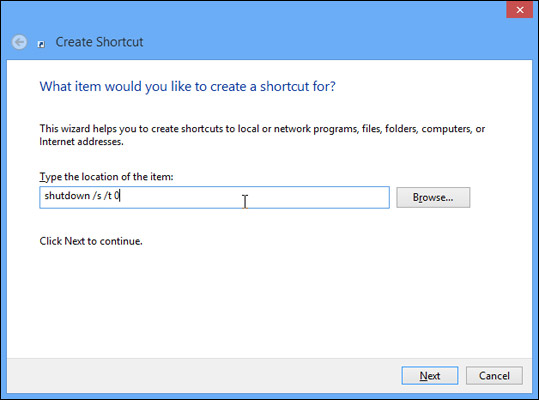
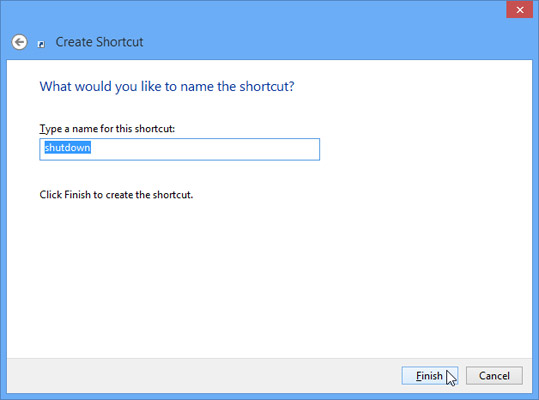
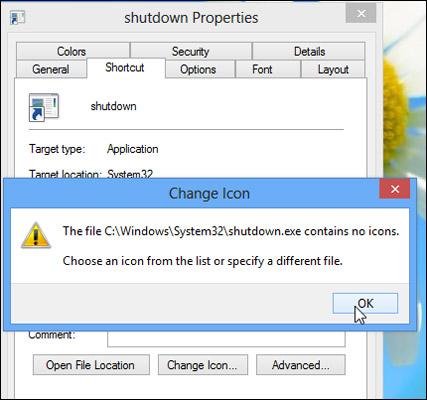
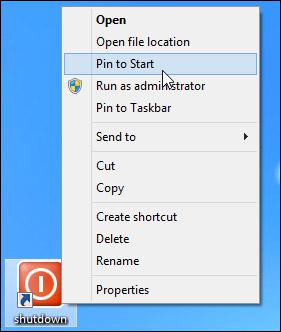
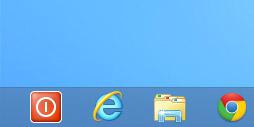
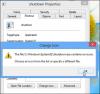
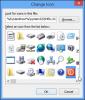
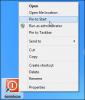
The easiest way to shut down your Windows 8 & 8.1 PC with one click. One of the ways is to use Keyboard Shortcuts to power down Windows. There’s an easy way to put the shutdown and restart functions just one click away from the desktop and Start screen. Just create shortcuts for both actions using the following steps: Step 1: Go to Desktop and Right Click then go new and Click Shortcut menu. Step 2: Enter the following Code in Shortcut bar. Make Shutdown Button Code is: shutdown -s -t 0 Make Restart ButtonCode is: shutdown -r -t 0 Make Logoff Button Code is: shutdown -l -t 0 Step 3: Change the Setup Icon Go to Shutdown Button Proporties then click Change Icon and Choose your Icon Done. Step 4: Right click the shortcut and select Pin to Start. The shutdown icon will now appear on your Start screen. Step 5: Drag the shutdown icon to a prominent place on your Start screen. We recommend putting it in the first column to the left so you will always see it. Step 6: Right click the icon and select Pin to Taskbar if you want the shortcut to live on your desktop’s taskbar as well. Step 7: Repeat the previous steps to create a Restart or Log Off button. Extra tips: With the steps above, your PC can achieve quick shutdown, restart and logoff, but how about when you want your PC to shutdown automatically when you are not around. For example, you are downloading something from the internet or you are converting some files while you go outside or go to sleep. An automatic shutdown feature will come in real handy. I got the right solution for this: download Wise Auto Shutdown(http://wisecleaner.com/wiseautoshutdownfree.html), and set the time you want your computer to shut down, restart, etc. Then your computer will shut down or log off at the exact time you set.


-
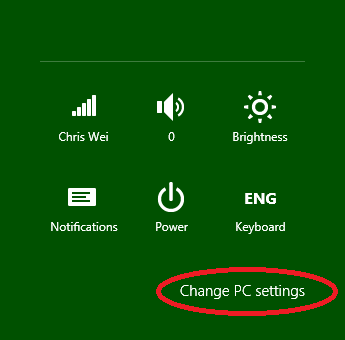
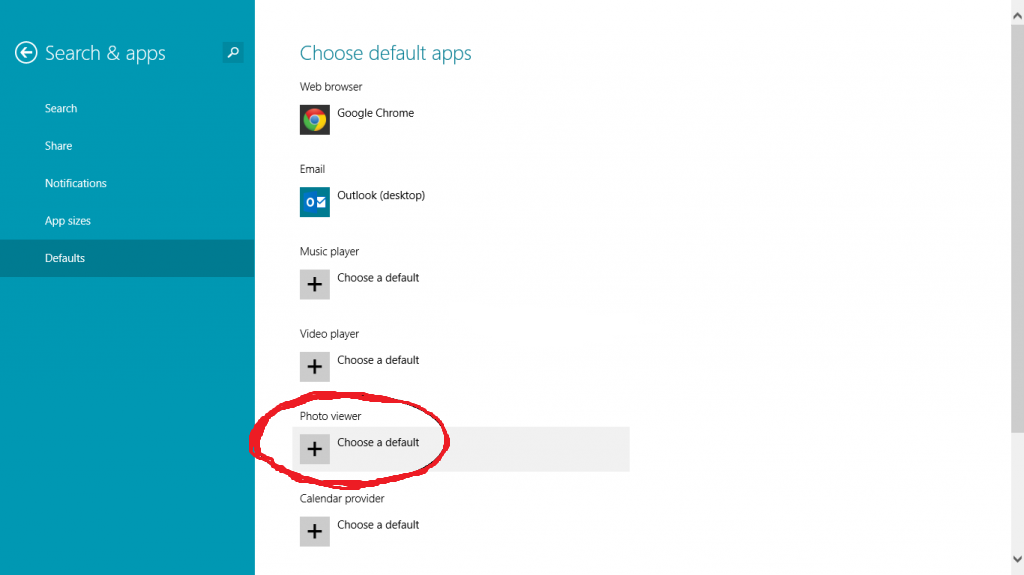
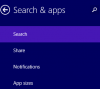
Step 1: Go to the very right corner at the bottom of your desktop screen until the Charms Bar appears. Click “Settings” on it. Step 2: You will get a few options where you need to click “Change PC Settings” at the bottom of the screen. Step 3: Now you will see “PC Settings” menu where you need to select the category “Search & Apps” as it has been shown in the image below. Step 4: In the next section, you need to select “Defaults” category from the given list to move to the next section. Step 5: Here, go to the Default “Photo Viewer” and click on the “+” icon. You will see some relevant apps where you need to select “Windows Photo Viewer” to set it as your default app to view your photos. Step 6: Now you will notice the icon of “Windows Photo Viewer” is appearing instead of “+” icon in Photo Viewer category that shows you have surely set your desired photo viewer as a default one.


-
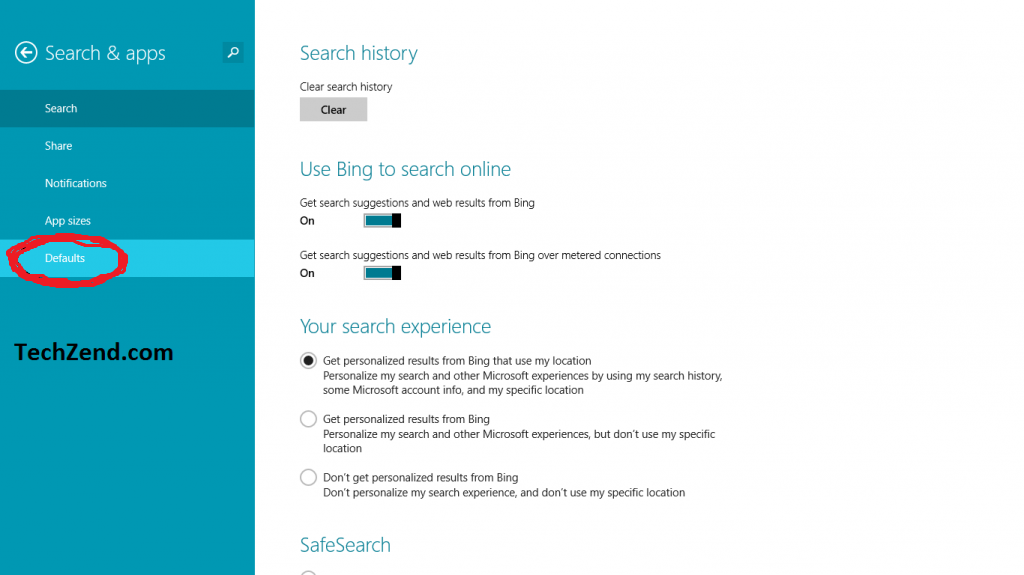
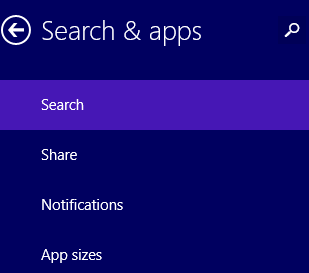
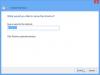
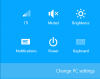
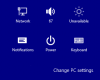
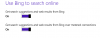
In Windows 8.1, when you search for something, Windows will use Bing’s search engine to initiate the online search. Every time you search for something on your local hard drive, Windows will enhance the results by searching for the keywords online. There will be many users out there who find this annoying and want to disable Bing’s search engine feature. Some people just don’t want their personal search activity to be routed via an online search engine like Bing. Privacy is important to everyone, and below is how to achieve that: Disable Bing Search Engine Feature From Windows 8.1 To start off, launch the Charms bar (or press Windows + C combination on your keyboard). From there, head over to the Settings charm menu. See the “Change PC Settings” option on the bottom right of the screen? Click on it. This will open up the settings. You need to open to “Search & Apps” menu, where you will see the option to disable search results via Bing. Make sure it’s showing as “Off”.

-
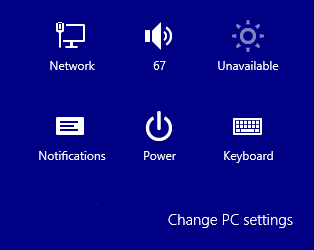
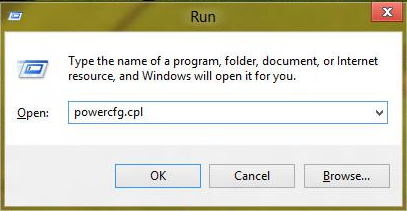
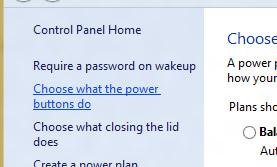
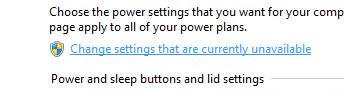
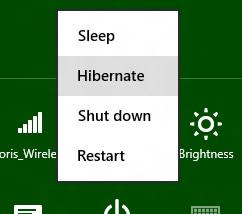
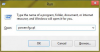
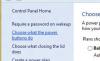
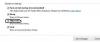
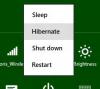
What I hate about Windows 8&8.1 is the unavailability of hibernate option inside Power menu. If you need to have Hibernate option inside your Windows 8 Power menu, read this article. Step 1: On your keyboard press Win+R to lunch the Run dialog window. Step 2: Inside Run window type powercfg.cpl and press Enter on your keyboard. Step 3: When Power Options window opens up, inside left pane you need to click on Choose what the power buttons do link. Step 4: Now click on Change settings that are currently unavailable, located at the top. Step 5: Now scroll down the options and at the bottom of existing window you should notice the Hibernate option. Select the checkbox in front of Hibernate and click on Save changes. Step 6: Next time when you launch Windows 8 power menu, you will see Hibernate option available.

-
- 1
-
-
- get back hibernation option
- hibernate option
- (and 2 more)
-
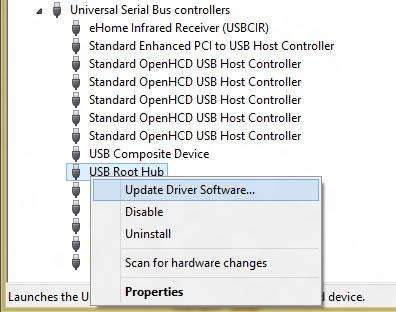
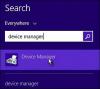
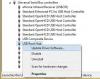
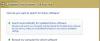
Some say with the development of cloud storage, USB drive will be an old timer, But technically, today we can’t imagine any device without USB, whether we use it on our laptop or desktop computer, tablet, smart phone, car or any other device. However even USB became standard for every device, still its drivers could get corrupted sometime, disabled by mistake or removed by virus on our computers. If this happens our computer won’t recognize any device we connect to our computer over USB and we will need to re-install our drivers all over again. This tutorial will show you how to re-install USB drivers in Windows 8 & 8.1 operating system. To get started follow steps below: Step 1: Search Device Manager, click on Device Manager. If by any chance you got prompted by UAC click on Yes. Step 2: When Device Manager window opens up click on small arrow next to Universal Serial Bus controllers to expand its options. Step 3: You will most probably see dozens of new options in here but you need to right mouse click on USB root Hub and from context menu choose Update Software Driver. Step 4: A new window will open offering you the option to search the internet for your drivers or browse your computer. Click on Search Automatically for updated driver software. Step 5: Windows 8 will search for drivers which may take few minutes until it finds them. Once they are found, wait additional few minutes until they are re-installed and you are ready to use your USB connectors again.
-
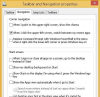
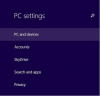
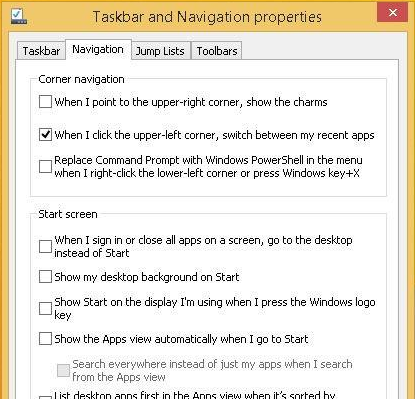
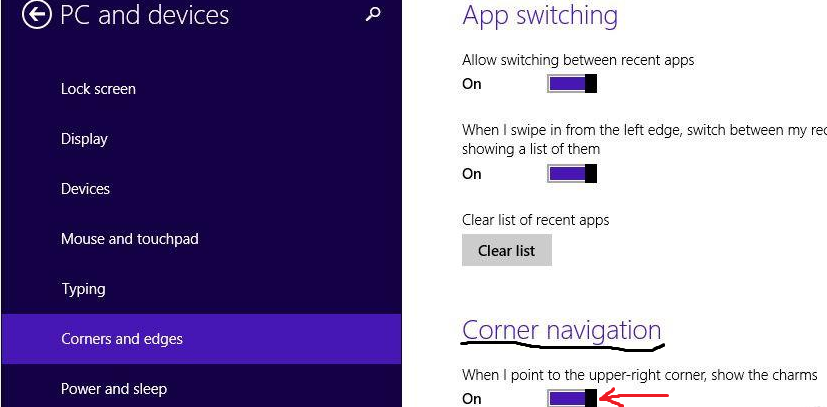
In Windows 8 or Windows 8.1, the charms bar will appear when we move the cursor to the upper or lower right corners of the screen. But some computer users think this feature is annoying. The charms bar shows up many times when users accidentally move the mouse to the top or bottom right side corner. This article will show you how to disable the charms bar in your operating system. Method One 1. Right-click on the Taskbar, and click on Properties. 2. In Taskbar and Navigation properties, click on the Navigation tab, and uncheck the When I point to the upper-right corner, show the charms box, and click OK. Method Two 1. In Window 8.1 or Windows RT 8.1, hit Win + C keys to open PC settings, and click on PC and devices on the left side. 2. Click on Corners and edges on the left side, and drag the When I point to the upper-right corner, show the charms slider to the left to turn it off. 3. When finished, close the PC settings.