Search the Community
Showing results for tags 'instructions'.
-
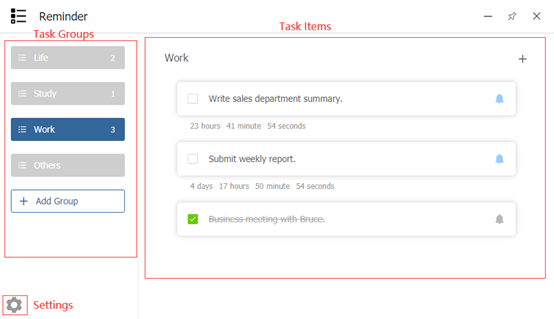
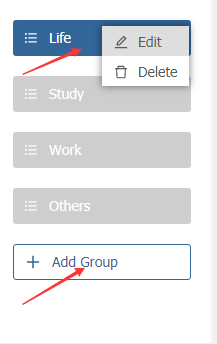
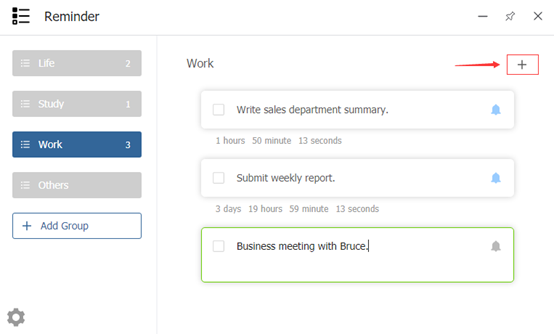
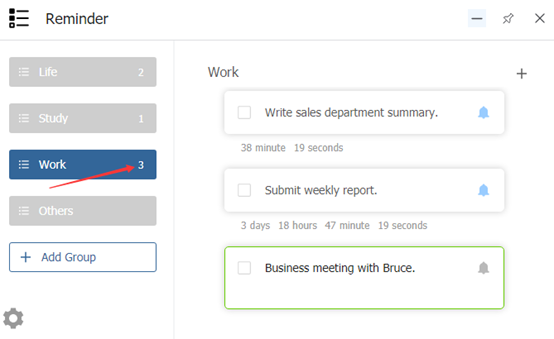
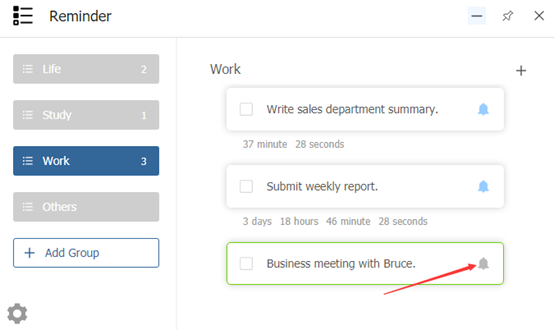
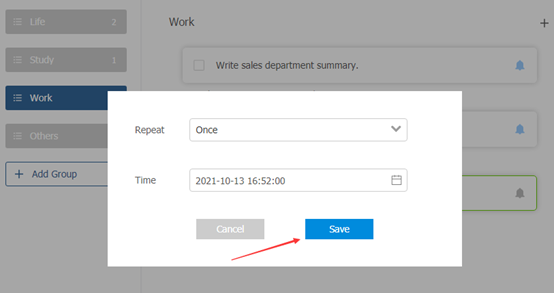
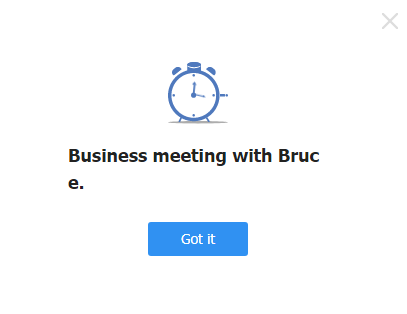
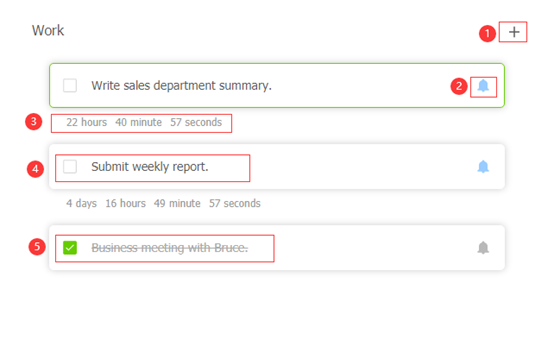
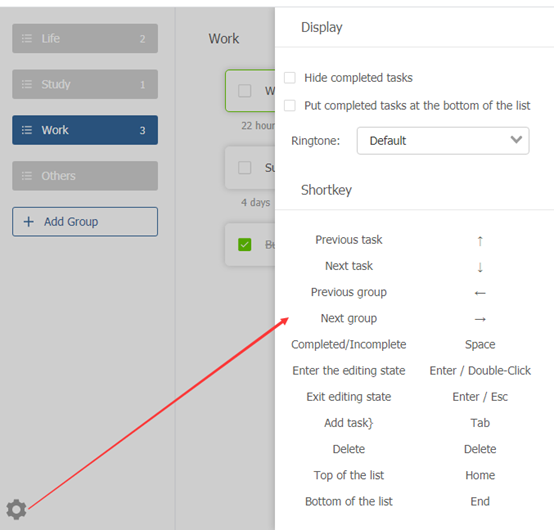
Reminder is a things to-do reminder plug-in that can be used on a computer, just like an alarm clock in mobile phone. It only takes a few seconds for the user to create a task. Support multi-task reminders, such as business meetings, birthday dinners, anniversaries, etc. No longer worry about memory being like a sieve. The page as a whole is divided into three parts: Task groups, Task items and Settings Steps: 1. Click Add Group to create a new group. Here you can create multiple groups. Each group supports adding multiple tasks. Then double-click to edit or modify the task group name. In addition, you can also right-click to implement edit function or delete the task group. 2. Create new task item by clicking + in the upper right corner. Then edit task item. Note: For each new alarm task, the total number of tasks will be displayed on the corresponding task group. 3. Set date and time. Select the frequency of alarm ringing (once, daily, weekly, monthly, yearly) and specific time, and finally click Save. 4. The alarm is ringing. Click Got it to close it. 5. Completed tasks will be checked as green. Note: Part one----create new item. Part two----set date and time. Part three----time left. Part four----uncompleted task. Part five----completed task. 6. Settings Here you can perform some basic task settings such as: ----If you check Hide completed tasks, the completed tasks will not be displayed in the task item. If you check Put completed tasks at the bottom of the list, the completed tasks will be placed below the unfinished tasks. ----Choose your favorite ringtone: Default or Mute. ----Use some shortcut keys to make the operation easier. For example, by pressing the Tab key to create a new task or pressing Space key to mark whether the task has been completed.
-
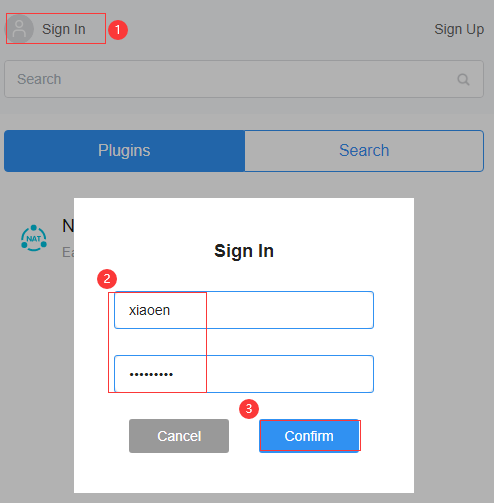
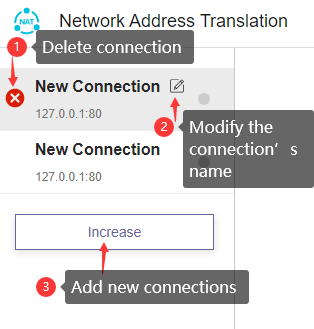
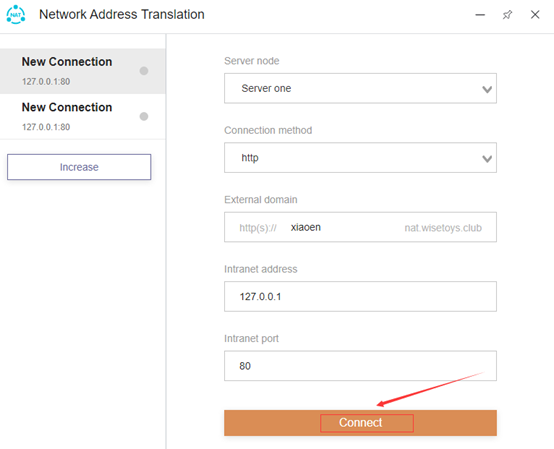
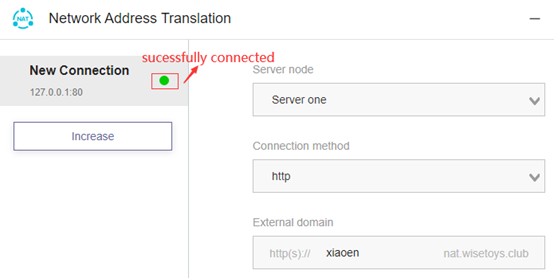
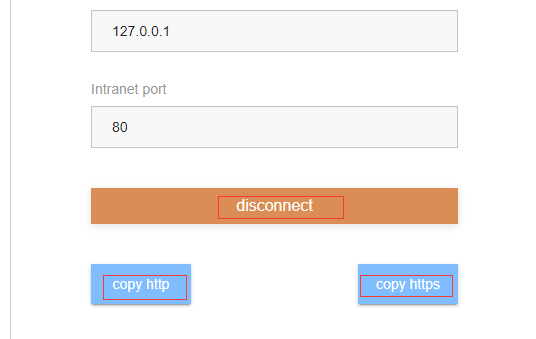
Network Address Translation is to make data packets with a specific source IP address and source port number not be shielded by the NAT device and routed correctly to the internal network host. Generally speaking, it is a way to establish a link between a private network and an Internet network. Hereinafter, Network Address Translation is referred to as NAT for short. Steps: 1. Please log in to your Wise Toys account before using NAT. Fill in the username and password. If you do not have an account, please fill in the email to register first. 2. There are connections on the left side of the page. Click part one to delete the connection; Click part two to modify the connection’s name; Click part three to add new connections; 3. On the right side of the page is the specific content of the link item: Server node-currently only supports one server, with development, it will be possible to support two or more; Connection method--- Contains 3 modes: http, Local Directory and tcp; External domain---generally is the username; Intranet address---take 127.0.0.1 as an example; Intranet port----take 80 as an example; Click Connect. 4. The connection item on the left shows a green dot that means the connection is successful. If you don’t want to connect, then click disconnect. Note: Currently, only two items can be connected at the same time. After the connection is successful, you can click copy http or copy https to copy the link. Http is a plaintext protocol transmission, and https is an encrypted protocol transmission. In other words, https is more secure than http.
-
- wise toys
- instructions
-
(and 1 more)
Tagged with:
-
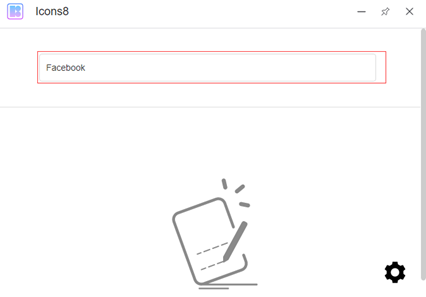
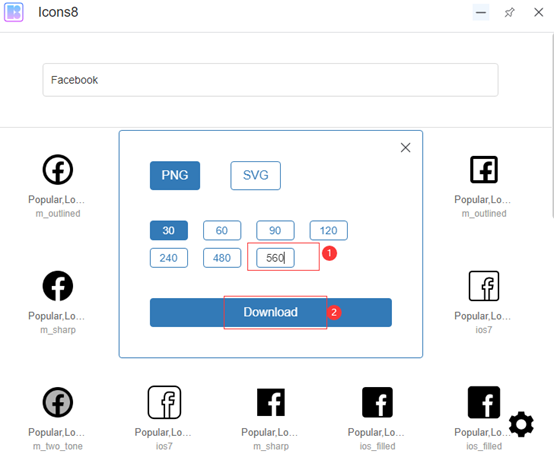
Icons8 is a free icon material website, suitable for designing people. There are a large collection of icons in different styles for different projects. The number of icons is huge and the quality is high. Designers don't need to spend a lot of time looking for good materials, because Icons8 are all available. Steps: 1. Start Icons8, enter the icon theme, here we take Facebook as an example. Press Enter to search. 2. Select the appropriate icon and click Download. The downloaded icon supports two formats: PNG and SVG. The PNG format supports several different sizes, and you can also customize the size by yourself. For example, the custom size in the picture is 560.
-
- wise toys
- instructions
-
(and 1 more)
Tagged with:
-
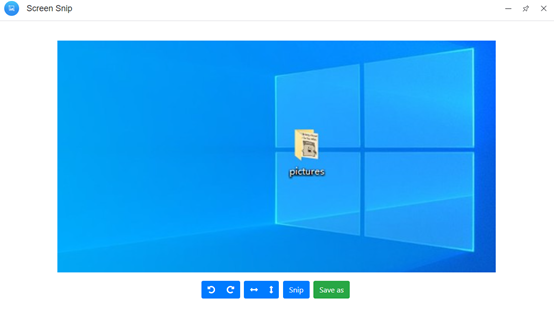
Screen Snip can take a screenshot of any place in the Windows window. User's guidance: 1. Click Screen Snip to start taking screenshots. 2. After the interception is completed, click "Save As" to save to the location you need to save.
- 2 replies
-
- wise toys
- instructions
-
(and 1 more)
Tagged with:
-
Steps Recorder can record and save steps on a computer, which is equivalent to the screen recording function of a mobile phone. User's guidance: 1. Select "Start Recording". Perform the steps on the computer to reproduce the problem. You can pause recording at any time and resume recording later. 2. Select "Stop Recording". 3. In the "Save As" dialog box, type a name for the file, and then select "Save". 4. The file will be saved as a compressed file with a .zip file extension. To view the recording, open the compressed file you just saved, and then double-click the file. The file will open in the browser.
- 1 reply
-
- wise toys
- instructions
-
(and 1 more)
Tagged with:
-
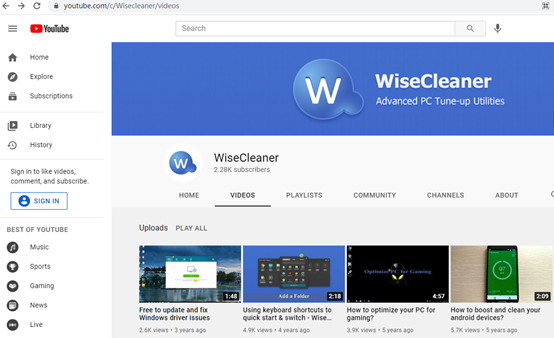
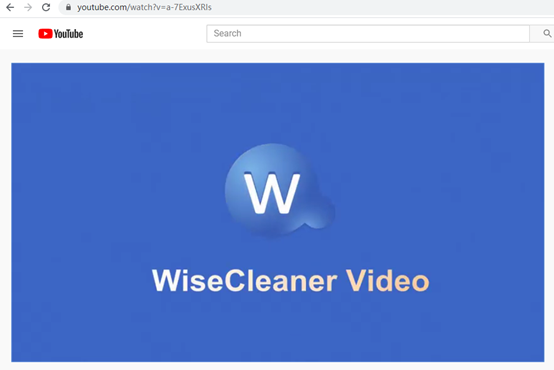
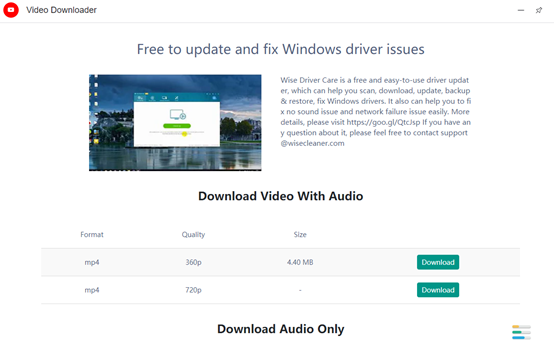
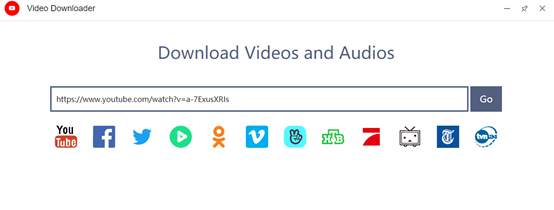
Video Downloader supports video downloads from major video websites. Including YouTube, Facebook, Twitter, etc. User's guidance: 1. Find the URL of the video you want to download. We randomly select a video from https://www.youtube.com/c/Wisecleaner/videos. The video URL is https://www.youtube.com/watch?v=a-7ExusXRIs. 2. Copy the video URL to Video Downloader and click Go. 3. Select the appropriate video quality according to personal needs, and click to Download. 4. Select the save location.
-
- wise toys
- instructions
-
(and 1 more)
Tagged with:
-
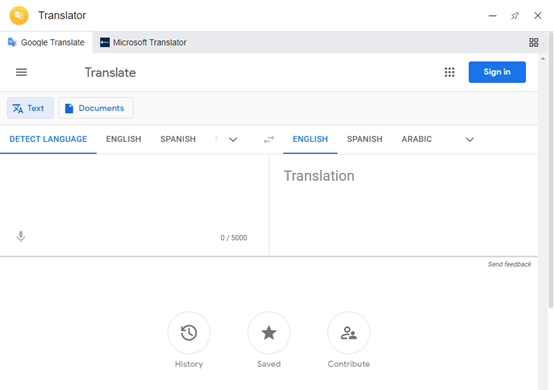
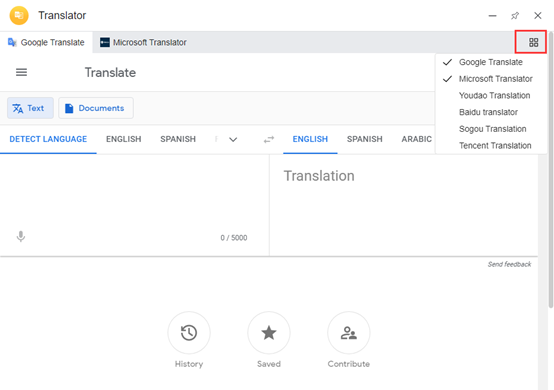
A plug-in that contains 6 translation tools. You can choose which one to use, according to your preferences. User's guidance: 1. Enter the text content to be translated. For example: WiseCleaner Software - Stabilize, Secure and Speed Up Your Windows PC. 2. Select the target language. The text content translated into the target language can be copied.
-
- wise toys
- instructions
-
(and 1 more)
Tagged with:
-
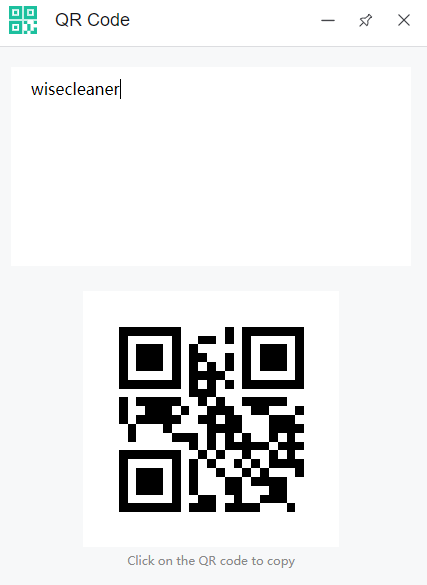
QR Code is a plug-in that automatically generates a QR code. It can prevent privacy leakage to a certain extent. User's guidance: 1. As shown in the picture, enter the text content, and the corresponding QR code will be generated immediately. 2. Click the QR code to copy it elsewhere.
-
- wise toys
- instructions
-
(and 1 more)
Tagged with:
-
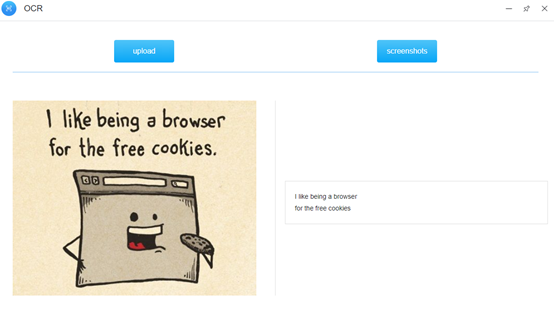
OCR is a plug-in that can recognize text on pictures. The picture supports two ways of uploading locally and taking screenshots. User's guidance: 1. Upload pictures that have been downloaded locally. 2. Take a screenshot and upload the picture directly. The recognized text can be copied. You don't need to type one by one, which saves time.
-
- wise toys
- instructions
-
(and 1 more)
Tagged with:
-
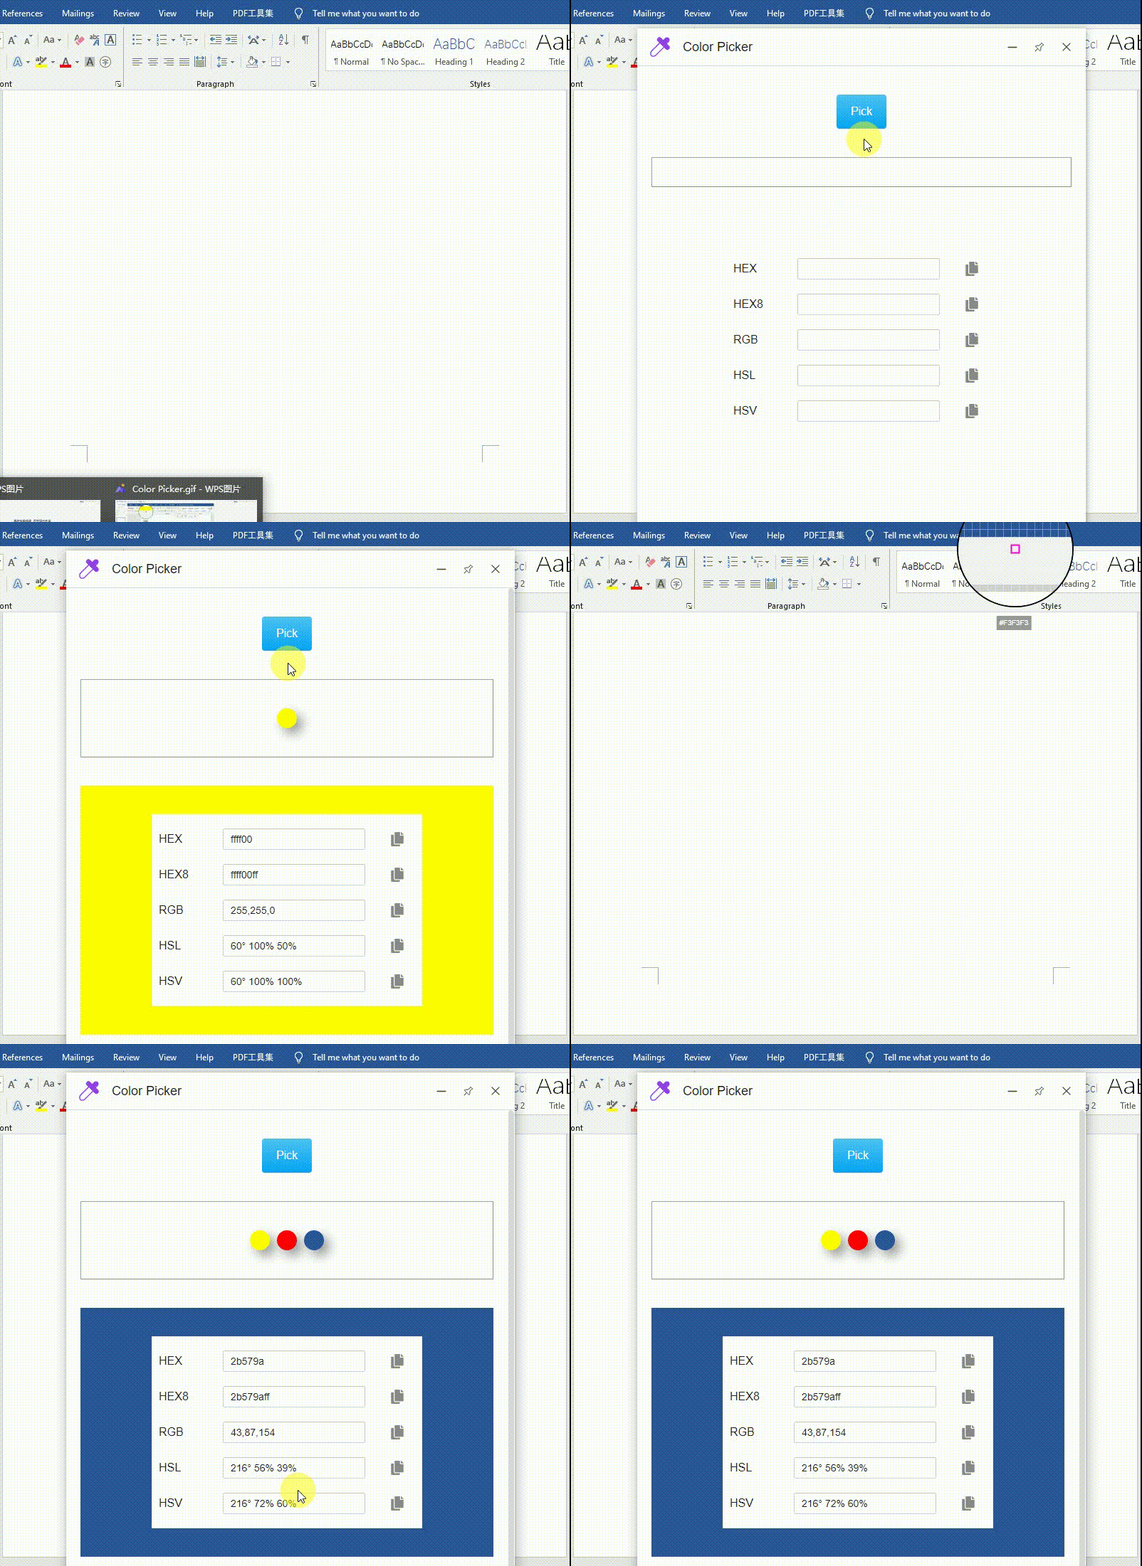
Color Picker can help you extract the color of any place on the screen. User's guidance: As shown in the GIF: 1. Click Pick. 2. Click the left mouse button to pick up the color.
-
- wise toys
- instructions
-
(and 1 more)
Tagged with:
-
Currency Exchange is a plug-in that can quickly check currency exchange rates between different countries. All you need to do is enter the amount in the text box. Users can accurately know the recent changes in global exchange rates. User's guidance: 1. As shown in the figure, click Add currency to add currencies that are not displayed in the interface. 2. Left click, hold down the mouse and drag to adjust the order of currency types. The default number for the first currency type is 1. 3. Assuming that we adjust the number to 5 or other numbers, we can see the conversion results of other currencies in time. Note: The exchange rate is updated in real time.
-
- instructions
- wise toys
-
(and 1 more)
Tagged with:
-
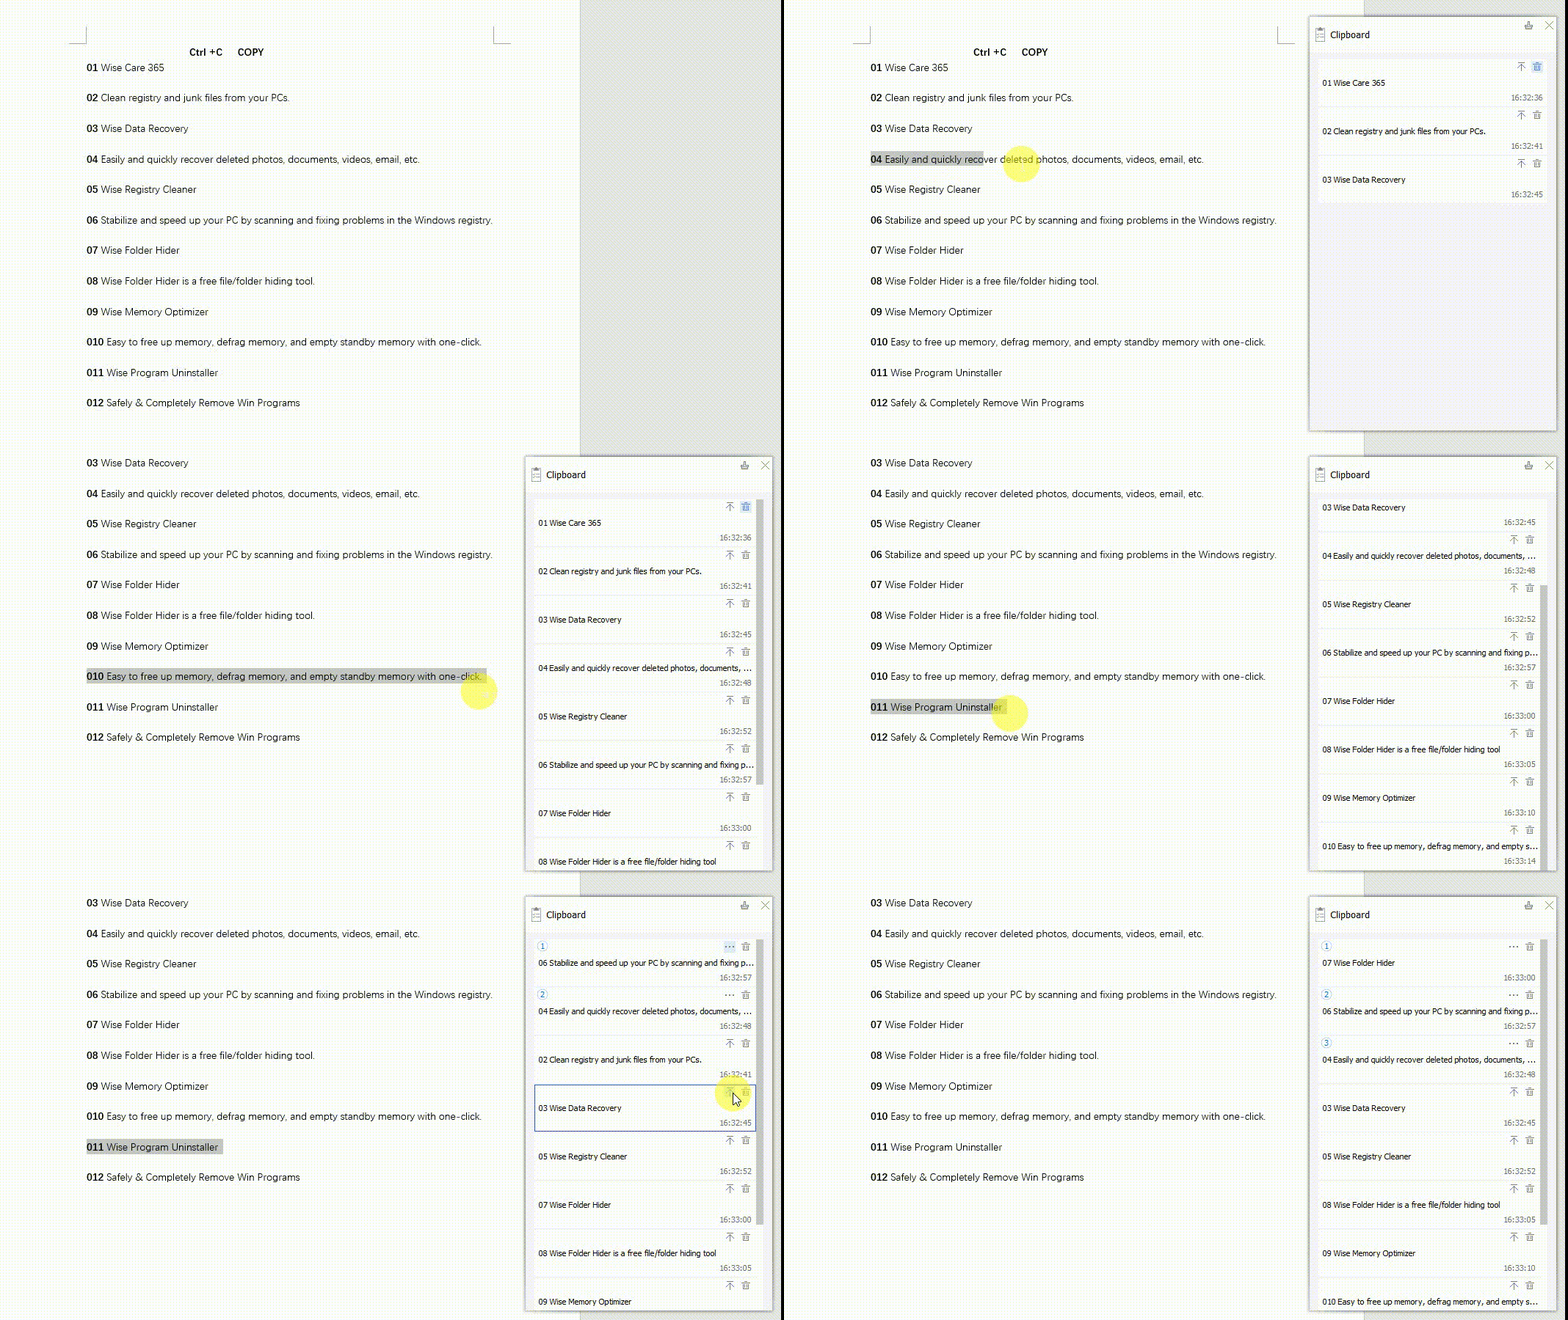
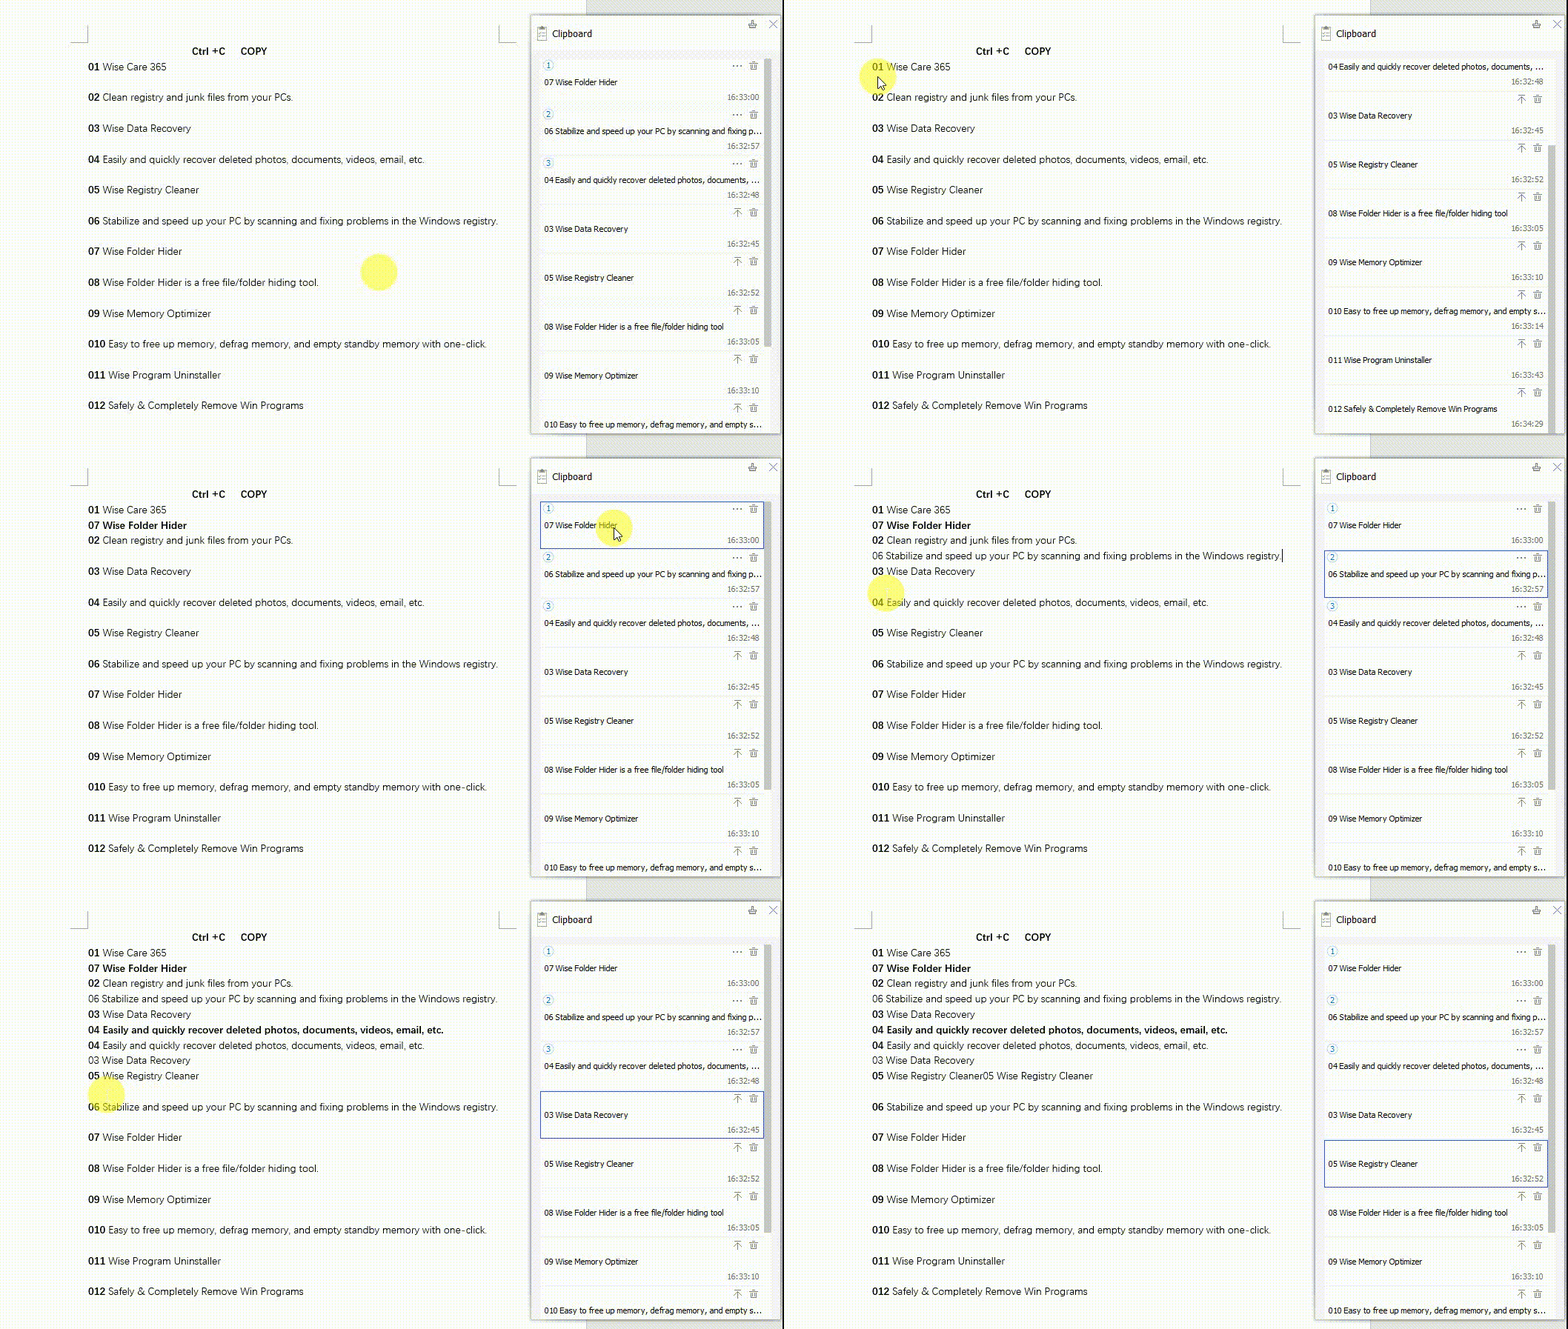
Clipboard is a very useful plug-in to paste and copy. One of its main features is automatic paste. User's guidance: 1. Ctrl+C to copy text and automatically paste it on the Clipboard. 2. The Clipboard can keep 10 pasted records in total. If there are more than 10 entries, the earliest pasted text content will be squeezed out by the latest pasted content. For example: if you paste the eleventh record, the first pasted record will disappear, the second pasted record will jump to the first pasted record, and so on. 3. The arrow indicates the top function. Paste records that have been pinned to the top will not be overwritten by subsequent pasted records. 4. Click the content on the clipboard, it will be automatically pasted to the position behind the mouse cursor.
-
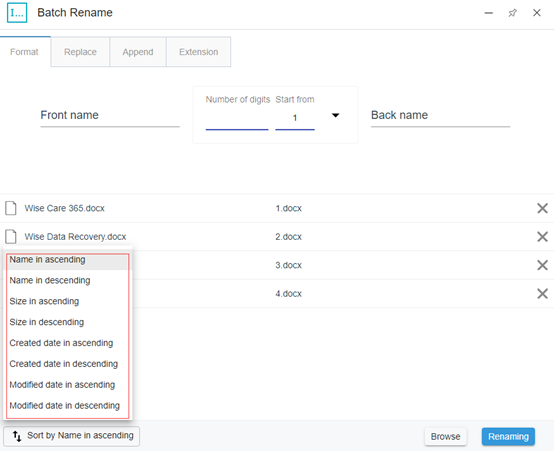
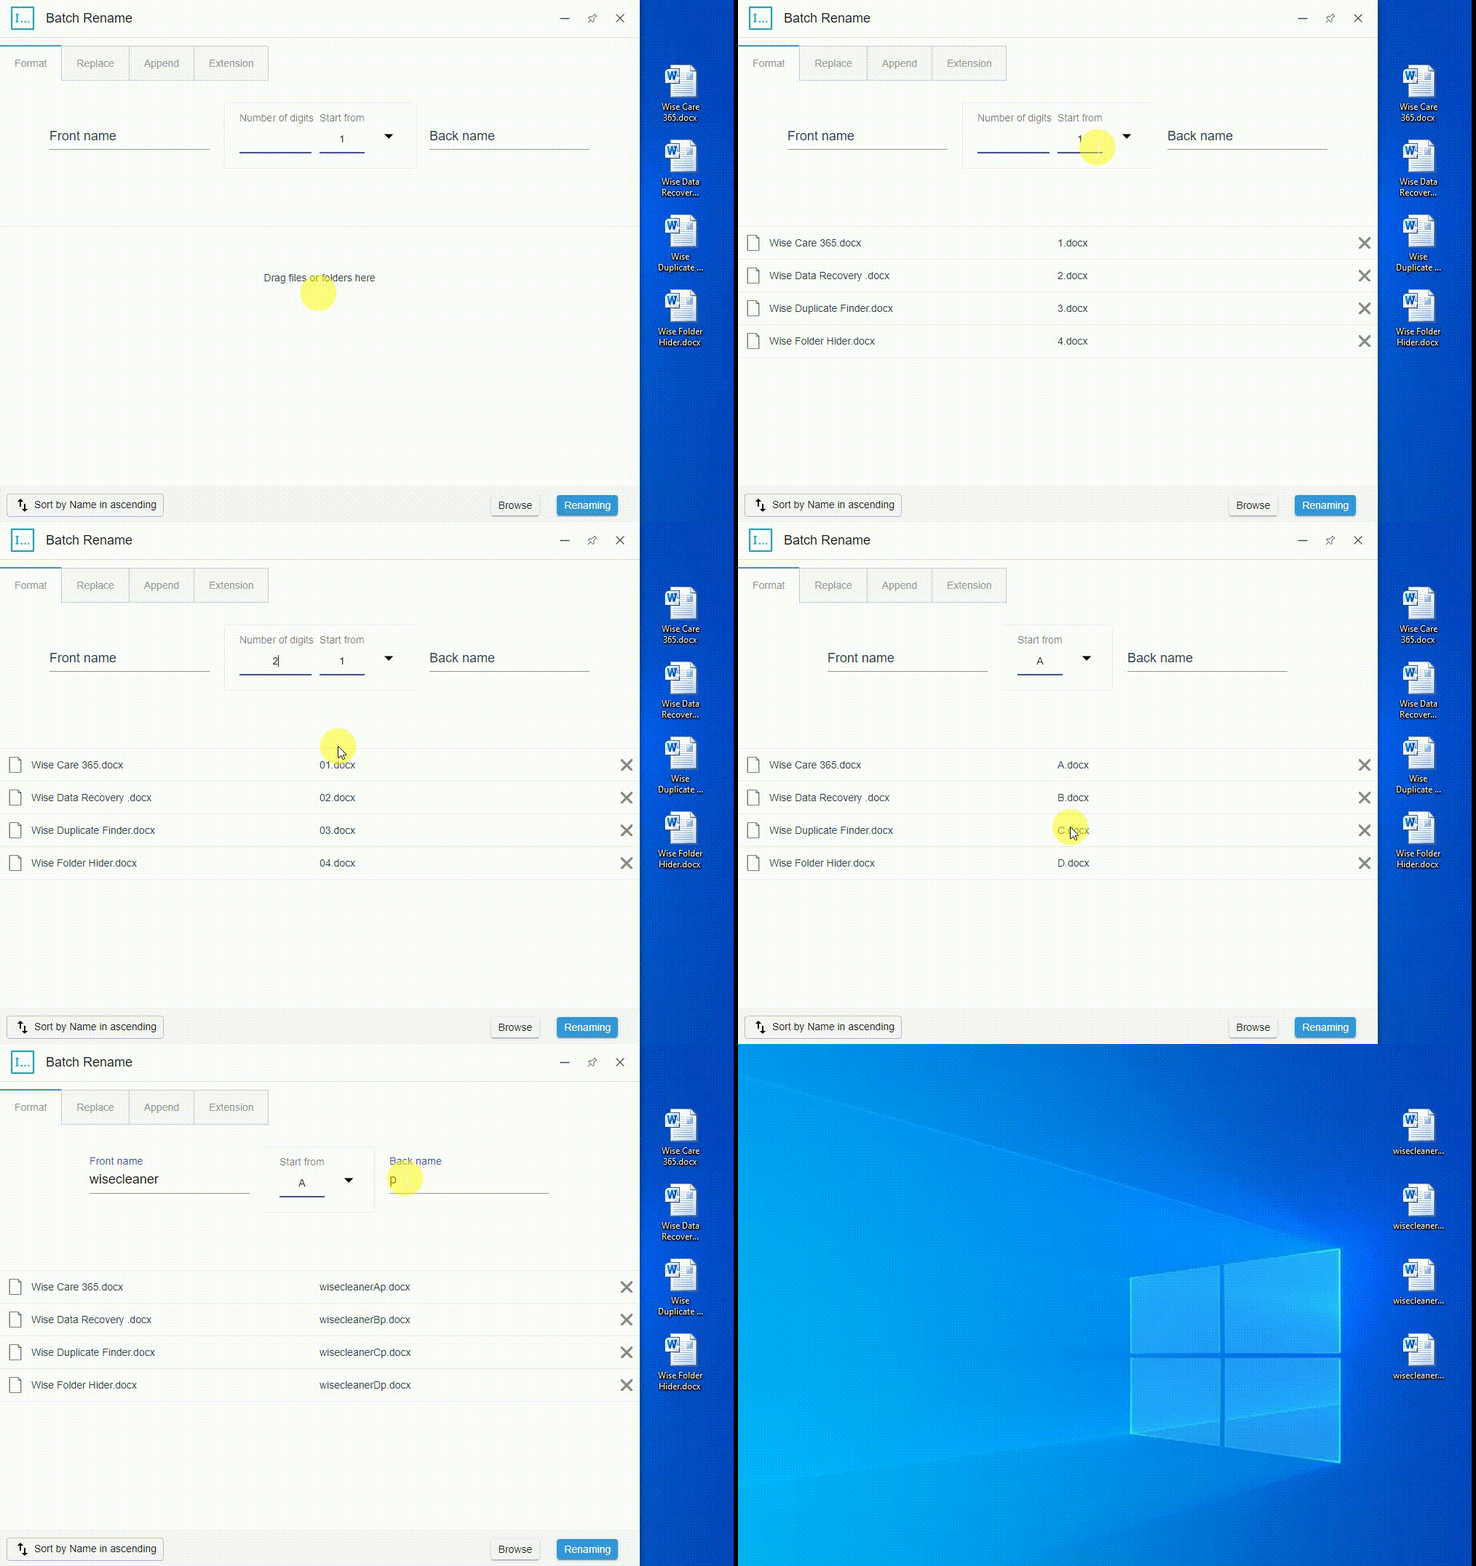
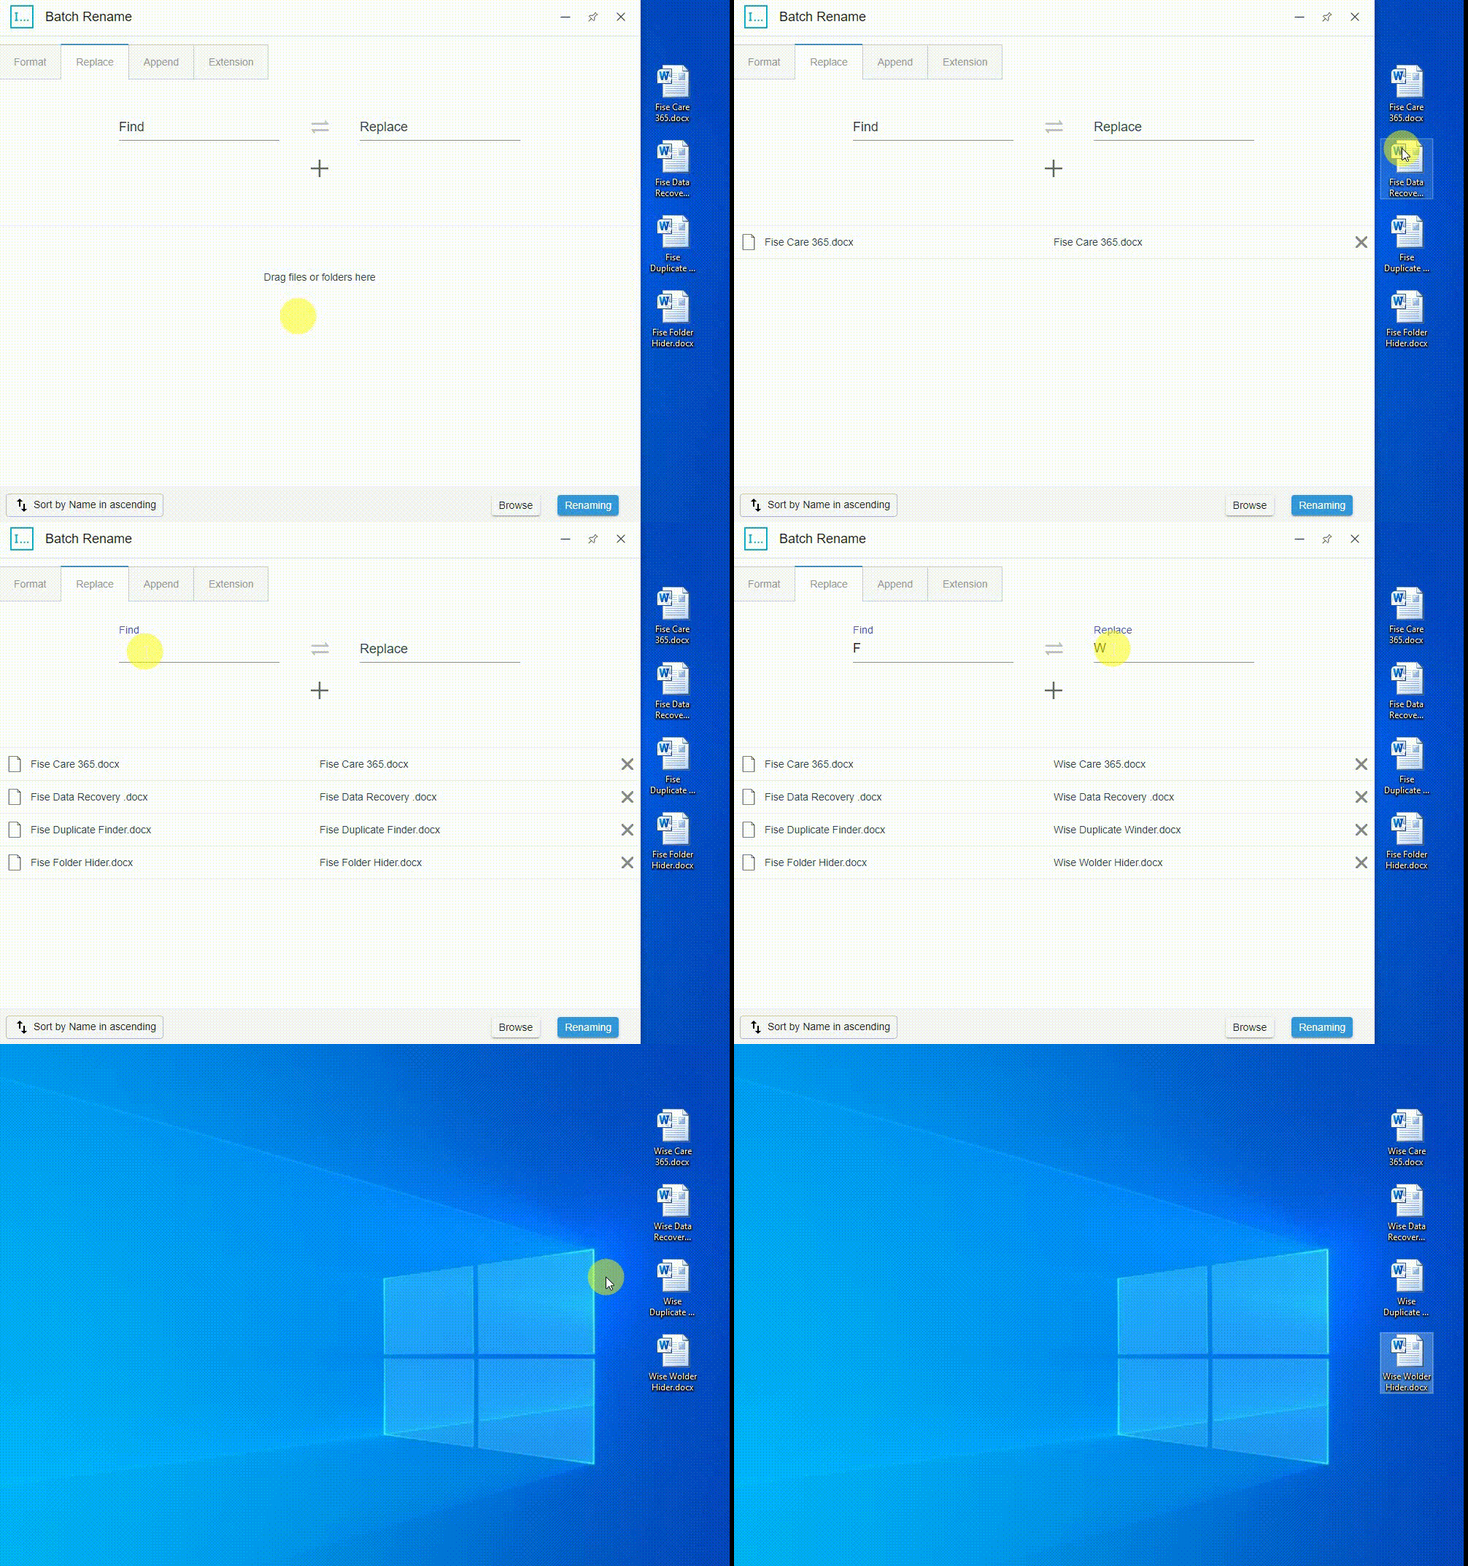
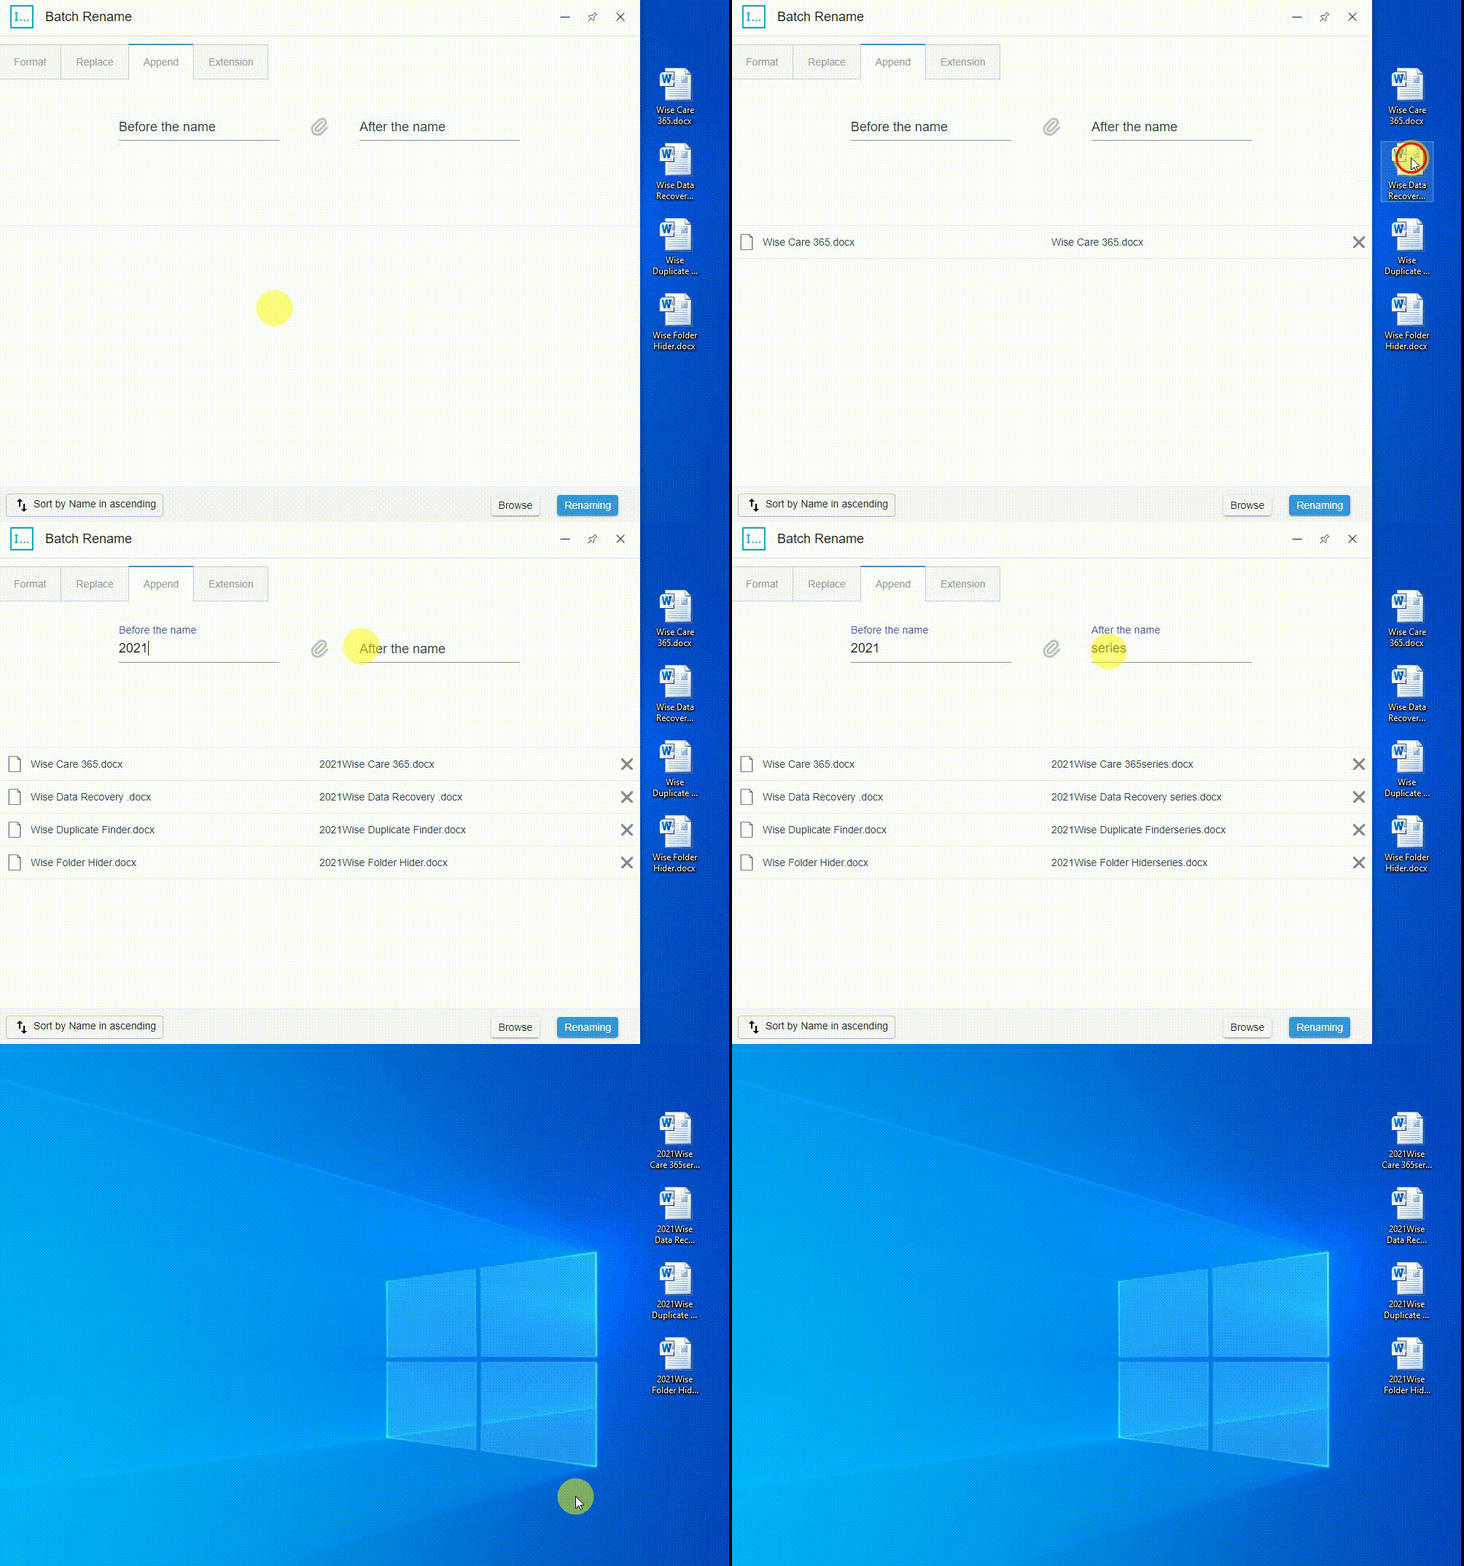
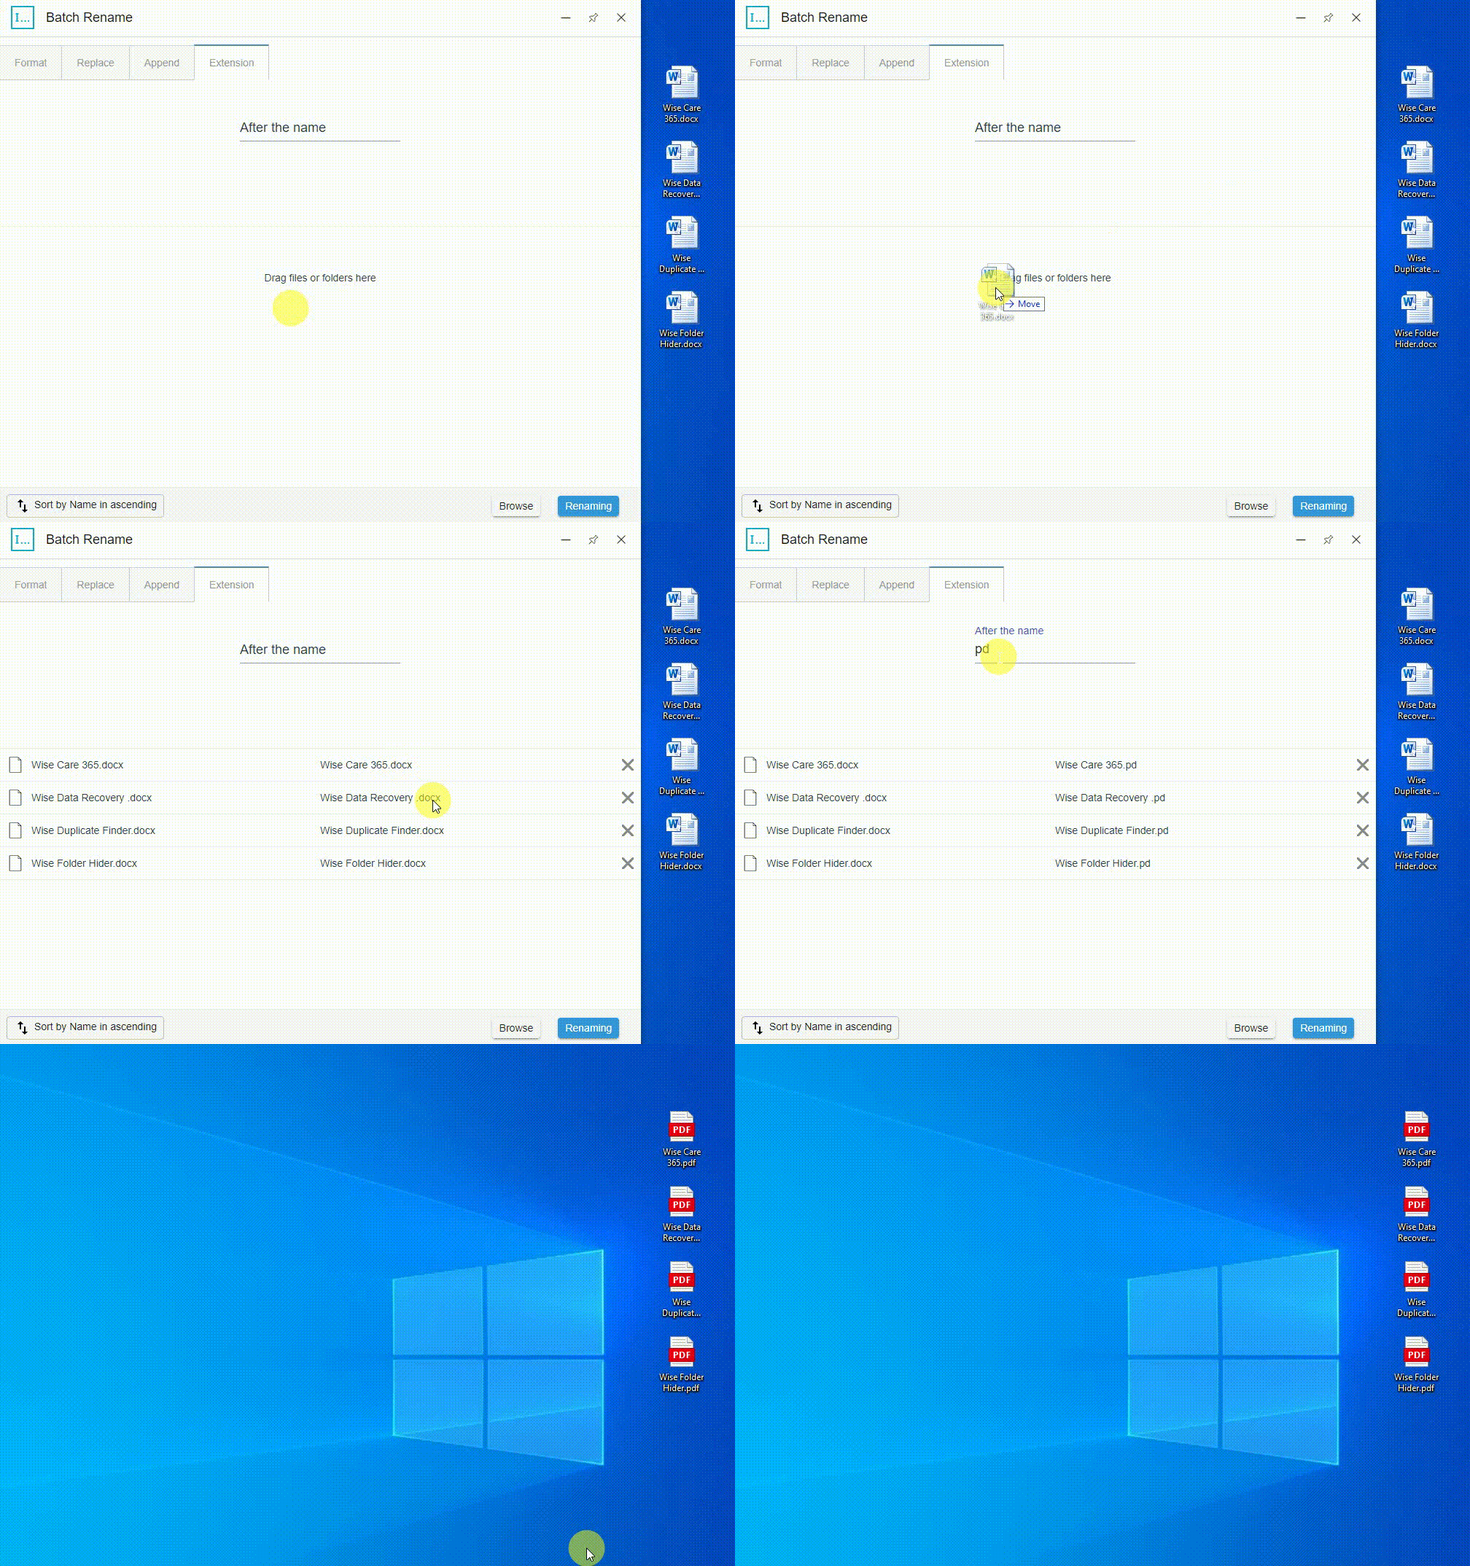
Just like its name, Batch Rename is a plug-in that can batch rename folders or files. The first thing you need to do is to drag the renamed files into the blank space. You can also upload the files locally via the Browse button. As shown in the picture, in the lower left corner, you can adjust the order of the files according to the file name, size, creation date, and modification date. It supports four types of file batch renaming, they are Format, Replace, Append and Extension. User's guidance: (Let us take Wise Care 365.docx, Wise Data Recovery.docx, Wise Duplicate Finder.docx and Wise Folder Hider.docx as examples.) 1. Format: Rename the entire file source name. This means that the file source name is not retained at all. Format supports users to modify the front part, the middle part and back part of the file source name. The drop-down menus in the middle part are number, uppercase letters, and lowercase letters. The default initial number of the number part is 1. The number of digits is empty by default. You can choose one of them according to your needs. Suppose we modify the number of digits in the middle part to 3, the first part is modified to wisecleaner, and the latter part is modified to product. Then click Renaming. The result is shown in the picture. 2. Replace: Replace and rename the same part of the file source name. Suppose we replace F in all file names with W. Then click Renaming. The result is shown in the picture. 3. Append: Rename the file at the front or back in batches on the basis of keeping the file source name. Suppose we modify the previous part to 2021 and the latter part to series. Then click Renaming. The result is as shown in the picture. 4. Extension: Rename the extension of the file. Suppose we modify the extension docx to pdf. Surprisingly, this function also supports converting pdf files into docx files. The result is shown in the picture.
-
- wise toys
- instructions
-
(and 1 more)
Tagged with:


