Search the Community
Showing results for tags 'Windows PC'.
-
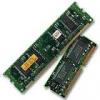
Instead of buying a new computer, adding RAM is often the most cost-effective upgrade you can make to speed up a sluggish computer. You may see a lot of similar articles on the internet, but they all seem a little bit complicated for normal users. Follow the next easy steps to upgrade your RAM: 1. Check how many memory slots the motherboard has Most computer motherboards have two, three, or four memory slots. Some higher end motherboards have as many as six, or possibly even eight memory slots. This is the total number of slots available. Unless you are using a very old computer, you will have to change the RAM. If there is one more slot for adding one memory, you don’t have to reinstall the system. 2. Find Out the Maximum RAM Capacity for Your System Determine if Windows is 32-bit or 64-bit. Download Wise Care 365, click Hardware Overview in System Monitor, you will see the info of your operating system. 32-bit can support up to 4 GB of RAM. In fact, 32-bit Windows is limited to accessing 3.2GB of that 4GB). 64-bit can support up to 128 GB of RAM or even more than that. 3. Find Out the maximum RAM capacity for your mainboard In Wise Care 365, check the Mainboard in System Monitor, you will see your mainboard type. Google it to find the spec of it. You will see the maximum RAM capacity for your mainboard. 4. Find out the right type of RAM for your computer Call me preachy but please first know if you are buying a RAM for your laptop or desktop. In most cases, they are different. Most motherboards accept only one type of RAM, if you're buying new RAM, you're probably going to make your life a lot easier by buying the exact same model as you currently have in your machine, but they don’t have to be the same brand. Check the Memory info in System Monitor and buy the RAM that has the same speed and memory type so that it will be compatible with your computer.
- 3 replies
-
- Windows PC
- choose the right ram
-
(and 1 more)
Tagged with:


